
Subscribe to Our Youtube Channel
Related Manuals for Noble DG-E


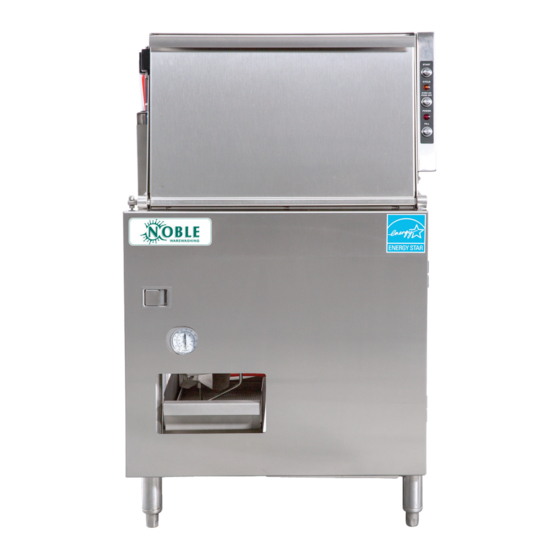
Summary of Contents for Noble DG-E
- Page 1 NOBLE CHEMICAL SANITIZING DISHMACHINE INSTALLATION, OPERATION & SERVICE MANUAL FOR NOBLE MODELS: NOBLE DG-E NOBLE DG-D Noble Warewashing July, 2015 Lancaster, Pennsylvania P/N 07610-004-24-94 www.nobleproducts.biz...
- Page 3 REVISION/ REVISION MADE APPLICABLE DETAILS PAGE DATE 07-15-15 Release to production.
- Page 4 NOMENCLATURE FOR THE MODELS COVERED IN THIS MANUAL NOBLE DG-E DG-E - Low temperature, chemically sanitizing, with a booster tank. Detergent, rinse aid & sanitizer chemical feeder pumps DG-D - Dual door. Low temperature, chemically sanitizing, with a booster tank.
-
Page 5: Table Of Contents
Frame & Motor Assembly Pump and Motor Assembly Booster Tank Assembly Incoming Plumbing Assembly Door Components Front Panel Assembly ELECTRICAL SCHEMATICS NOBLE DG-E (prior to serial # 14A288762) NOBLE DG-E (after serial # 14A288762) NOBLE DG-E schematics NOBLE DG-E Harness Connections... -
Page 6: Specification Information
SECTION 1: SPECIFICATION INFORMATION... -
Page 7: Specifications
SECTION 1: SPECIFICATION INFORMATION SPECIFICATIONS OF THE NOBLE DG-E ELECTRICAL REQUIREMENTS: OPERATING CAPACITY ( NSF RATED): WASH PUMP MOTOR HP RACKS PER HOUR DISHES PER HOUR RINSE TYPICAL GLASSES PER HOUR 1,044 HEATER TOTAL ELECTRICAL VOLTS RATINGS AMPS CIRCUIT 2KW@110V... -
Page 8: Dimensions
SECTION 1: SPECIFICATION INFORMATION MACHINE DIMENSIONS 25 1/4 (642 mm) A - Incoming Water Connection B - Drain Connection - 2" IPS C - Electrical Connection Point NOTE: All vertical dimensions are 24 1/2 at lowest point due to adjustable (622 mm) bullet feet and may be raised an additional 2 3/4". -
Page 9: Installation/Operation Instructions
SECTION 2: INSTALLATION & OPERATION INSTRUCTIONS... -
Page 10: Installation Instructions
SECTION 2: INSTALLATION & OPERATION INSTRUCTIONS INSTALLATION INSTRUCTIONS VISUAL INSPECTION: Before installing unit check container and machine for damage. A damaged container may be an indication of damage to the machine. If there is any type of damage to both container and unit, do not throw away the container. The dishmachine has been inspected at the factory prior to shipping and is expected to arrive in new, undamaged condition. -
Page 11: Electrical Installation Instructions
SECTION 2: INSTALLATION & OPERATION INSTRUCTIONS ELECTRICAL INSTALLATION INSTRUCTIONS ELECTRICAL POWER CONNECTION: DISCONNECT ELECTRICAL POWER SUPPLIES & TAG OUT IN ACCORDANCE WITH APPROPRIATE PROCEDURES & CODES AT THE DISCONNECT SWITCH TO INDICATE THE CIRCUIT IS BEING SERVICED. Electrical and grounding conductors must comply with the applicable portions of the National Electric Code ANSI/NFPA 70 (latest edition) and/or other electrical codes. -
Page 12: Operation Instructions
SECTION 2: INSTALLATION & OPERATION INSTRUCTIONS OPERATION INSTRUCTIONS OPERATIONAL START-UP AND CHECK: Before proceeding with the start-up, verify the following: 1. Open the door and verify that the sump strainer is correctly installed in the sump. 2. Verify that the drain stopper is in position. 3. - Page 13 SECTION 2: INSTALLATION & OPERATION INSTRUCTIONS OPERATION INSTRUCTIONS (CONTINUED) WARNING: Certain materials, including silver, silver plate, aluminum and pewter, are attacked by sodium hypochlorite sanitizers (bleach). PREPARING DISHES: Proper preparation of ware is essential for the smooth and efficient operation of the dishmachine, resulting in fewer rewashes and using less detergent.
-
Page 14: Chemical Dispensing Equipment
SECTION 2: INSTALLATION & OPERATION INSTRUCTIONS CHEMICAL DISPENSING EQUIPMENT WARNING: CHLORINE-BASED SANITIZERS CAN BE DETRIMENTAL TO THE MACHINE IF THE CHEMICAL SOLUTION IS TOO STRONG. SEE A CHEMICAL PROFESSIONAL TO ENSURE THE DISPENSER IS SET UP CORRECTLY. This equipment is not recommend for use with deionized water or other aggressive fluids. Use of deionized water or other aggressive fluids will result in corrosion and failure of materials and components and will void the manufacturer's warranty. -
Page 15: Detergent Control
SECTION 2: INSTALLATION & OPERATION INSTRUCTIONS DETERGENT CONTROL DETERGENT CONTROL: Detergent usage and water hardness are two factors that contribute greatly to how efficiently this dishma- chine will operate. Using detergent in the proper amount can become a source of substantial savings. A qualified water treatment spe- cialist can relate what is needed for maximum efficiency from the detergent. -
Page 16: Electronic Cycle Timer
SECTION 2: INSTALLATION & OPERATION INSTRUCTIONS ELECTRONIC CYCLE TIMER OVERVIEW Adjustable SELECT CYCLE STEP TO ADJUST PRESS SAVE TO EXIT Cycle Steps LEDs • Drain The timer accepts user • Fill RINSE CYCLE PUMP DRAIN SANI SANI DETER • Sanitizer input and provides •... - Page 17 SECTION 2: INSTALLATION & OPERATION INSTRUCTIONS ELECTRONIC CYCLE TIMER CHANGING CYCLE 1. Press button for step being changed. The LED for that step will come on. STEP TIMES SELECT CYCLE STEP TO ADJUST PRESS SAVE TO EXIT The first two steps RINSE CYCLE PUMP...
- Page 18 SECTION 2: INSTALLATION & OPERATION INSTRUCTIONS ELECTRONIC CYCLE TIMER RESETTING TO 1. Press and hold CYCLE COUNT button and DOWN ARROW button (under STEP DURATION) simultaneously for 3–4 seconds. FACTORY DEFAULTS SELECT CYCLE STEP TO ADJUST PRESS SAVE TO EXIT RINSE CYCLE PUMP...
- Page 19 SECTION 2: INSTALLATION & OPERATION INSTRUCTIONS ELECTRONIC CYCLE TIMER PLANT TEST MODE 1. Press and hold CYCLE COUNT button and DOWN ARROW button (under STEP START TIME) simultaneously for 3–4 seconds. SELECT CYCLE STEP TO ADJUST PRESS SAVE TO EXIT RINSE CYCLE PUMP...
-
Page 20: Preventative Maintenance
SECTION 3: PREVENTATIVE MAINTENANCE... - Page 21 SECTION 3: PREVENTATIVE MAINTENANCE PREVENTATIVE MAINTENANCE PREVENTATIVE MAINTENANCE: The manufacturer of this dishmachine highly recommends that any maintenance and repairs not specifically discussed in this manual should be performed by qualified service personnel only. Performing mainte- nance on the dishmachine may void a warranty. By following the operating and cleaning instructions in this manual, users should get the most efficient results from the dishmachine.
- Page 22 SECTION 4: TROUBLESHOOTING...
-
Page 23: Troubleshooting Section
SECTION 4: TROUBLESHOOTING SECTION COMMON PROBLEMS WARNING: Inspection, testing and repair of electrical equipment should be performed only by qualified service personnel. Certain procedures in this section require electrical tests or measurements while power is applied to the machine. Exercise extreme caution at all times. If test points are not easily accessible, disconnect power, attach test equipment and reapply power to test. - Page 24 SECTON 4: TROUBLESHOOTING SECTION COMMON PROBLEMS Problem: Rinse water runs continuously with breaker turned off. CAUSE SOLUTION Defective plunger in solenoid valve Replace. Defective diaphragm in solenoid valve Replace diaphragm. Problem: Wash temperature not at required reading on thermometer. CAUSE SOLUTION Check that white/blue wires are connected See note on page 12.
-
Page 25: Parts Section
SECTION 5: PARTS SECTION... -
Page 26: Chemical Feeder Pump Assembly
SECTION 5: PARTS SECTION CHEMICAL FEEDER PUMP ASSEMBLY Squeeze Tube Lubricant Housing Kit (Red roller) Mfg. No.: 04320-121-37-10 Motor, 36 RPM 115V Detergent/Sanitizer Feeder Pump Mfg. No.: 04320-111-35-14 Motor, 14 RPM 115V Rinse Aid Feeder Pump Mfg. No.: 04320-111-35-13 Motor, 36 RPM 240V Detergent/Sanitizer Feeder Pump Mfg. -
Page 27: Solenoid Valve Repair Parts
SECTION 5: PARTS SECTION SOLENOID VALVE REPAIR PARTS KITS Screw Data Plate Cap Screw Coil and Housing Data Plate Valve Bonnet Spring & Plunger Kit Spring position is moved 06401-003-07-40 for clarity. Goes below the plunger. Cap Retainer O-Ring & Diaphragm Diaphragm O-Ring 06401-003-07-41... - Page 28 SECTION 5: PARTS SECTION CONTROL BOX ASSEMBLY 9, 10 Normal/Delime Rinse Aid/Detergent Sanitizer 11, 27 11, 27 12, 13, 28...
- Page 29 SECTION 5: PARTS SECTION CONTROL BOX ASSEMBLY 16, 27 17, 28 18, 27 17, 28 24, 27 25, 26, 27 22, 23...
-
Page 30: Control Box Assembly
SECTION 5: PARTS SECTION CONTROL BOX ASSEMBLY (CONTINUED) ITEM DESCRIPTION Mfg. No. Control Box Weldment 05700-003-09-42 Control Box Cover 05700-003-30-54 Decal, Warning - Disconnect Power 09905-100-75-93 Screw, 10-32 x 1/2’’ Long, Phillips Tusshead 05305-011-39-36 Decal, Peri-pump Prime 09905-003-32-56 Switch, Delime/Normal 05930-301-21-18 Detergent/Rinse Aid Pump Prime Switch 05930-011-35-27... -
Page 31: Peripump Box Assembly
SECTION 5: PARTS SECTION PERI-PUMP BOX ASSEMBLY ITEM DESCRIPTION Mfg. No. Peri-pump Assembly, 36 RPM 05700-002-96-08 Peri-pump Assembly, 14 RPM 05700-002-96-09 Drip Channel 05700-003-32-89 Weldment, Peri-pump Box 05700-003-32-00 Weldment, Peri-pump Box Cover 05700-003-33-80 Fitting, Conduit, Heyco 1/2’’ 05975-011-65-51 Clamp, 5/8” Nylon (Located inside of box) 04730-011-39-01 Clamp, 1”... -
Page 32: Electrical Connection Box Assembly
SECTION 5: PARTS SECTION ELECTRICAL CONNECTION BOX ASSEMBLY ITEM DESCRIPTION Mfg. No. Box, Power Junction Weldment 05700-003-30-58 Terminal Block Spacer 05700-011-40-05 Terminal Block 05940-500-09-61 Locknut, 6-32 with Nylon Insert 05310-373-03-00 Locknut, 10-24 with Nylon Insert 05310-373-01-00 Lug, Ground 05940-200-76-00 Decal, Power Connection 09905-011-47-64 Decal, Warning to Disconnect Power 09905-100-75-93... -
Page 33: Frame Assembly
SECTION 5: PARTS SECTION FRAME ASSEMBLY ITEM DESCRIPTION Mfg. No. Frame Weldment 05700-003-09-40 Frame Weldment Double Door 05700-003-28-12 Foot, 3” Adjustable 05340-002-14-55 Plate, Hinge Weldment 05700-003-10-11 Washer, Hinge Weldment 05700-002-54-62 Spacer, PB Bolt 05700-000-29-40 Clamp, Pipe 05700-000-35-05 Washer, 1/4”-20 S/S 05311-174-01-00 Keeper, Door Panel Latch 05700-003-09-31... -
Page 34: Hood Assembly
SECTION 5: PARTS SECTION HOOD ASSEMBLY ITEM DESCRIPTION Mfg. No. Hood Weldment 05700-003-09-56 Hood Weldment Double Door 05700-003-28-17 Switch, 115V Reed 05930-002-36-80 Bracket, Limit Switch 05700-021-71-18 Locknut, 10-24 with Nylon Insert 05310-373-01-00 Clamp, Pipe 5/8” 05700-000-35-06 Rack Rail Weldment 05700-002-45-67 Washer, 1/4”-20 I.D. -
Page 35: Switch Panel Assembly
SECTION 5: PARTS SECTION SWITCH PANEL ASSEMBLY ITEM DESCRIPTION Mfg. No. Complete Side Panel Assembly 05700-003-24-38 Complete Side Fanel Assembly (Double Door) 05700-003-24-40 Side Panel Weldment 05700-003-24-36 Side Panel Weldment (Double Door) 05700-003-24-37 2 (3) Switch, Prime Assembly 05700-003-14-91 Switch, On/Off Assembly 05700-003-14-92 1 (2) Light, Amber... - Page 36 SECTION 5: PARTS SECTION TUB ASSEMBLY...
-
Page 37: Tub Assembly
SECTION 5: PARTS SECTION TUB ASSEMBLY CONTINUED ITEM DESCRIPTION Mfg. No. Tub Weldment 05700-003-09-51 Tub Weldment (Double Door) 05700-003-28-15 Lower Manifold Weldment 05700-002-45-51 Manifold Gasket 05700-111-35-03 Drain Seat Insert 05700-021-34-38 Spillway Gasket 05700-111-34-52 Spillway Weldment 05700-031-37-86 Locknut, 1/4”-20 S/S Hex with Nylon Insert 05310-374-01-00 Manifold O-Ring 05330-111-35-15... - Page 38 SECTION 5: PARTS SECTION FRAME AND MOTOR ASSEMBLY See Motor Assembly Page See Plumbing Assembly Page See Booster Assembly Page See Frame Assembly Page...
-
Page 39: Frame & Motor Assembly
SECTION 5: PARTS SECTION FRAME AND MOTOR ASSEMBLY (CONTINUED) ITEM DESCRIPTION Mfg. No. Discharge Tube Connector 05700-011-70-34 Pump Suction Hose 05700-002-40-82 Discharge Hose Assembly 05700-002-45-58 Fitting, 1/2” Pushlock, Female, Brass 04730-011-93-99 Hose, 1/2” x 22 1/2” Long 05700-002-45-59 Wash Restrictor 05700-002-84-69 Accumulator Strainer Weldment 05700-003-33-25... -
Page 40: Pump And Motor Assembly
SECTION 5: PARTS SECTION MOTOR & PUMP ASSEMBLY Complete Pump & Motor Assembly Mfg. No.: 06105-002-16-29 Pump Only Assembly Mfg. No.: 05700-002-79-49 Motor Only Mfg. No.: 06105-002-79-61 Shim Kit Mfg. No.: 05700-002-82-58 Case Capscrew Impeller Assembly Mfg. No.: 05305-002-81-88 Mfg. No.: 05700-002-81-86 Pump Casing Mfg. -
Page 41: Booster Tank Assembly
SECTION 5: PARTS SECTION BOOSTER TANK ASSEMBLY ITEM DESCRIPTION Mfg. No. Booster Tank Weldment 05700-002-45-56 Heater, 120V, 2000 Watts 04540-002-45-13 Heater Gasket 05330-100-01-10 Thermostat 05930-003-13-65 Fitting, Imperial Brass 05310-924-02-05 Plug, 1/4” Brass 04730-209-01-00 Lockwasher, 5/16” 05311-275-01-00 Nut, 5/16”-18 S/S Hex 05310-275-01-00 Locknut, 6-32 S/S Hex w/ Nylon Insert 05310-373-03-00... -
Page 42: Incoming Plumbing Assembly
SECTION 5: PARTS SECTION INCOMING PLUMBING ASSEMBLY ITEM DESCRIPTION Mfg. No. Y-Strainer 04730-217-01-10 Nipple, Close, 1/2’’ NPT, Brass 04730-207-15-00 Valve, Solenoid, 1/2’’ NPT, 115V 04810-100-12-18 Adapter, 1/2’’ Fitting (CU to Male) 04730-401-03-01 Tube, Copper, 1/2’’ x 1 1/4’’ Long 05700-001-08-28 Union, 1/2’’, Copper to Copper 04730-412-05-01 Elbow, 607, 1/2’’... -
Page 43: Door Components
SECTION 5: PARTS SECTION DOOR ASSEMBLY ITEM DESCRIPTION Mfg. No. Complete Door Assembly 05700-003-35-30 2 (2) Door Weldment 05700-003-35-29 2 (2) Magnet, Reed Switch 05930-002-68-53 4 (2) Locknut, 6-32 S/S Hex with Nylon Insert 05310-373-03-00 2 (4) Locknut, 1/4”-20 S/S Hex with Nylon Insert 05310-374-01-00 2 (2) Nut, Hex 1/4”-20 S/S... -
Page 44: Front Panel Assembly
SECTION 5: PARTS SECTION FRONT PANEL ASSEMBLY Double Door Only Panel Clips 2 per machine 05340-003-22-95 (Double Door Only) Back Panel Weldment 1 per machine 05700-003-24-42 ITEM DESCRIPTION Mfg. No. Complete Panel Assembly 05700-003-09-53 Panel Weldment 05700-003-09-54 Handle 05340-001-96-30 Back panel weldment 05700-002-24-42 Panel clips 05700-033-22-95... -
Page 45: Electrical Schematics
SECTION 6: ELECTRICAL SCHEMATICS... - Page 46 SECTION 6: ELECTRICAL SCHEMATICS NOBLE DG-E 115V, 50/60 HERTZ, SINGLE PHASE (BEFORE SERIAL # 14A288762)
-
Page 47: Noble Dg-E (After Serial # 14A288762)
SECTION 6: ELECTRICAL SCHEMATICS NOBLE DG-E 115V, 50/60 HERTZ, SINGLE PHASE (AFTER SERIAL # 14A288762) -
Page 48: Noble Dg-E Schematics
SECTION 7: ELECTRICAL SCHEMATICS NOBLE DG-E, 115V, 50/60 HERTZ, SINGLE PHASE... -
Page 49: Noble Dg-E Harness Connections
SECTION 7: ELECTRICAL SCHEMATICS NOBLE DG-E HARNESS CONNECTIONS... - Page 50 Noble Warewashing • Lancaster, Pennsylvania www.nobleproducts.biz Noble DG-E Technical Manual 07610-004-24-94 Issued: 07-15-15 Revised: N/A...
Need help?
Do you have a question about the DG-E and is the answer not in the manual?
Questions and answers