
Subscribe to Our Youtube Channel
Related Manuals for SIIG CE-H26411-S1


Summary of Contents for SIIG CE-H26411-S1
- Page 1 Full HD HDMI Extender over IP with POE, RS-232 & IR ser M CE-H26411-S1 for Transmitter CE-H26511-S1 for Receiver 04-1284A...
- Page 2 1. Introduction Full HD HDMI Extender over IP with POE, RS- 232 & IR for point to point, point to multi-point, multi- point to multi-point and screen wall broadcast including RS-232 and IR control extension. Easy installation with networking 10/100 BASE-T switch hub and CAT-5 cable for building up the extension or broadcast system.
-
Page 3: Features & Application
2. Features & Application ⚫ RS-232 bi-directional extension ⚫ 6 bits switch for 64 stream channel selection ⚫ HDCP compliant and Blu-Ray ready ⚫ Support IR extension ⚫ Automatic or manual EDID configuration ⚫ Networking environment under 10/100 BASE-T switch hub and CAT-5 cable ⚫... -
Page 4: Specifications
3. Specifications Transmitter Receiver VIDEO INPUT HDMI Type-A female connector None HDMI Type-A female connector for VIDEO OUTPUT HDMI Type-A female connector loop through 3.5mm phone jack for IR emitter to 3.5mm phone jack for IR receiver control video source device cable to receive remote signal H.264 compression video format Full HD encoder/ decoder COMPRESSION... -
Page 5: Hardware Description
4. Hardware Description ■ Transmitter (TX) 1. 2.0 mm power jack for DC5V2A power input. 2. LAN port, RJ-45 connector for 10/100 BASE- T CAT5 extension. 3. HDMI Type-A female connector for loop through video output. 4. HDMI Type-A female input connector. 5. -
Page 6: Dip Switch
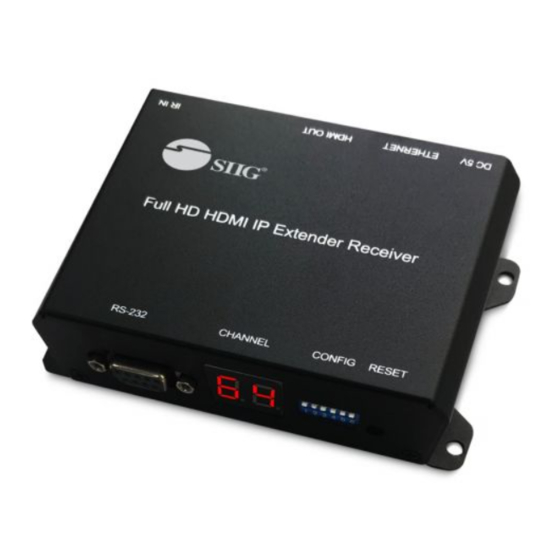
7. Display group indication. 8. Group configuration, 6 bits switch for 64 stream channel selection. Reset button. Channel DIP SWITCH 000000 100000 111111 Dimension CE-H26411-S1 Transmitter Shell Metal Width 110mm/130mm Height 30mm... - Page 7 Depth 86mm Weight 290g ■ Receiver (RX) 1. 2.0 mm power jack for DC5V2A power input. 2. LAN port, RJ-45 connector for 10/100 BASE- T CAT5 extension. 3. HDMI Type-A female connector for video output. 4. 3.5mm phone jack for IR receiver cable to receive signal from remote controller.
- Page 8 stream channel selection. 8. Reset button. Channel DIP SWITCH 000000 100000 111111 9. Dimension CE-H26511-S1 Receiver Shell Metal Width 110mm/130mm Height 30mm Depth 86mm Weight 290g...
-
Page 9: Installation
5. Installation 5.1 Device Connection 1. Set up the group of the transmitter with the correspondent receiver for signal extension and display. 2. Connect the HDMI cables between the source and transmitter for input, and the display and receiver for output. 3. - Page 10 5.2 Configuration 5.3 Application Pattern ■ Unicast...
- Page 11 ■ Multicast...
- Page 12 ■ Screen Wall...
- Page 13 PC via the PC tool ” IPTV_Control_Center.exe” to set up and control the system. ※Please download the PC tool from the SIIG website or contact us by email to get the software. CE-H26411-S1 1. The IP address default of the classNetworking :168.254.xxx.xxx,...
- Page 14 2. Connect the PC with the Ethernet switch of application site to enter. 3. Activate the tool “IPTV_Control_Center.exe” to search and setup.
- Page 15 4. Enter the tool in “Device Scan Page” and click on “Start Scan”to search for the connected devices. The connected devices will be indicated in “Output Window” area. (Illustration [1] [2]) 5. In...
-
Page 16: Transmitter Setting
“TX Setup Page” to do transmitter setting and in the“RX Setup Page” to do receiver setting separately. ( Illustration [3]) 6. TRANSMITTER SETTING In the “TX Setup Page”, please select the TX device which is required to setup on the “TX Device Selection”... - Page 17 The setting functions of the transmitter clarified below, please set up based on the request of the application site. ⚫ IP Setup: Setting the static IP of the selected TX. **We suggest activating the DHCP automatic IP assignment to avoid the conflict of IP address. (Illustration [6]) ⚫...
- Page 18 ⚫ Group ID: Setting the selected TX group ID, maximum up to 64 groups from 0 to 63. (Illustration [9]) ⚫ UART Baudrate: Setting the baud rate of RS-232 extension on the selected TX. (Illustration [10]) ⚫ Stream Output Path: Setting the selected TX video output path.
- Page 19 7. RECEIVER SETING In the “RX Setup Page”, please select the RX device which is required to setup on the “RX Device Selection” and the relevant setting information of the selected RX device will be shown in the “RX Device Info” area (Illustration [14] and [15])
- Page 21 The setting functions of the receiver clarified below, please set up based on the request of the application site. ⚫ IP Setup: Setting the static IP of the selected RX(Illustration [16]) ⚫ Screen Mode: Setting to display the video on the selected RX or not.
- Page 22 12 digits and hexadecimal base, values is limited to 0~F. Please use the legal MAC address to avoid conflict with the devices. (Illustration [20]) ⚫ Group ID: Setting the selected RX to the group ID for streaming between the corresponding TX and RX, maximum up to 64 groups from 0 to 63 (Illustration [21]) ⚫...
- Page 23 8. NOTICE: Please reboot after setting up the CE- H26411-S1 system via the PC tool and the previous setting via hardware or software will be ignored, the system will auto detect to update the latest setting and apply as the start mode.
- Page 24 10. The CE-H26411-S1 system can be firmware upgraded via PC. To upgrade the firmware please click on “Firmware Upgrade” and select the path to save the firmware and click on “Upgrade TX Firmware” to accomplish upgrade version. (Illustration [26] and [27])
-
Page 25: Web User Interface Configuration
6. Web User Interface Configuration 6.1 TX System 6.1.1 TX Log-in Log-in page will pop up when entering TX system ⚫ Default User Name and Password:... - Page 26 User Name: ite000 Password: 123456 ⚫ Update User Name and Password System provides 1 set user name and password. If user doesn’t want to user default, please put preferred User Name and Password as follows. Then press “Confirm” to change user name and password.
- Page 27 6.1.2 Version Information Here user can see firmware information and network setting of TX Note. Please also set TX and all RXs in the same group by setting DIP SWITCH.
- Page 28 6.1.3 Multicast To support several RX please press “Multicast” to enable multicast function. 6.1.4 Upgrade firmware To upgrade firmware please press “Upgrade” button which is under “Upgrade Firmware”. Please choose the location of firmware file. Then press ”Upgrade” button again to load firmware and system will start firmware upgrade automatically.
- Page 29 6.1.5 Reset ⚫ Encoder Reset: To reboot Encoder only please click on “Encoder Reset” button.
- Page 30 ⚫ Reboot Device: To reboot whole device please click on “Reboot” button. 6.2 RX System 6.2.1 RX Log-in Log-in page will pop up when entering RX system ⚫ Default User Name and Password: User Name: admin Password: 123456...
- Page 31 6.2.2 Upgrade firmware To upgrade firmware please press “Upgrade” button which is under “Upgrade Firmware”. Please choose the location of firmware file. Then press ”Upgrade” button again to load firmware and system will start firmware upgrade automatically.
- Page 32 6.2.3 Reboot To reboot whole device please click on “Reboot” button. It will show message as “Reload page after 10 seconds” in the bottom of the page.
-
Page 33: Package Contents
7. Package Contents 1. Full HD HDMI Extender over IP with POE, RS-232 & IR – Transmitter (1) Full HD HDMI Extender over IP with POE, RS-232 & IR – R eceiver (1) 3. IR receiver cable comes with receiver (1) IR emitter cable comes with transmitter (1) User manual (1) Transmitter...
Need help?
Do you have a question about the CE-H26411-S1 and is the answer not in the manual?
Questions and answers