
Subscribe to Our Youtube Channel
Related Manuals for Redexim RINK SP950


Summary of Contents for Redexim RINK SP950
- Page 1 User manual RINK SP950 Translation of the original user manual 2215 English 933.095.410 EN Kwekerijweg 8 | 3709JA | Zeist | The Netherlands | T: +31 (0)306 933 227 redexim@redexim.com www.redexim.com...
-
Page 2: Ec-Declaration Of Conformity
EC – DECLARATION OF CONFORMITY Manufacturer (or importer) Certificate of Conformity for RINK Topdresser SP950 The undersigned Rink Spezialmaschinen GmbH 88279 Amtzell Germany hereby declares that the machine specified below conforms to all relevant complies with the provisions of the Machinery Directive (2006/42/EG). 1. -
Page 3: Table Of Contents
TABLE OF CONTENTS Content Page EC-Declaration of conformity………………………………………………..2 SAFETY REGULATIONS ................4 SHORT DESCRIPTION................6 TECHNICAL FEATURES ................6 FIRST STARTUP ..................7 • Starting the engine ................7 • After the first loaded ride ..............7 OPERATION ....................8 •... -
Page 4: Safety Regulations
SAFETY REGULATIONS RINK Topdresser SP950 (1) The is manufactured exclusively for the application of fine grained, loose dressing material such as sand, grit, granulate or similar materials. Any other use is considered improper. The manufacturer is not liable for damages resulting from improper use;... - Page 5 (6+7) The Rink Topdresser SP950 is designed for safe use. This is only possible if the safety instructions described in this manual are fully followed. Read and understand the manual before using the Rink Topdresser SP950. If the machine is not used as described in the manual, there may be a risk of injury and/or damage to the Rink Topdresser SP950.
-
Page 6: Short Description
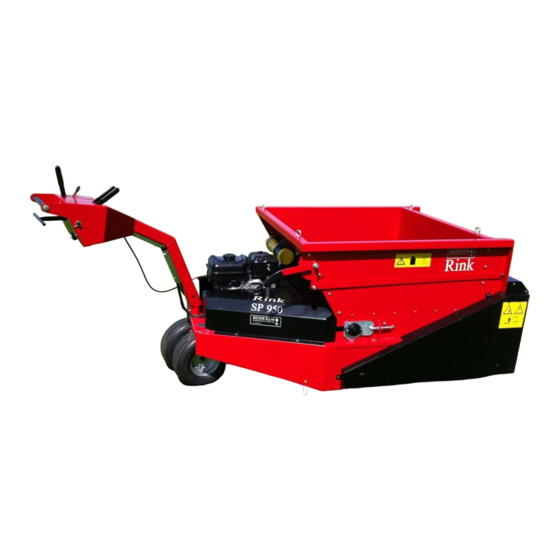
SHORT DESCRIPTION RINK Topdresser SP950 is manufactured exclusively for the application of fine grained, loose dressing material such as sand, grit, granulate or similar materials. The dressing device of the Topdresser is driven by V-belts and chains. The dressing rate is controlled by a mechanical slide. -
Page 7: First Startup
FIRST STARTUP Starting the engine a) Fill the gas tank with lead-free gas. b) Put the throttle in FAST-position. c) Put the engine switch to ON-position and the starter lever to the left. d) Start the engine, repeat if necessary and close the choke slightly. e) As soon as the engine runs, push the starter lever back and adjust the desired engine speed with the throttle. -
Page 8: Operation
OPERATION Before each ride - Check dresser for obvious damages, repair damages. - Check tire-pressure. - Check the track of the conveyor belt and adjust if necessary. The conveyor belt should not rub on either side. Loading - Observe the desired maximal ground pressure. - When loading, pay attention that the driving components (engine) are not overly dirty or soiled. -
Page 9: Setting Of Dressing Density
Setting of dressing density The dressing density (mm) depends on - Driving speed - Engine rotation speed - Slide opening (1) Please set the desired dressing density on firm ground before starting work. -
Page 10: Care And Maintenance
CARE and MAINTENANCE Greasing of the dresser with multi-purpose grease (every 50 operating hours) Bearings on both sides of the brush roller Bearings on both sides of the rear drive roll Bearings on both sides of the front tension roll Bearing on the steering axle Bearing on the drive shafts Bearing at the belt tightener... -
Page 11: Care And Maintenance
CARE and MAINTENANCE Setting of the brush roller distance (if necessary) - Loosen two screws (1) on both sides of the brush roller. - Slide the brush roller down until the brush roller touches the conveyor belt slightly. - Tighten the screws (1). Conveyor belt tightening (when slipping) - Loosen the counter nut (2). -
Page 12: Removal Of The Dresser From The Chassis
Removal of the dresser from the chassis For demounting and mounting of the conveyor belt and for possible maintenance work on the chassis, it is necessary to remove the dresser from the chassis. - Remove the protective cover (1) by loosening the screws (2). - Remove the chain (3) by pushing the chain tightener (5) through the tension spring (4) upwards in the direction of the arrow. -
Page 13: Replacing The Brush Roller
Replacing the brush roller The brush roller (6) consists of 10 individual segments, which are interlinked. Both outer segments are secured on the shaft, each with three grub screws (5). To replace the brush roller proceed as follows: Loosen the grub screws (1) of the brush bearing on the right side. Loosen and remove the screws (2, 3) of the right brush bearing holder (4). -
Page 14: Replacing The Conveyor Belt
Replacing the conveyor belt... -
Page 15: Replacing The Conveyor Belt
Replacing the conveyor belt Loosen the nuts (1) and release the conveyor belt in the direction of the arrow. Loosen the grub screws of the bearings (2) towards the driving direction on the right. Remove the brush roller (4) by loosening the screws (3). Take off the right side panel (6) by removing the screws (5). -
Page 16: Chain For Traction Drive (5)
1. Chain for traction drive (5) Remove the protective cover (1) by loosening the screws (2). Loosen the screws (6) and tighten the axle shaft to the rear. Pay attention to uniform tightening on the left, middle and right bearing. Tighten the screws (6). -
Page 17: Trouble Shooting (Problem Analysis)
Attention: Excessive tightening causes a permanent idling of the conveyor belt, the brush and the traction drive. Should this be the case, please free up tightening. Trouble Shooting (Problem analysis) Problem Cause Solution Slide does not open Fastening elements too tight Loosen fastening elements Slider is jammed Check slide opening...
Need help?
Do you have a question about the RINK SP950 and is the answer not in the manual?
Questions and answers