
Related Manuals for Olimpia splendid Bi2 SL SMART S1


Summary of Contents for Olimpia splendid Bi2 SL SMART S1
- Page 1 SL SMART S1 SLR SMART S1 IT IT INSTRUKTIONER FÖR INSTALLATION OCH UNDERHÅLL FÖR VERSION MED 2 RÖR INSTRUKTIONER FÖR INSTALLATION OCH UNDERHÅLL FÖR VERSION MED 2 RÖR...
- Page 3 1. L’apparecchio può essere utilizzato da bambini di età non inferiore a 8 anni e da persone con ridotte capacità fisiche, sensoriali o mentali, o prive di esperienza o della necessaria conoscenza, purché sotto sorveglianza oppure dopo che le stesse abbiano ricevuto istruzioni relative all’uso sicuro dell’apparecchio e alla comprensione dei pericoli ad esso inerenti.
- Page 6 20 mm 20 mm 400 mm...
- Page 7 1÷2°...
- Page 15 EN - 34...
- Page 16 MAIN INDEX GENERAL ......................... 37 1.1 - GENERAL INFORMATION ......................37 1.1.1 Conformity ..........................37 1.2 - SYMBOLS ..........................37 1.3 - GENERAL WARNINGS ......................38 1.4 - FUNDAMENTAL SAFETY RULES ...................39 1.5 - PRODUCT RANGE ........................40 1.6 - MORE ABOUT THE Bi2 ......................40 1.7 - OVERALL DIMENSIONS Bi2 ....................41 1.8 -...
- Page 17 DISPOSAL This symbol on the product or its packaging indicates that the appliance cannot be treated as normal domestic trash, but must be handed in at a collection point for recycling electric and electronic appliances. Your contribution to the correct disposal of this product protects the environment and the health of your fellow men. Health and the environment are endangered by incorrect disposal. Further information about the recycling of this product can be obtained from your local town hall, your refuse collection service, or in the store at which you bought the product.
- Page 18 ILLUSTRATIONS The illustrations are grouped on the initial pages of the manual MAIN INDEX The main index of this manual is given on page “EN-1” 1 - GENERAL 1.1 - GENERAL INFORMATION Thank you for choosing an Olimpia Splendid Bi2 cooler-radiator/cooler-convector for controlling the climate in your home. Please read this instruction use and installation manual carefully before installing and starting up the appliance. Following the indications contained in this manual will ensure that the appliance continues to function perfectly over time. In compliance with European standard 99/44/EEC the...
- Page 19 AND INJURY, INCLUDING THE FOLLOWING: 1. After unpacking, make sure that all the components are present. If not, contact the OLIMPIA SPLENDID agent who sold the appliance to you. 2. OLIMPIA SPLENDID appliances must be installed by an authorised installer...
- Page 20 ALWAYS accompany the appliance, even when it is passed to a new owner or user or transferred onto another system. If it is lost or damaged, please contact the local OLIMPIA SPLENDID technical service centre.
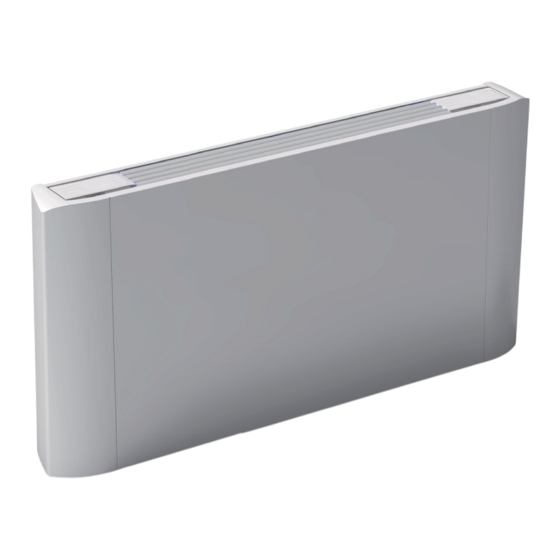
- Page 21 1.5 - PRODUCT RANGE The there are two basic types of Bi2 cooler-radiators/cooler-convectors, SL and SLR, each of which is offered in five sizes with different performances and dimensions. cooler-convector (suitable for horizontal or vertical installations). ventil radiator with radiant plate (suitable for vertical installations). 1.6 - MORE ABOUT THE Bi2 (Fig.1) Supporting structure in high resistance electro-galvanised steel sheet.
- Page 22 1.7 - OVERALL DIMENSIONS Bi2 (Fig.3) See figure 3 and refer to the model in question. 1000 1000 SLR SMART SL SMART A (mm) 1159 1359 1559 A (mm) 1159 1359 1559 B (mm) B (mm) C (mm) C (mm) (mm) (mm) (mm) (mm) 1.8 - NOMINAL TECHNICAL FEATURES Refer to the data for the respective model in the table in figure 4.
- Page 23 - places subject to high frequencies. WARNING A failure to apply the indicated standards, which may cause malfunctioning of the equipment, relieves OLIMPIA SPLENDID from any form of warranty and from possible damages caused to people, animals or property. Make sure that: a.
- Page 24 2.5 - VERTICAL FLOOR OR WALL INSTALLATION When mounting on the floor with support feet, refer to the individual instructions leaflets supplied and the relative manual for the mounting of the feet. N.B. Do not damage the cardboard packaging, the templates needed for correct machine installation are printed on the back and underside of it. Use the templates on the packaging (cut along the lines indicated), and trace the position of the two fixing brackets on the wall (fig. 7). Use a suitable drill to make the holes with and insert the toggle bolts (2 for each bracket) (fig. 8 ref. A); fix the two brackets (fig. 8 ref. B). Do not over-tighten the screws so that the brackets can be adjusted with a spirit level (fig. 9).
- Page 25 2.7.2 - Connections The choice and sizing of the hydraulic lines must be made by an expert who must operate according to the rules of good technique and the laws in force. To make the connections: - position the hydraulic lines - tighten the connections using the “spanner and counter spanner” method (fig. 12 ref. B) - check for any leaks of liquid - coat the connections with insulating material (fig. 12 ref. C). The hydraulic lines and joints must be thermally insulated. Avoid partially insulating the pipes. Do not over-tighten to avoid damaging the insulation. Use hemp and green paste to seal the threaded connections; the use of Teflon is advised when there is anti-freeze in the hydraulic circuit.
- Page 26 N.B. for the horizontal installation carefully note the following precautions: - make sure that the machine is installed perfectly level or with a slight inclination towards the condensation discharge; - insulate carefully the inflow and outflow pipes up to the machine union to prevent any drops of condensation outside the same collection bowl;...
- Page 27 2.9.4. Dismantling the exchanger - Loosen the four screws that fix the exchanger (fig. 20 ref. A); - remove the battery water probe; - remove the exchanger (fig. 20 ref. B); - remove the drip-collector extension from the central tray (fig. 20 ref. C); - on the opposite side remove the plug on the condensation evacuation hole (fig. 20 ref. D); - loosen the central condensation collection tray fixing screw (fig. 20 ref. E), move the tray and rest it on the opposite side so that the fixture mouth for the drip-collector extension comes out of the structure, and block the tray with the screw previously removed; - re-insert the drip-collector extension and the plug on the opposite side; - open the pre-cut hexagonal holes on the right side insulation and close with insulation the hexagonal holes on the left shoulder; - rotate the exchanger moving the fixtures to the opposite side, and reinsert it on the machine (fig. 21); - tighten all the fixing screws of the exchanger (fig. 22ref. A). When all the operations described have been completed, remount all the components dismounted pre- viously following the dismounting operations in the opposite order.
- Page 28 Wait until the parts have cooled down to avoid the risk of burns. When necessary, clean the outer surfaces of the Bi2 cooler-convector with a soft cloth damp cloth (fig. 25). Do not use abrasive sponges or abrasive or corrosive detergents to avoid damaging the painted surfaces. 2.14 - CLEANING AIR SUCTION FILTER The air filters must be checked at regular intervals and cleaned when necessary, and in any event whe- never recommended by the electronic controls installed (if present). The frequency with which filters are cleaned will depend on specific machine running conditions. To clean the air filters, proceed as described in the following sections.
- Page 29 3 - TROUBLESHOOTING In case of water leaks or anomalous functioning immediately cut off the power supply and close the water taps. Should one of the following anomalies occur, contact an authorised service centre or an authorised qualified person, but do not intervene personally. - The front heating plate does not reach a uniform temperature during heating.
- Page 30 - the electrical connections are - C h e c k t h e e l e c t r i c a l not correct. connections. The appliance leaks water during - L e a k s i n t h e h y d r a u l i c - Check the leak and fully the heating function.
Need help?
Do you have a question about the Bi2 SL SMART S1 and is the answer not in the manual?
Questions and answers