
Related Manuals for WEG CFW320


Summary of Contents for WEG CFW320
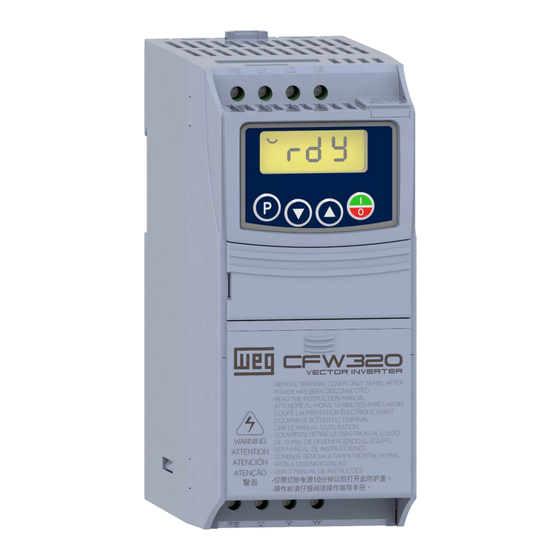
- Page 1 Motors | Automation | Energy | Transmission & Distribution | Coatings Frequency Inverter CFW320 User’s Manual...
- Page 3 User’s Manual Series: CFW320 Language: English Document: 10008951923 / 00 Models: Frame Sizes A, B and C Publication Date: 04/2022...
- Page 4 P204 = 5 for 60 Hz. P204 = 6 for 50 Hz. It is only necessary to set these parameters once. Refer to the programming manual of the CFW320 for further details about the programming of parameter P204.
-
Page 5: Table Of Contents
2.2 ABOUT THE CFW320 ........ - Page 6 CONTENTS 5.4 PREVENTIVE MAINTENANCE ................28 5.5 CLEANING INSTRUCTIONS .
-
Page 7: Safety Notices
SAFETY NOTICES 1 SAFETY NOTICES This manual provides information for the proper installation and operation of the CFW320 frequency inverter. It has been written to be used by qualified personnel with suitable training or technical qualification for operating this type of equipment. The personnel must follow all the safety instructions described in this manual and/or defined by the local regulations. -
Page 8: Preliminary Recommendations
CFW320 frequency inverter and its accessories. DANGER! La XC10 n’est pas compatible USB, par conséquent, il ne peut pas êstre connectés à des ports USB. Ce connecteur sert uniquement d’interface entre le CFW320 variateur de fréquence et de ses accessoires. NOTE! ✓... - Page 9 Ce produit a été fabriqué sous un contrôle de qualité conséquent, mais s’il est installé sur des systèmes où son dysfonctionnement entraîne des risques de dommages matériels ou corporels, alors des dispositifs de sécurité externes supplémentaires doivent assurer des conditions de sécurité en cas de défaillance du produit, afin d’éviter des accidents. CFW320 | 3...
-
Page 10: General Information
It is not the intention of this manual to present all the possibilities for the application of the CFW320, as well as WEG cannot take any liability for the use of the CFW320 which is not based on this manual. - Page 11 Three-phase power supply connection available for specific models only. Available as accessory. Inputs/Outputs available on standard product. The number of Inputs/Outputs can be expanded by using an I/O expansion module accessory. Figure 2.1: Block diagram of CFW320 for frame size A 220V CFW320 | 5...
- Page 12 DO1 (RL1) Flash Memory Module Available as accessory. Inputs/Outputs available on standard product. The number of Inputs/Outputs can be expanded by using an I/O expansion module accessory. Figure 2.2: Block diagram of CFW320 for frame size A 110V 6 | CFW320...
- Page 13 Inputs/Outputs available on standard product. The number of Inputs/Outputs can be expanded by using an I/O expansion module accessory. Breaking resistor connection. Breaking IGBT available only on ‘DB’ models. Figure 2.3: Block diagram of CFW320 for frame size B 220V CFW320 | 7...
- Page 14 DO1 (RL1) Flash Memory Module Available as accessory. Inputs/Outputs available on standard product. The number of Inputs/Outputs can be expanded by using an I/O expansion module accessory. Figure 2.4: Block diagram of CFW320 for frame size A 380-480V 8 | CFW320...
- Page 15 Inputs/Outputs available on standard product. The number of Inputs/Outputs can be expanded by using an I/O expansion module accessory. Breaking resistor connection. Breaking IGBT available only on ‘DB’ models. Figure 2.5: Block diagram of CFW320 for frame sizes B and C 380-480V CFW320 | 9...
-
Page 16: Terminology
GENERAL INFORMATION 2.3 TERMINOLOGY Table 2.1: Terminology of the CFW320 inverters Model identification Product Degree of Special Special Brake Frame Rated Phase Rated and Series Protection Hardware Software Size Current Number Voltage E.g.: CFW320 01P6 - - - - - -... -
Page 17: Identification Label
Report any damage immediately to the carrier. If the CFW320 is not installed soon, store it in a clean and dry location (temperature between -25 °C and 60 °C (-13 °F and 140 °F)), with a cover to prevent dust accumulation inside it. -
Page 18: Installation And Connection
40) and provide an air deflecting plate so that the heat rising up from the lower inverter does not affect the top inverter. Provide independent condults for the physical separation of signal, control and power cables (refer Section 3.2 ELECTRICAL INSTALLATION on page 13). 12 | CFW320... -
Page 19: Cabinet Mounting
Figure A6 on page 38 ilustrates the CFW320 installation procedure for surface mounting. 3.1.2.3 DIN-Rail Mounting The CFW320 inverter can also be mounted directly on a 35 mm-rail, in accordance with DIN EN 50.022. For further details, refer to Figure A7 on page 3.2 ELECTRICAL INSTALLATION... -
Page 20: Circuit Breakers, Fuses, Grounding And Power Cables
For proper protection, use fuses or circuit brakers in the inverter power supply side with current not above the values indicated in Table B2 on page 47 Table B3 on page 49. For further details, refer to the Item 3.2.3.1.1 Short Circuit Current Ratings (SCCR) on page 14 | CFW320... -
Page 21: Power Connections
Power supply L1/L L2/N Fuses Disconnecting switch PE L1 L2 L3 PE U Shielding (*) The power terminal L3 is not available in single-phase models of frame size A. Frame size A single-phase and three-phase power supply CFW320 | 15... - Page 22 (*) The 10 A model of the 200 V line can also be supplied by single-phase power supplies (see Table 2.2 on page 10). Frame sizes B and C three-phase power supply Figure 3.1: (a) to (d) Power and grounding connections 16 | CFW320...
-
Page 23: Input Connections
3.2.3.2 Power Supply Reactance In a general way, the inverters of the CFW320 line can be installed directly in the power supply, without reactance in the supply. However, check the following: In order to prevent damages to the inverter and assure the expected useful life, you must have a minimum line impedance that provides a line voltage drop of 1 %. -
Page 24: Dynamic Braking
- rated current of the inverter output. s,rat - line frequency. NOTE! ✓ WEG reactors available for CFW320 inverters are listed in the Table B7 on page 3.2.3.3 Dynamic Braking NOTE! ✓ The dynamic braking is available on DB models from frame size B onwards. -
Page 25: Output Connections
The inverter has an electronic motor overload protection that must be adjusted according to the driven motor. When several motors are connected to the same inverter, install individual overload relays for each motor. The motor overload protection available in the CFW320 is in accordance with the UL 61800-5-1 standard. ATTENTION! If a disconnect switch or a contactor is installed at the power supply between the inverter and the motor, never operate it with the motor spinning or with voltage at the inverter output. -
Page 26: Grounding Connections
éleves (p. ex. les moteurs de forte puissance, machines de soudage, etc.). 3.2.5 Control Connections The control connections must be made in accordance with the specification of the connector of the CFW320 control board. Functions and typical connections are presented in Figure 3.3 on page... - Page 27 Figure 3.3: (a) and (b) Signals of C320 control card connector NOTE! ✓ The CFW320 inverters are supplied with the digital inputs configured as active low (NPN). In order to change the configuration, check the use of parameter P271 in the programming manual of the CFW320.
-
Page 28: Cable Separation Distance
3.3 INSTALLATIONS ACCORDING EUROPEAN DIRECTIVE ELECTROMAGNETIC COMPATIBILITY The CFW320 inverters feature external RFI filter to reduce electromagnetic interference (refer to Chapter 6 ACCESSORIES on page 30). Those inverters, when properly installed, meet the requirements of the electromagnetic compatibility (EMC) directive (2014/30/EU). -
Page 29: Emission And Immunity Levels
A professional is a person or organization familiar with the installation and/or commissioning of inverters, including their EMC aspects. 3.3.3 Characteristics of the RFI Filter CFW320 inverters, when installed with external filter, comply with the directive for electromagnetic compatibility (2014/30/EU). The use of RFI filter kit indicated in the Table 6.1 on page 30, or equivalent, is required to reduce the disturbance conducted from the inverter to the power line in the high frequency band (>... - Page 30 (*) Input CM Choke only on required models, according to Table 6.1 - please refer to the RFI filter kit installation guide. Connection of the three-phase RFI filter Figure 3.5: (a) and (b) Connection of the RFI filter - general conditions 24 | CFW320...
-
Page 31: Keypad (Hmi) And Basic Programming
1. At the end of this level, the modified value is saved when the key is pressed. Figure 4.3 on page 26 illustrates the basic browsing of the operating modes of the HMI. CFW320 | 25... - Page 32 NOTE! ✓ A list of parameters is presented in the quick reference of the parameters. For further information about each parameter, refer to the CFW320 programming manual. 26 | CFW320...
-
Page 33: Troubleshooting And Maintenance
5 TROUBLESHOOTING AND MAINTENANCE 5.1 FAULTS AND ALARMS NOTE! ✓ Refer to the CFW320 quick reference and the programming manual for further information on each fault or alarm. 5.2 SOLUTION FOR THE MOST FREQUENT PROBLEMS Table 5.1: Solution for the most frequent problems Problem Point to be Verified... -
Page 34: Information Necessary For Contacting Technical Support
Do not touch the components or connectors directly. If necessary, first touch the grounded metallic frame size or wear a ground strap. Do not perform any withstand voltage test: if necessary, consult WEG. The inverters require low maintenance when properly installed and operated. -
Page 35: Cleaning Instructions
Odor Heatsink Accumulation of dust Clean Dirt (*) The CFW320 fan can be easily replaced as shown in Figure A5 on page 5.5 CLEANING INSTRUCTIONS When it is necessary to clean the inverter, follow the instructions below: Ventilation system: Disconnect the inverter power supply and wait for 10 minutes. -
Page 36: Accessories
They may be ordered separately, and will be shipped in individual packages. The CFW320 inverters have two slots for simultaneous connection of the accessories: Slot 1 - Communication accessory or external HMI (see Figure A3 on page 36). -
Page 37: Technical Specifications
Typical efficiency: ≥ 97 %. Classification of chemically active substances: level 3C2. Mechanical condition rating (vibration): level 3M4. Audible noise level: < 60dB. For further information about technical specifications, refer to APPENDIX B - TECHNICAL SPECIFICATIONS on page CFW320 | 31... -
Page 38: Electronics/General Data
4 keys: Start/Stop, Up arrow, Down arrow and Programming keypad (HMI) keypad LCD Display View/edition of all parameters Indication accuracy: - current: 10 % of the rated current - speed resolution: 0.1 Hz Enclosure IP20 Frames sizes A, B and C 32 | CFW320... -
Page 39: Considered Standards
IEC 60721-3-3 - classification of environmental conditions - part 3: classification of groups of environmental parameters and their severities - section 3: stationary use at weather protected locations level (*) Compliance with standards upon installation of external RFI filter. See Chapter 3 INSTALLATION AND CONNECTION on page CFW320 | 33... - Page 40 2 - mounting supports (for DIN rall mounting) 3 - communication accessory cover 4 - cover expansion accessory 5 - protection cover of the connection of the IO expansion accessory 6 - fan with mounting support Figure A1: Main components of the CFW320 34 | CFW320...
- Page 41 APPENDIX A 1 - Nameplate affixed to the side of the inverter Figure A2: Location of the nameplate CFW320 | 35...
- Page 42 Figure A3: (a) and (b) Slot 1 Communication accessory or external HMI (a) Removal of the protection cover of the connection of the IO expansion accessory (b) Accessory connection Figure A4: (a) and (b) Slot 2 Input and output (I/O) expansion accessory 36 | CFW320...
- Page 43 APPENDIX A (a) Release the locks of the fan cover (b) Removal of the fan (c) Cable disconnection (d) Cable disconnected Figure A5: (a) to (d) Removal of the heatsink CFW320 | 37...
- Page 44 1.340 2 (17.7) (1.37) (1.97) (8.08) (2.76) (6.24) (2.95) 44.5 50.1 214.0 89.0 164.0 1.50 2 (17.7) (1.75) (1.97) (8.43) (3.50) (6.45) (3.3) Dimension tolerance: ±1.0 mm (±0.039 in) Figure A6: Frequency inverter dimensions for mechanical installation 38 | CFW320...
- Page 45 APPENDIX A (a) Surface mounting (b) DIN rail mounting (c) Removal of CFW320 on DIN Rail CFW320 | 39...
- Page 46 (1) Using a suitable size screwdriver (longer than the depth of the product), position it on the product at the indicated location. (2) Press the product release latch down. (3) Remove the CFW320 from the DIN rail by first removing the bottom of the product. Note: no tool is required for fixing the CFW320 to the DIN rail.
- Page 47 2 - Grounding points 3 - Connector communication accessory 4 - Control terminals 5 - Connector expansion accessory Recommended Torque Frame size Grounding Points Power Terminals Lbf.in Lbf.in Figure A8: Power terminals, grounding and recommended tightening torque CFW320 | 41...
- Page 48 APPENDIX A Line mm (in) mm (in) mm (in) 200 V 90.5 (3.564) 58.0 (2.283) 87.0 (3.425) 400 V 87.5 (3.445) 48.0 (1.900) 83.9 (3.303) Figure A9: Inverter dimensions in mm [in] - frame size A 42 | CFW320...
- Page 49 APPENDIX A Line mm (in) mm (in) mm (in) 200 V 101.5 (3.996) 68.2 (2.685) 97.0 (3.819) 400 V 97.7 (3.846) 64.5 (2.539) 93.3 (3.673) Figure A10: Inverter dimensions in mm [in] - frame size B CFW320 | 43...
- Page 50 APPENDIX A Figure A11: Inverter dimensions in mm [in] - frame size C 44 | CFW320...
- Page 51 APPENDIX B APPENDIX B - TECHNICAL SPECIFICATIONS Table B1: (a) and (b) List of models of CFW320 series, main electrical specifications (a) 200 V Line Power Wire Size for +BR and BR Terminals Braking rms Current Minimum Recommended Resistor Maximum Current...
- Page 52 Power Wire Size for +BR and BR Terminals Braking rms Current Minimum Recommended Resistor Maximum Current Grounding Wire Size Power Wire Size Maximum Motor @ UL Maximum Motor Frame size Power Supply Rated Voltage (Y) Number of Input Phases Inverter 46 | CFW320...
- Page 53 APPENDIX B Table B2: (a) and (b) Fuses and circuit breaker specifications for inverter protection (a) AC Power Supply CFW320 | 47...
- Page 54 Supply Reactance on page (2) CFW320 400 V Line inverter models (with rated voltage of 380 Vac...480 Vac) are specified to be used only on Wye connected electrical distribution systems. These inverters, when protected by MPW Motor Protector Circuit Breaker, may have different SCCR values according to the grid voltage (380 V, 400 V, 415 V, 440 V, 460 V or 480 V).
- Page 55 Table B3: (a) and (b) Fuses and circuit breakers specifications for protection according to UL standard (a) AC Power Supply Current Limiter Trip Signaling Block UL Type E Line Side Terminal Fuse Current Input Phases Maximum Voltage Frame size Inverter CFW320 | 49...
- Page 56 Supply Reactance on page (2) CFW320 inverter models of 400 V Line (with rated voltage of 380 Vac...480 Vac) are UL listed only for use on Wye connected electrical distribution systems (380Y/220 V to 480Y/277 V systems). They are not UL listed for use on Delta/Delta systems, Delta corner ground, or high-impedance ground systems (IT system), on the voltages of 380-480 V.
- Page 57 CFW320A02P6S2NB20 CFW320A04P2S2NB20 13.8 CFW320A06P0S2NB20 13.2 19.8 CFW320A07P3S2NB20 11.0 16.1 24.2 CFW320A01P6T2NB20 CFW320A02P6T2NB20 50/122 CFW320A04P2T2NB20 CFW320A06P0T2NB20 10.8 CFW320A07P3T2NB20 11.0 13.2 CFW320A01P6D3NB20 CFW320A02P6D3NB20 CFW320A04P2D3NB20 CFW320A06P0D3NB20 10.8 CFW320A07P3D3NB20 11.0 13.2 CFW320B10P0B2DB20 10.0 15.0 22.0/12.0 33.0/18.0 CFW320B15P2T2DB20 15.2 22.8 18.2 27.3 CFW320 | 51...
- Page 58 APPENDIX B (b) 400 V Line Rated Carrier Frequency 52 | CFW320...
- Page 59 Table 3.3 on page (4) For frame sizes B and C models of 400 V Line, use the second ferrite available with the RFI filter accessory on the power supply cables (according to Table 6.1 on page 30). CFW320 | 53...
- Page 60 APPENDIX B Table B6: (a) and (b) Specification of the output current as a function of the switching frequency for the CFW320 (a) 200 V Line 2.5 KHz 5.0 KHz 10.0 KHz 15.0 KHz Inverter Model CFW320A01P6... 1.6 A 1.6 A 1.6 A...
- Page 61 APPENDIX B Table B7: Line and load reactors for the CFW320 CFW320 | 55...
- Page 62 WEG Drives & Controls - Automation LTDA. Jaraguá do Sul - SC - Brazil Phone 55 (47) 3276-4000 - Fax 55 (47) 3276-4020 São Paulo - SP - Brazil Phone 55 (11) 5053-2300 - Fax 55 (11) 5052-4212 automacao@weg.net www.weg.net...
Need help?
Do you have a question about the CFW320 and is the answer not in the manual?
Questions and answers