Table of Contents
Advertisement
Quick Links
Order No.: DD+DIS303.03E
*1WACPK1*
1 piece WACPK MA 1
INSTALLATION PLANNING and
Technical Data
Internal Version 6
The Installation Planning Instructions can also be ordered separately.
Order number: DD+DIS303.03E
printed in Germany 02 / 2004
Agfa Group Confidential
Installation Planning
Classic E.O.S.
Type 5270/100
Classic E.O.S. CL
Type 5270/105
Advertisement
Table of Contents

Related Manuals for AGFA Classic E.O.S.


Summary of Contents for AGFA Classic E.O.S.
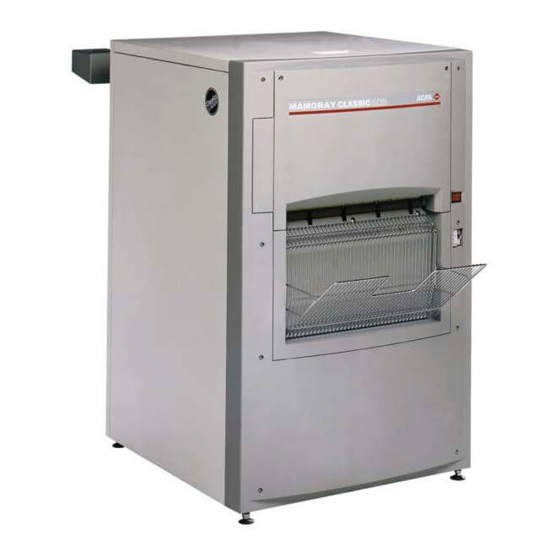
- Page 1 Type 5270/100 1 piece WACPK MA 1 Classic E.O.S. CL Type 5270/105 INSTALLATION PLANNING and Technical Data Internal Version 6 The Installation Planning Instructions can also be ordered separately. Order number: DD+DIS303.03E printed in Germany 02 / 2004 Agfa Group Confidential...
- Page 2 Caution: This system uses mains voltage. Please observe the pertinent safety instructions. These instructions describe adjustments and routines, which must only be performed by qualified technical personnel. Note: Electrical repairs and connections must only be made by certified electricians. Mechanical repairs and connections must only be made by certified technicians.
-
Page 3: Table Of Contents
Installation Planning DD+DIS303.03E Chapter 14 Contents Safety................1 Scope of Delivery and Accessories ......3 Classic E.O.S. Type 5270/100..........3 Classic E.O.S. CL Type 5270/105 ........3 Peripheral equipment ............4 Exhaust connection through the floor ........4 System Overview............5 Classic E.O.S. Type 5270/100..........5 Classic E.O.S. - Page 4 Installation Planning DD+DIS303.03E 8.2.1 Instructions for breaking out the openings......17 8.2.2 Required openings for standard installations......17 8.2.3 Installing the developer / fixer supply hoses ......18 8.2.4 Installing the disposal hoses ..........19 Supply and disposal through the floor......20 8.3.1 Installing the disposal hoses ..........
-
Page 5: Safety
• If the machine is not operated correctly, or if it is not serviced correctly, Agfa will not be liable for any resulting disturbances, damage or injuries. • When installing the machine make sure that either the mains plug or an all-cable disconnecting device is provided in the internal installation close to the machine and is easily accessible. - Page 6 Installation Planning DD+DIS303.03E • If solution gets into the inside of the machine (e.g. by spilling during tank filling), the machine must immediately be disconnected from the mains and cleaned thoroughly by the service personnel. • Do not use chlorine or chlorine containing substances in the film processor.
-
Page 7: Scope Of Delivery And Accessories
Installation Planning DD+DIS303.03E Scope of Delivery and Accessories Classic E.O.S. Type 5270/100 Machine Type Power connection Code Classic E.O.S. 5270/100 1 N~ 230 V (200-240 V) 50/60 Hz 37XK3 Accessory box • Wire chute • Exhaust hose including joint to the connection stub •... -
Page 8: Peripheral Equipment
Installation Planning DD+DIS303.03E Peripheral equipment Mixer Type 5280 Mixer communication cable CM+9528030301 (Mixer to film processor) Replenisher tanks (2 x 30 liters) Type 8186 / 701 with level sensor / cable 5 m ABC Code: FJ1QL Replenisher tanks (2 x 80 liters) Type 8186 / 101 with level sensor / cable 6 m ABC Code: F98XW... -
Page 9: System Overview
Installation Planning DD+DIS303.03E System Overview Classic E.O.S. Type 5270/100 TYPE 5270/100 5270_10014_006.cdr Figure 1 The system requires the following components which must be considered in the planning: Film processor Classic E.O.S. 5270/100 Disposal tanks or connection to a centralized disposal system Chemical solution mixer Replenisher tanks for developer and fixer instead of mixer Water connection via water filter (not shown) -
Page 10: Classic E.o.s. Cl Type 5270/105
Installation Planning DD+DIS303.03E Classic E.O.S. CL Type 5270/105 The system requires the following components which must be considered in TYPE 5270/105 the planning: 5270_10014_005.cdr Figure 2 Film processor Classic E.O.S. CL 5270/105 Laser Imager LR3300 Disposal tanks or connection to a centralized disposal system Chemical solution mixer Replenisher tanks for developer and fixer instead of mixer Water connection via water filter (not shown) -
Page 11: Machine Dimensions
Installation Planning DD+DIS303.03E Machine Dimensions Classic E.O.S. Type 5270/100 710 (27.95) TYPE 5270/100 540 (21.26) 210 (8.27) (1.18) Figure 3 Dimensions in mm (inch) Edition 6, Revision 0 Classic E.O.S. / Classic E.O.S. CL Chapter 14 / 7 (Type 5270 / 100 / 105) -
Page 12: Classic E.o.s. Cl Type 5270/105
Installation Planning DD+DIS303.03E Classic E.O.S. CL Type 5270/105 710 (27.95) TYPE 5270/105 540 (21.26) 985 (38.81) 740 (29.13) 210 (8.27) 35 (1.38) 65 (2.56) 1760 (69.344) 35 (1.38) 740 (29.156) 740 (29.156) LR3300 5270_10014_004.cdr Figure 4 Dimensions in mm (inch) Chapter 14 / 8 Classic E.O.S. -
Page 13: Transport Path
Installation Planning DD+DIS303.03E Transport path The film processor must fit through all doors and hallways on its transport path to the installation site. Classic E.O.S. / Classic E.O.S. CL Smallest door width (Type 5270/100/105) without pallet at least 73 cm (29 inch) with pallet at least 82 cm (32 inch) Edition 6, Revision 0... -
Page 14: Access For Repair And Maintenance
Installation Planning DD+DIS303.03E Access for Repair and Maintenance Classic E.O.S. Type 5270/100 The required floor space for the film processor (with feed table, chute and the TYPE 5270/100 required clearance on the left) is 1270 x 860 mm (50.03 x 33.88 inch). The free space indicated in the illustration must be guaranteed for repair and maintenance, otherwise the time required for service will increase. -
Page 15: Classic E.o.s. Cl Type 5270/105
Installation Planning DD+DIS303.03E Classic E.O.S. CL Type 5270/105 The required floor space for the film processor in combination with the Laser TYPE 5270/105 Imager LR3300, feed table, chute and the required clearance on the left is 1700 x 860 mm (66.98 x 33.88 inch). In case of an installation of the Laser Imager LR3300 or another daylight system observe the installation documentation enclosed with the machine. -
Page 16: Daylight / Darkroom Installation (Only Classic E.o.s. Type 5270/100)
Installation Planning DD+DIS303.03E Daylight / Darkroom Installation (only Classic E.O.S. Type 5270/100) Chapter 7 “Daylight / Darkroom Installation” only refers to the Standalone Version Type 5270/100. Type 5270/105 has been designed for installation as daylight system. Machine in the daylight, film feed in the darkroom, light seal at the darkroom feed table 7.1.1 Installation at the wall opening... -
Page 17: Installation With Light Tight Wall
Installation Planning DD+DIS303.03E 7.1.2 Installation with light tight wall Darkroom Daylight Film feed TYPE 5270/100 A 60° chamfer must be provided on the wall opening. Wall Light tight wall Film output (wire chute) Wall base Light seal (foam rubber – by the meter) Order no. -
Page 18: Machine In The Darkroom, Film Exit In The Daylight, Light Seal At The Dryer With Light Tight Wall
Installation Planning DD+DIS303.03E Machine in the darkroom, film exit in the daylight, light seal at the dryer with light tight wall 7.2.1 Installation at the wall opening with light tight wall Darkroom Daylight Film feed TYPE 5270/100 Wall A 60° chamfer must be provided on the wall opening. -
Page 19: Light Tight Wall
Installation Planning DD+DIS303.03E Light tight wall TYPE 5270/100 min. 670 (26.4) max. 680 (26.8) 1020 (40.2) Figure 13 Dimensions in mm (inch) Coverage of a wall opening of up to 1400 mm x 900 mm (55.16 inch x 35.46 inch) is possible. An overlap of 50 mm (1.97 inch) must be guaranteed on all sides. -
Page 20: Installation
Installation Planning DD+DIS303.03E Installation Hoses and installation material Only use fiber-reinforced PVC hoses Ø 19x4 mm for the external hose connections (outside the machine)! The supply and disposal hoses for developer, fixer, water, and safety overflow in the machine are marked by tapes: = developer = water = fixer... -
Page 21: Supply And Disposal Through The Lower Front Panel (Only Classic E.o.s. Type 5270/100)
Installation Planning DD+DIS303.03E Supply and disposal through the lower front panel (only Classic E.O.S. Type 5270/100) 8.2.1 Instructions for breaking out the openings • It is not necessary to remove TYPE 5270/100 the front panel in order to break out the openings. •... -
Page 22: Installing The Developer / Fixer Supply Hoses
Installation Planning DD+DIS303.03E 8.2.3 Installing the developer / fixer supply hoses TYPE 5270/100 Only use fiber-reinforced PVC hoses Ø 10x3 mm (0.39x0.12 inch) for the external hose connections (outside the machine)! Position the hoses without kinks! Installing the developer / fixer supply: 527003OM.CDR Figure 16 Developer (DEV) -
Page 23: Installing The Disposal Hoses
Installation Planning DD+DIS303.03E 8.2.4 Installing the disposal hoses TYPE 5270/100 Only use fiber-reinforced PVC hoses Ø 19x4 mm (0.75x0.16 inch) for the external hose connections (outside the machine)! Position the hoses without kinks! 527003QM.CDR Figure 17 Drain direction Water drain / overflow Developer drain / overflow Safety overflow, tanks Fixer drain / overflow... -
Page 24: Supply And Disposal Through The Floor
Installation Planning DD+DIS303.03E Supply and disposal through the floor Only use fiber-reinforced PVC hoses Ø 10x3 mm (0.39x0.12 inch) for the external hose connections (outside the machine)! Position the hoses without kinks! Classic E.O.S. (5270/100) Classic E.O.S. CL (5270/105) TYPE 5270/100 TYPE 5270/105 5270_10003_016.CDR 5270_10014_011.CDR... -
Page 25: Installing The Disposal Hoses
Installation Planning DD+DIS303.03E 8.3.1 Installing the disposal hoses FIX2 FIX1 5270_10003_017.CDR Figure 20 Pos Designation Configuration PVC hose Ø 19x2.5 mm Pre-installed in the machine (0.75x0.10 inch) transparent Hose clamp Hose connection stub Ø 20 mm (0.79 inch) Hose clamp Not included in the shipment, CM+9037200400 PVC hose,... -
Page 26: Replenisher Tanks For Developer And Fixer
Installation Planning DD+DIS303.03E Replenisher tanks for developer and fixer Replenisher pump with filter Replenisher tanks or Mixer Replenisher hose Figure 21 • To be observed for the use of individual tanks or a mixer: maximum suction height: 2 m (78.74 inch) maximum suction length: 15 m (590.55 inch) Replenisher tanks must not be installed inside the machine! -
Page 27: Disposal Tanks
Installation Planning DD+DIS303.03E Disposal tanks For disposal of chemicals and wash water the regulations of the local authorities regarding the pertaining Sewage Act must be observed! If it is allowed to drain the exhausted solutions into the sewer, then the drain pipe must be a polyethylene pipe up to the main pipe (vertical drain pipe). -
Page 28: Water Connection
Installation Planning DD+DIS303.03E Water connection Also see Chapter 3 Water consumption Permanent replenishment: max. 3 liters / min (101.45 fl.oz. / min). The water supply rate per square meter of processed film can be changed via code. Water pressure 2 bar (200 kPa) to 6 bar (600 kPa) Water temperature min. -
Page 29: Wall / Machine Connection At A Water Pressure Of 2 - 6 Bar
Installation Planning DD+DIS303.03E 8.6.1 Wall / machine connection at a water pressure of 2 – 6 bar To protect the drinking water from a return flow of waste water via the hand shower a safety fitting (1) must be installed. This consists of a ventilation valve with integrated check valve. -
Page 30: Wall / Machine Connection At A Water Pressure > 6 Bar
Installation Planning DD+DIS303.03E 8.6.2 Wall / machine connection at a water pressure > 6 bar To protect the drinking water from a return flow of waste water via the hand shower a safety fitting (1) must be installed. This consists of a ventilation valve with integrated check valve. -
Page 31: Overview Of Adaptation Parts For Water Installations
Installation Planning DD+DIS303.03E 8.6.3 Overview of adaptation parts for water installations: Adaptation part with name Connection Order number/ part number A ½ " external thread B ¾ " external thread CM+7034200320 Reduction nipple (brass) A ¾ " external thread CM+9034200600 B ¾... - Page 32 Installation Planning DD+DIS303.03E Adaptation part with name Connection Order number/ part number A ¾ " external thread CM+9034200580 B 1.085-12 UNS-3B internal thread PIPE THREADS American National Standard Reduction piece (fitting for USA) A ¾ " external thread CM+7512017410 (GHT) PIPE THREADS American National Standard...
-
Page 33: Exhaust Connection
Installation Planning DD+DIS303.03E Exhaust connection Also see Chapter 3, Section 6 8.7.1 Exhaust connection through lower front panel (only Type 5270/100) Flexible exhaust hose ∅ 100 mm Crossover Connection piece for exhaust hose Dimensions in mm Figure 27 The film processor has an integrated exhaust unit. •... -
Page 34: Exhaust Connection Through The Floor
Installation Planning DD+DIS303.03E 8.7.2 Exhaust connection through the floor Flexible exhaust hose ∅ 100 mm Exhaust connection through the floor Exhaust connection: 2 screw-type exhaust connections; center hole through the floor > _ 114 mm ∅ Dimensions in mm Order no.: CM+9522030091 Figure 28 The film processor has an integrated exhaust unit. -
Page 35: Electrical Connection Of The Machine
Installation Planning DD+DIS303.03E Electrical connection of the machine Power connection 1N~ 230 – 240 V; 50/60 Hz (200 - 240 V) Fuse protection 15 / 16 A A GFI switch: (I = 30 mA in compliance with VDE 664) is integrated in the machine. Leakage current <... - Page 36 Installation Planning DD+DIS303.03E Outlet connection: All-pole main breaker (option: if there is no access to the outlet) Mains supply with outlet Power cable with three-prong plug GFI switch = 30 mA, in compliance with VDE 664) Note: Parts are not included in the machine shipment.
-
Page 37: Technical Data
Installation Planning DD+DIS303.03E Technical Data Electrical data Power connection 1N~ 230 – 240 V; 50/60 Hz (200 - 240 V) Power consumption: Standby 0.45 kWh (1620 kJ) (room temperature ~ 20 °C) during film processing 2.9 kW/h (10440 kJ/h) Fuse protection 15 A / 16 A Leakage current towards PE <... -
Page 38: Transport And Storage Conditions
Installation Planning DD+DIS303.03E Radiation effects Upon machine installation in the close vicinity to the X-ray room, the local regulations for radiation protection must be followed (protection of personnel against scattered radiation). The machine has not been designed for the installation in the X-ray room, i.e. there is no internal screening against scattered radiation. -
Page 39: Machine Specifications
Installation Planning DD+DIS303.03E Machine Specifications 10.1 Type overview Machine Type Power connection Code Classic E.O.S. 5270/100 1N~ 230-240 V (200 - 240 V) ECZ26 50/60 Hz Classic E.O.S. CL 5270/105 1N~ 230-240 V (200 - 240 V) ECZ38 50/60 Hz 10.2 Film types All commercially available medical x-ray films suitable for machine processing. -
Page 40: Functional Data
Installation Planning DD+DIS303.03E 10.4 Functional data Process code HT (60s) IP (90s) RP (2min) EXT (3min) Feeding speed 160 cm/min 106 cm/min 80 cm/min 52 cm/min (62.99 in/min) (41.73 in/min) (31.5 in/min) (20.47 in/min) Processing time in DEV 12.5 sec 18.8 sec 24.9 sec 38.3 sec... -
Page 41: Dimensions And Weights
Installation Planning DD+DIS303.03E Dimensions and Weights 11.1 Classic E.O.S. Type 5270/100 Dimensions Length mm Width mm (inch) Height mm (inch) (inch) incl. packing box 1200 (47.24) 800 (31.5) 1460 (57.48) without packing 1270 (50) 710 (27.95) 1130 (44.49) material (with feed table and chute) Weight Weight approx. -
Page 42: Machine Standards And Directives
Installation Planning DD+DIS303.03E Machine Standards and Directives 12.1 Safety Europe EN 60950 / A11 1997 "Safety of Information Technology Equipment" (identical with IEC 950: 1992 and with VDE 0805/ 11. 97). UL 1950 July 3, 1995 “Safety of Information Technology Equipment, Including Electrical Business Equipment”. -
Page 43: Certificates And Guidelines
Installation Planning DD+DIS303.03E 12.4 Certificates and guidelines CE Medical Device Directive 93/42 EEC TÜV Product Service Mark “Design tested and monitored” UL Approbation E 477 50 (M) C-UL Approbation E 477 50 (M) “Technical directives for DIN 1988, Part 4/ 1988 / EN 1717:2001 drinking water installations, protection against reflux”... - Page 44 Installation Planning DD+DIS303.03E Chapter 14 / 40 Classic E.O.S. / Classic E.O.S. CL Edition 6, Revision 0 (Type 5270 / 100 / 105)
-
Page 45: Checklist For Installation Planning
Installation Planning DD+DIS303.03E Checklist for Installation Planning General yes no System components Film processor Daylight system Mixer Replenisher tanks Centralized disposal Disposal tanks Silver recovery (fixer, water) Transport path Sufficient floor load Elevator (door size, load) Door size Installation version Daylight Darkroom Unloading and unpacking... - Page 46 AGFA and the Agfa-Rhombus are trademarks of Agfa-Gevaert AG, Germany Herausgegeben von / Published by / Edité par Agfa-Gevaert AG Fototechnik Tegernseer Landstraße 161 D - 81539 München Printed in Germany / Imprimé en Allemagne / stampato in Germania...
Need help?
Do you have a question about the Classic E.O.S. and is the answer not in the manual?
Questions and answers