Table of Contents
Advertisement
Quick Links
Advertisement
Table of Contents

Related Manuals for DALBO AXR-H


Summary of Contents for DALBO AXR-H
- Page 1 AXR-H 400/450/500/600 cm Serial number 1500 – 1549...
- Page 2 AXR-H...
- Page 3 DALBO AXR-H Type, 400, 450, 500, 600 cm Congratulations on your new AXR-H disc harrow. To ensure safe operation and to obtain opti- mal use of the machine, read the rules and instructions of the following operator’s manual carefully before operating the machine.
-
Page 4: Table Of Contents
RANSPORT AFETY Transport locks ....................................11 ......................................12 ISC GANG LOCKS Hydraulic locks for 6 meter AXR-H ..............................12 Automatic hydraulic lock for the 6 meter AXR-H .......................... 13 ......................................13 UTER ARROWS Mounting ......................................13 Adjustment ....................................... 14 OPERATING AND DRIVING INSTRUCTIONS ............................15 ..................................... - Page 5 AXR-H Operating Instructions..................................25 Maintenance ....................................26 .................................. 26 LECTRO YDRAULIC PERATION ....................................27 EARING ROTECTORS Mounting ......................................27 ....................................27 IRON CAGE ROLLER Mounting ......................................27 Adjustment ....................................... 28 REPLACEMENTS AND REPAIRS ................................29 ..................................29 EPLACING EARINGS Mounting discs and bearings ................................. 30 Replacing the bearings in the housings ............................
-
Page 6: Usage
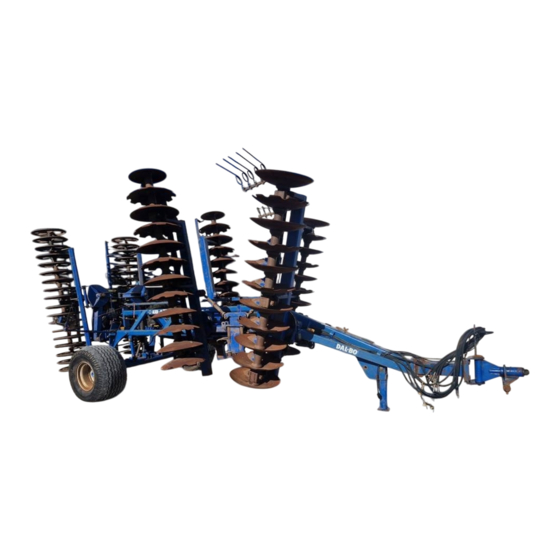
AXR-H Usage The AXR-H is a rugged disc harrow that is designed to cut, mix and pulverise plant stubble and plant residue. The AXR-H performs particularly well when breaking down large quantities of straw and plant residue, since the implement will never drag or become plugged with plant material. - Page 7 AXR-H The AXR-H must not be used as a crane, a post driver, a hydraulic press or anything similar. Operate the tractor and AXR-H only while seated in the driver’s seat. Never allow anyone to ride on the implement.
-
Page 8: Hook-Up And Dismounting
AXR-H Hook-up and Dismounting The linkage of the AXR-H is manufactured in compliance with DS/ISO 730-1 catego- ry II and III. If the lift of your tractor is not equipped for this, contact your DALBO representative. Hook-Up First mount the lift arms into the ball sockets (A). Elevate the lift and move the hitch jack up into the transport/working position (B). -
Page 9: Handling Without Tractor Lift Arms
AXR-H Handling without tractor lift arms If you need to move the AXR-H other than by use of the three-point hitch, we rec- ommend lifting it with straps around the middle section, raising the machine so that it hangs in balance. -
Page 10: Adjustments And Settings
AXR-H Adjustments and Settings The AXR-H is preset in the factory, but it will always be necessary to make some fi- ne adjustments before use. The numerous adjustment possibilities make your AXR- H more versatile, and allow you to get optimum performance from the implement. -
Page 11: Scrapers
AXR-H Fig. 4 Scrapers Adjust the scrapers by loosening the bolts (A), so that the scrapers can be moved. Adjust the scrapers so that there is a minimum space of 5 mm between the scrap- ers and the discs, but make sure that the scrapers never touch the discs. -
Page 12: Disc Gang Locks
Remember to disengage the locks before folding up the implement. Hydraulic locks for 6 meter AXR-H The disc gangs of the AXR-H 600 are equipped with hydraulic locks as standard. Fig. 9 The locking system is activated when folding and unfolding the disc sections. -
Page 13: Automatic Hydraulic Lock For The 6 Meter Axr-H
AXR-H Automatic hydraulic lock for the 6 meter AXR-H A fully hydraulic locking system can be mounted on the disc gangs of the AXR-H 600 if the hydraulic requirements exceed the hydraulic outlets of the tractor. After the side wings are unfolded, hold the hydraulic lever in the same position un- til the locks are activated. -
Page 14: Adjustment
AXR-H Adjustment The distance between the outermost disc and the fingers of the outer harrows can be adjusted with a pin (A), using approximately 30 cm as a standard setting. Re- member to insert the split cotter pin again. Fig. 11 Fig. -
Page 15: Operating And Driving Instructions
Never load extra weight onto the AXR-H. The AXR-H is an effective land manager and it is capable of mixing a large quantity of soil and plant residue. However, in addition to this effective land treatment, proper driving and equipment settings are required to ensure that the fields will be left uniformly level and without any ridges. -
Page 16: Folding
Secure to disengage the locks on the discgang before folding up the implement. After the side wings and the packer roller have been folded up, lower the AXR-H so that the transport lock of the wheel suspension locks firmly and securely. -
Page 17: Ridge Along The Middle
The AXR-H can be set for very light soil cultivation at a depth of only 5 cm. If work is carried out at a depth of only 5 cm, best results will be achieved through a very aggressive angling of the discs, so that the full amount of the cut can be achieved. -
Page 18: Travel Speed
When starting up, first lower the tractor lift down to the chosen depth. Then, sink the rear of the AXR-H down using the wheel frame. This special control of the im- plement provides a uniform start and stop of tillage work at the headland. -
Page 19: Troubleshooting
AXR-H Troubleshooting Table 4 • AXR-H tilted too far backwards Ridge in the middle • Angle too wide on the rear disc gangs • Tilted too far forwards Ridge on the sides • Angle too wide on the front disc gangs •... -
Page 20: Maintenance
AXR-H Maintenance Proper maintenance ensures a long lifetime for the AXR-H and also optimum per- formance from the implement. To facilitate maintenance, grease fittings have been mounted on those locations where wear on the equipment is the greatest. Tighten all nuts, bolts, hydraulic fittings or any other fastened assemblies after the first workday. -
Page 21: Safety Instructions
Safety Instructions It is extremely dangerous to work or walk under the AXR-H when it is raised in the transport position unless it is securely blocked or held into position. The engine of the tractor must be stopped and the brakes must be locked. -
Page 22: Adjusting The Castle Nut On The Packer Roller Pivot
Lubricate and adjust the wheel bearings once a year. Make sure that the tyre pres- sure is 3.9 bar for 500/55x15.5 14 ply tyres. If the AXR-H has been frequently in use both in the spring and in the autumn, the wheel bearings must be lubricated Dismounting/mounting of wheels every six months. -
Page 23: Adjustment And Lubrication Of Wheel Bearings
AXR-H ing a new wheel, screw the nut on and tighten by hand. Next, lower the wheels until they are touching the ground and tighten the nut to a torque of 100 Nm. Adjustment and lubrication of wheel bearings Dismounting/Mounting Wheels 1. -
Page 24: Options
(see hydraulic di- agram). 3. Fasten the incoming hoses to the AXR-H and connect the hoses to one of the tractor’s double-acting female coupling. Move the packer roller folding cylin- ders until they are fully extended several times in a row to bleed air out of the system. -
Page 25: Hydraulic Angle Adjustment
7. Check the hydraulic system for leaks. Never allow bystanders within the operating radius of the AXR-H when the angle adjustment is activated. Table 7. Hydraulic Hose Markings Function... -
Page 26: Maintenance
Electro-Hydraulic Operation Electro-hydraulic operation requires only one double-acting service on the tractor. AXR-H´s functions are accessed through four electronic sockets that are mounted in a box located on the tractor. Electro-hydraulic operation is particularly an advantage when there is a lack of hy- draulic services on the tractor. -
Page 27: Bearing Protectors
Mounting Mounting of the bearing protectors must be carried out while the AXR-H is in the un- folded position and is resting on the ground. Remove the bolts from one bearing at a time and mount the bearing protector, then continue on to the next bearing. -
Page 28: Adjustment
AXR-H Adjustment Down pressure of the F-iron cage roller must be adjusted according to depth and field conditions. Fig. 23 Move the pin (A) to adjust the pres- sure of the F-iron cage roller. The pressure of the cage roller must not be greater than necessary. -
Page 29: Replacements And Repairs
It is extremely dangerous to work or walk under the AXR-H when it is has been raised by the lift/lifted on the wheel frame unless the implement is securely sup- ported or held into position. -
Page 30: Mounting Discs And Bearings
AXR-H AXR-H when it is raised on the wheel frame and/or has been raised by the lift, the AXR-H must be supported). 3. Remove the split cotter pin from the castle nut and unscrew the nut. The spac- ers, discs and bearings can then be pulled off the shaft. Be careful not to dam- age the screw thread on the shaft. - Page 31 AXR-H Table 8 Model Disc gang 1 2 3 4 5 6 7 8 9 1 Shaft length AXR-H 9 disc front N S N S N S N 2019 10 discs back S N S N S N S...
-
Page 32: Replacing The Bearings In The Housings
AXR-H Replacing the bearings in the housings Fig. 25 1. Flange Ø138 inside the dish 3. Lip seals 75/95/10 4. Cover with lip seals 5. Housingb 6. Bolt 10x20 mm 7. Bearing 32015x 8. Cover sealing 9. Hollew shaft 10. Flange Ø138 inside the dish 11. -
Page 33: Replacing T-Ring Packer Roller Bearings
”). Disc scrapers To change the disc scrapers, the AXR-H must be unfolded in the working position. The scrapers are mounted onto the disc gang with three bolts. Remove the bolts and mount a new scraper. Notice that the scrapers on the right/left sides as well as... -
Page 34: Replacing Discs
Fig. 28 1. Unhitch the AXR-H from the tractor and rest it on the support bar. 2. Remove the bolt (A) together with the washer, and then the axle (B) can be pulled out. -
Page 35: Replacing Packer Roller Arm Bushings
Remember to secure the bolt with Loctite. Replacing Packer Roller Arm Bushings The slack can be checked by raising the AXR-H on the wheel frame with the arms of the packer roller completely unfolded. Using your hands, grab onto the outside arm of the packer roller and move it back and forth. -
Page 36: Replacing Packer Roller Centre Pin
1. Unfold the packer roller to the working position and lower the transport wheels until the wheels just barely carry the weight of AXR-H, but the T-rings are still resting on the ground. Support the main frame in this position. -
Page 37: Dismounting Disc Gangs
It is recommended that a crane is available for the dismounting of the disc gangs. Fig.31 1. The AXR-H must be hitched to a tractor and unfolded, and it must be resting in a secure position on the ground. 2. Suspend the disc bars with two straps so that the disc gangs are hanging in balance. -
Page 38: Replacing F-Iron Cage Roller Bearings
Replacing Side Wing Folding Cylinders The AXR-H must be unfolded and lowered down so that the discs are resting on the ground. It is important to remove the pressure from the cylinders. -
Page 39: Assembly
AXR-H Fig. 34 Cylinder 70/30-205 1. Empty the oil from the cylinder by moving the cylinder back and forth. 2. Move the piston to the middle position. Unscrew the gland (pos. 11) approxi- mately 25 mm out. (A special tool is needed to remove the gland). If the gland is stuck, it may help to warm up the very front of the socket. -
Page 40: Replacing Wheel Frame Cylinder
After mounting the cylinder, carefully raise and lower the AXR-H several times to bleed air out of the system. Initially, the AXR-H must not be lifted higher than 10-20 cm from the ground. Never allow bystanders within the operating radius of the AXR- Changing the seals on the wheel frame cylinder Fig. -
Page 41: Assembly
After mounting the cylinder, carefully raise and lower the AXR-H several times to bleed air out of the system. Initially, do not lift the AXR-H higher than approximate- ly 10-20 cm off the ground. Never allow bystanders within the operating radius of the AXR-H. -
Page 42: Assembly
AXR-H Cylinder 80/40-350 1. Empty the oil from the cylinder by moving the cylinder back and forth. 2. Move the piston into the middle position. Unscrew the gland (pos. 3) from the cylinder casing (pos. 1). A special tool is needed to remove the gland. If the gland is stuck, it may help to warm up the very front of the socket. -
Page 43: Replacing Angle Adjustment Cylinders
AXR-H Replacing Angle Adjustment Cylinders The AXR-H must be unfolded and lowered with the side wings resting securely on the ground. It is important to relieve pressure in the angle adjustment cylinder. 1. Remove the hydraulic fittings from the cylinder. -
Page 44: Assembly
Never allow bystanders within the operating radius of the implement. Replacing hydraulic lock cylinders on the disc gangs The AXR-H must be unfolded and lowered with the side wings resting securely on the ground. ... -
Page 45: Changing The Seals On The Hydraulic Lock Cylinders
AXR-H Fig. 39 1. Remove mounting bracket. 2. Remove bolts fas- tening the cyl- inder. 3. Mount in re- verse order. Changing the seals on the hydraulic lock cylinders 1. Empty the oil from the cylinder by moving the cylinder back and forth. -
Page 46: Assembly
AXR-H 4. Unscrew the castle nut (pos. 19). 5. Carefully knock off the hub (pos. 22) and remove the bearings. 6. Remove the seal (pos. 16). 7. Remove the outer ring from the bearing. 8. Clean all parts. Fig. 40 Assembly 1. -
Page 47: Hydraulic Diagram 400/450/500
AXR-H Hydraulic diagram 400/450/500 Page 47... -
Page 48: Hydraulic Diagram 600
AXR-H Hydraulic diagram 600 Page 48... -
Page 49: Scrapping
AXR-H Scrapping The AXR-H must be unfolded and the side sections must be lowered with the packer roller resting securely on the ground. It is important to relieve the pressure in all of the cylinders. When dismounting/mounting components, always pay careful attention to the weight of the part that you are about to handle. -
Page 50: Spareparts
AXR-H Spareparts Page 50...
Need help?
Do you have a question about the AXR-H and is the answer not in the manual?
Questions and answers