
Related Manuals for insize ISF-DF Series


Summary of Contents for insize ISF-DF Series
- Page 1 ISF-DF SERIES-E www.insize.com ISF-DF SERIES DIGITAL FORCE GAGE OPERATION MANUAL...
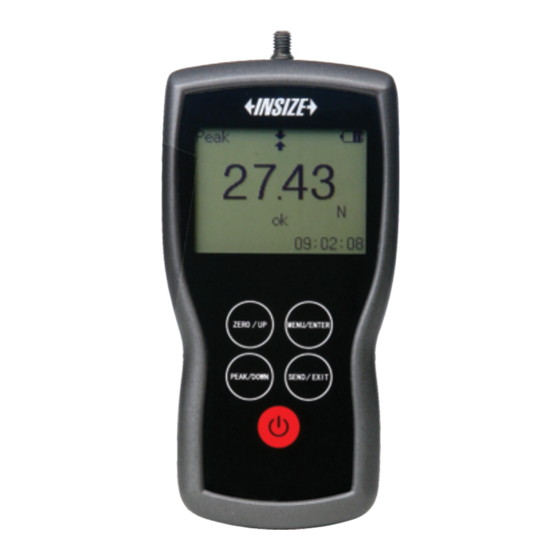
- Page 2 Description Attention Regardless of whether the unit is ON or OFF, Don’t exceed the Structure: capacity of the gauge. At 110% of the rated capacity, the display 1. Measuring Shaft: Measure tension or compression flashes to warn. Never exceeds 150% of the rated capacity, or the forces.
- Page 3 Key functions: The Force Gage has multi-level menu interface. Under the measure interface, touch “MENU” can enter the main menu interface. ON/OFF: Touch about two seconds the gauge will Power ON or OFF. Under the measure interface: Print the recent memory data or storage data, depending on the key default settings.
- Page 4 Test Mode: Under this menu, the measuring mode can be Print recent: Print recently stored data, the range is 0~19 selected. There are three kinds of mode: Track, Peak and groups. Under the measure interface, touch the key “SEND” Auto Peak. also can print the recent data if it is the default settings for Track: The real time measuring mode.
- Page 5 Storage Mode: There are two storage mode can be selected “ DOWN” to shift to the next position, touch EXIT” to abort, “ under this menu, Single and Series. Touch “UP” or “DOWN” and touch “ENTER” to confirm. keys to shift to the next position, touch “EXIT” to abort, and touch “ENTER”...
- Page 6 Contrast: Due to the use of different ambient temperatures and light conditions, it requires to adjust the contrast of LCD in order to making for observing and reading data. Touch “UP” or “DOWN” keys to adjust the value, touch “EXIT” to abort, and touch “ENTER”...
- Page 7 Users should connect the gauge and the charger use the USB cable, and then connect the charger with AC socket to start charging. Users can also use other USB device (e.g. Laptop) to charge the gauge. A fully charged battery pack will provide approximately 20 hours constant use between charges.
Need help?
Do you have a question about the ISF-DF Series and is the answer not in the manual?
Questions and answers