Table of Contents
Advertisement
User Guide & Instruction Manual
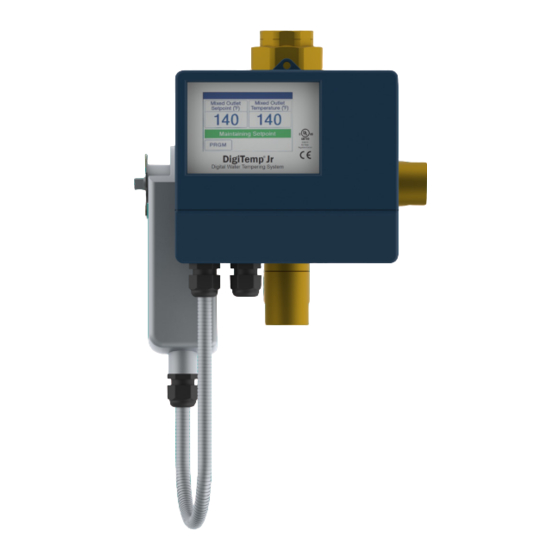
DigiTemp
Digital Water Mixing Valve
Important: Read this Manual BEFORE
using this equipment. Failure to read and
follow all safety and use information can
result in death, serious personal injury,
property damage, or damage to the
equipment.
Keep this Manual for future reference.
L-OMM-014_A
Technical Support • (800) 433-5654 (ext. 3) • customersupport@lyncbywatts.com • Mon-Fri, 8 am - 5 pm CST
Jr.
®
Lync • 425 W Everman Pkway, St. 101 • Fort Worth, TX 76134
Engineered Solutions
USA: T: (817) 335-9531 • Lyncbywatts.com
© 2022 Lync
Advertisement
Table of Contents

Related Manuals for Watts Lync DigiTemp Jr V23


Summary of Contents for Watts Lync DigiTemp Jr V23
- Page 1 User Guide & Instruction Manual DigiTemp ® Digital Water Mixing Valve Important: Read this Manual BEFORE using this equipment. Failure to read and follow all safety and use information can result in death, serious personal injury, property damage, or damage to the equipment.
- Page 2 (800) 433-5654 (opt. 3) with description of the problem and proof of the date of original purchase. Cost of shipping and insuring returned product must be paid by purchaser. Watts Heating & Hot Water Solutions is not responsible for any loss of damage to the product incurred during shipping.
-
Page 3: Table Of Contents
Radio Frequency Warnings & Hazards ..... . . 3 AS SUCH, WATTS HEATING & HOT WATER SOLUTIONS MAKES NO EXPRESS OF IMPLIED... -
Page 4: Safety Information
Attention Owners and Users Important Safety Information Thank you for purchasing the Watts Heating & Hot Water Solutions DigiTemp Jr. This equipment will ® Reading & Understanding the Manual provide safe and productive operation as long as it is installed, set up, used, and serviced in accordance with the instructions in this manual and is properly maintained. -
Page 5: Digitemp ® Jr. Description & Specifications
DigiTemp Jr. Description and Specifications DigiTemp Jr. Description and Specifications ® ® DigiTemp ® Jr. are electronic water mixing valves providing user-directed control and monitoring Sensor water distribution. They include an electronic Control Module featuring a color touch screen digital display to select desired outlet water temperature, an electronically actuated valve that mixes hot and cold water, a quick response temperature sensor and check valves. - Page 6 DigiTemp Jr. Description and Specifications Installation ® WARNING Specifications Maximum Operating Pressure ............200psi (1379 kPa) Maximum Hot Water Temperature ............. 200 °F (93 °C) Minimum Hot Water Supply Temperature** ....2 °F (1 °C) Above Set Point Hot Water Inlet Temperature Range ........120 – 180 °F (49-82 °C) Cold Water Inlet Range ............
-
Page 7: Digitemp ® Jr
Set up and Programming DigiTemp ® Control Unit Connections Turn on Power 1. Turn DigiTemp Jr. power “ON” by turning on the main switch. ® 2. When powered up, the display will show a 70 second countdown timer and read: •... - Page 8 Set up and Programming Set up and Programming Create a passcode Unlock the system DigiTemp Jr. comes programmed with a factory default passcode (1017). For added security, and to help 1. To unlock the system, on the Unlock screen, enter your new passcode, and touch the Enter icon. ®...
- Page 9 Set up and Programming Set up and Programming Note: Mixed Setback Offset is only available if a schedule is selected System Setup Menu Selecting and Setting Outlet Water Temperature Set-point: DANGER WARNING The next steps involve selecting or adjusting the mixed outlet water temperature –...
- Page 10 Set up and Programming Set up and Programming To set mixed setback offset (to set temperature lower during unoccupied period) press word mixed setback To change low temperature alert differential, press word low temp. alert diff. from the system setup menu. offset from the system setup menu and press off and ACCEPT.
-
Page 11: Bas Integration Manual
DigiTemp Jr. BAS Integration Manual DigiTemp Jr. BAS Integration Manual ® ® Configuring the Control for BAS communication 3. The control module has a knock-out plug hole. Knock-out the plug hole and run the BAS wire to the controller. 1. Configure the control to communicate using the “User Interface-BAS Menu” information within this manual and/or the “BAS Integration Manual.”... - Page 12 DigiTemp Jr. BAS Integration Manual DigiTemp Jr. BAS Integration Manual ® ® From within the “Programming” menu (shown below) only the Home, Setup and UNLOCK icons are active Select the BAS icon from within the “Setup” menu to access the “Building Automation” menu shown below. until the control is in the unlocked state.
- Page 13 DigiTemp Jr. BAS Integration Manual DigiTemp Jr. BAS Integration Manual ® ® The Building Automation “BAS Menu” shows default settings for each of the communication protocols To change the BACNet baud rate, press the words Bacnet Baud Rate, select the baud rate using the UP and DOWN arrows, and press ACCEPT supported by this control ( BACnet ®...
- Page 14 DigiTemp Jr. BAS Integration Manual DigiTemp Jr. BAS Integration Manual ® ® BAS Menu BACnet Analog Parameters ® BACnet Standardized Device Profile (ANNEX L) Objective Objective Present Status Range/ Out of Objective Name Description Event State Reliability Units BACnet Application Specific Controller (B-ASC) Identifier Type Value...
- Page 15 DigiTemp Jr. BAS Integration Manual DigiTemp Jr. BAS Integration Manual ® ® To enter the Modbus address, press the words Modbus Address from Building Automation menu and To enter the modbus parity, press the words Modbus Parity from Building Automation menu and select enter Modbus address and ACCEPT.
-
Page 16: Sanitization
Sanitization DigiTemp Jr. BAS Integration Manual ® The Sanitization function produces high water temperatures and is intended ONLY for use as part of a user- Modbus Parameters directed, controlled and supervised thermal eradication protocol that has been safely and properly designed ®... - Page 17 Sanitization Sanitization 5. Next, Select the run time by touching word Time from the Sanitization menu. 6. Using the slide bar or up and down arrows select the desired run time. Touch the ACCEPT icon to confirm the adjustment. 3. Select the sanitization set point by pressing the word Temperature from Sanitization menu. WARNING BEFORE starting the Sanitization function, make sure you are in full compliance with a safely and properly...
- Page 18 Sanitization Time Function 8. Once in the Mode menu, toggle to the ON radio button and then select ACCEPT. Touching the TIME icon on the “Programming” Menu will allow access to the Time Function: To turn on the Date & Time functionality, press the word Date & Time from the Time Options menu. The Sanitization Mode is now fully functional.
-
Page 19: Time Function
Time Function Time Function To set date and time, select month, date, year, hour, minute and AM/PM icon at a time and change with UP To select daylight savings time, press the word Daylight Savings from the Time Options menu or DOWN arrows then select ACCEPT. - Page 20 Schedule Function Schedule Function Touching the SCHEDULE icon on the “Programming” Menu will allow access to the schedule Function: Once in the Type menu, toggle to the Each Day radio button and then select ACCEPT. To turn on schedule, press the word Schedule from the Schedule menu To program Each day, press the word Program Schedule from the Schedule menu.
- Page 21 Schedule Function Monitor Function If prefer all day toggle to the all day radio button and then select ACCEPT. Touching the MONITOR icon on the “Programming” Menu will allow access to the Monitor Function For mixed outlet high, press the words Mixed Outlet High from the Monitor menu then you can ACCEPT or RESET to zero To program All day, press the word Program Schedule from the Schedule menu.
-
Page 22: Monitor Function
Monitor Function Toolbox Function To monitor actuator high reset count, press the words Actuator High Reset Count from the Monitor menu Touching the TOOLBOX icon on the “Programming” Menu will allow access to the Toolbox Function. then you can ACCEPT or RESET to zero Scroll through the Toolbox menu using the UP and DOWN buttons to access each option. - Page 23 Toolbox Function Toolbox Function To access the history log, press words History Log fro the Toolbox menu then select Back To adjust the screen brightness, press the words Screen Brightness from the Toolbox menu. Move the slider or use Up or Down arrows to adjust the brightness and select ACCEPT To select load default, press the words Load Defaults from the Toolbox menu.
-
Page 24: Toolbox Function
Always use proper precautions when accessing circuit breaker box. 5. If problem persists after conducting the above outlined problem solving procedures, contact Watts Heating and Hot Water Solutions Customer Care Department. See contact details on the cover of this manual. -
Page 25: Troubleshooting
Troubleshooting Troubleshooting Problem: Outlet temperature above set point Problem: If screen displays "---" instead of a measured value Solution: Solution: 1. Ensure flow is above the minimum rated flow by opening the hot water valve on two to four fixtures being 1. -
Page 26: Scheduled Testing, Inspection And Maintenance
Error Codes Scheduled Testing, Inspection and Maintenance If the control detects a problem, an error will display on the Home screen and from within the “Toolbox” menu. To navigate to the “Toolbox” menu unlock the control and select “Toolbox”. Resolution is in the chart below. Testing/Inspection WARNING Control Behavior during... - Page 27 Scheduled Testing, Inspection and Maintenance Scheduled Testing, Inspection and Maintenance Valve Replacement 1. Disconnect all power and fully de-energize the DigiTemp system. 2. Once de-energized and disconnected, the display will become inactive and the control box can be opened. 1. Follow actuator replacement above. 3.
- Page 28 Scheduled Testing, Inspection and Maintenance 7. Tighten down the armature clamping nut using the 10mm socket and torque wrench to 50 in-lb (5.65 N-m) 8. Using the 3/8" socket, elbow and torque wrench, torque down the support plate nut to 50 in-lb. NOTICE Take caution not to over tighten and strip these nuts.
- Page 29 Engineered Solutions Fort Worth, TX • (817) 335-9531 • lyncbywatts.com © 2022 Lync...
Need help?
Do you have a question about the Lync DigiTemp Jr V23 and is the answer not in the manual?
Questions and answers