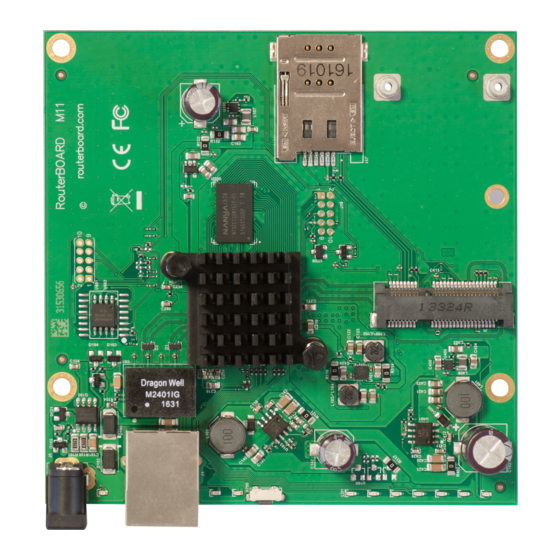
MikroTik RBM11G Quick Start Manual
Hide thumbs
Also See for RBM11G:
- Quick manual (9 pages) ,
- Quick start manual (21 pages) ,
- Quick manual (57 pages)
Table of Contents
Advertisement
Quick Links
RBM11G
Safety Warnings
Before you work on any equipment, be aware of the hazards involved with electrical circuitry, and be familiar with standard practices for preventing
accidents.
Ultimate disposal of this product should be handled according to all national laws and regulations.
All installation methods for mounting an access point on any wall surface is subject to the acceptance of local jurisdiction.
The Installation of the equipment must comply with local and national electrical codes.
This product is intended to be mounted outdoors on a pole but can also be installed indoors. Please read the mounting instructions carefully before
beginning installation. Failure to use the correct hardware and configuration or to follow the correct procedures could result in a hazardous situation to
people and damage to the system.
Use only the power supply and accessories approved by the manufacturer, and which can be found in the original packaging of this product.
Read the installation instructions before connecting the system to the power source.
We cannot guarantee that no accidents or damage will occur due to the improper use of the device. Please use this product with care and operate at your
own risk!
In the case of device failure, please disconnect it from power. The fastest way to do so is by unplugging the power plug from the power outlet.
It is the customer's responsibility to follow local country regulations, including operation within legal frequency channels, output power, cabling
requirements, and Dynamic Frequency Selection (DFS) requirements. All Mikrotik radio devices must be professionally installed.
First use
Insert the miniPCIe card (not included), please see paragraph
(Optional) Install the device in a case.
Connect antenna cables to the miniPCIe card and an Ethernet cable to the gigabit Ethernet port.
Plug-in power cable to turn on the device.
We recommend connecting to the device using Winbox with a default IP address of 192.168.88.1 with the username admin and no password.
Mounting
M11G router for professional use. Each of the devices comes in ESD protective packaging. When handling electrical equipment please observe the
following safety precautions:
Use a wrist grounding strap when unpacking and working with electrical components to avoid electrical discharge (ESD) damage.
After unpacking please place the router on the anti-static mat.
When mounting unit make sure there are no objects that can damage or touch the PCB plate.
Note that ETH and DC jack is extending over the perimeter of the PCB plate.
The device can be mounted in your desired location using the factory provided four holes in a PCB plate, located on each side of the device.
MiniPCIe slot
Installing a miniPCIe module should be done by a qualified person, please follow safety precautions when handling electrical equipment:
1.
Place the device on the anti-static mat.
2.
Locate the miniPCIe slot and remove two factory attached screws.
3.
Attach provided a thick thermal pad to the card, and install the card into miniPCIe slot so that the thermal pad is between PCB and card.
4.
The secure card in place using previously removed two screws.
5.
Attach the grey uFL connector to the MAIN antenna connector of the modem, attach the black cable to the secondary (or AUX) connector.
6.
Attach a thinner thermal pad to the top of the card.
7.
Mount unit in your desired location.
After you mounted the device, slide in the SIM card from your mobile operator into the SIM slot, with the chip facing down. The slot accepts miniSIM (2FF).
Powering
MiniPCIe slot
.
Advertisement
Table of Contents

Summary of Contents for MikroTik RBM11G
- Page 1 In the case of device failure, please disconnect it from power. The fastest way to do so is by unplugging the power plug from the power outlet. It is the customer's responsibility to follow local country regulations, including operation within legal frequency channels, output power, cabling requirements, and Dynamic Frequency Selection (DFS) requirements. All Mikrotik radio devices must be professionally installed. First use...
- Page 2 192.168.88.1 with the username admin and no password. In case you wish to boot the device from the network, for example, to use MikroTik Netinstall, hold the reset button of the device when starting it until the LED light turns off, and the device will start to look for Netinstall servers.
- Page 3 Use the MikroTik smartphone app to configure your router in the field, or to apply the most basic initial settings for your MikroTik home access point. To avoid pollution of the environment, please separate the device from household waste and dispose of it in a safe manner, such as in designated waste disposal sites.
- Page 4 Информация о дате изготовления устройства указана в конце серийного номера на его наклейке через дробь. Первая цифра означает номер года (последняя цифра года), две последующие означают номер недели. Изготовитель: Mikrotikls SIA, Aizkraukles iela 23, Riga, LV-1006, Латвия, support@mikrotik.com. Сделано в Китае, Латвии или Литве. Cм. на упаковке.


Need help?
Do you have a question about the RBM11G and is the answer not in the manual?
Questions and answers