Advertisement
Advertisement
Table of Contents

Summary of Contents for Feelworld LUT7S
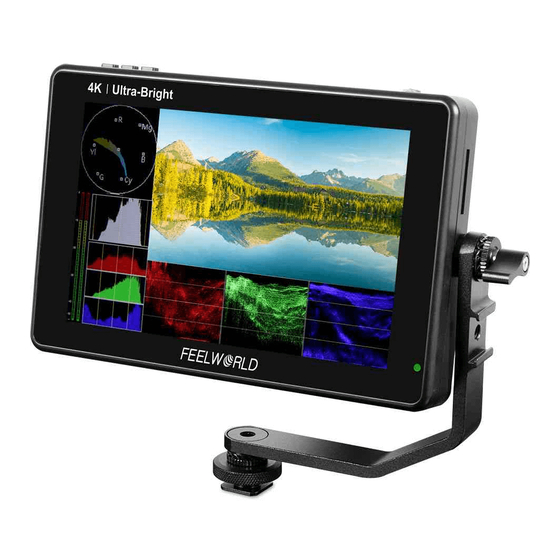
- Page 1 7″ 3D LUT Touchscreen Monitor 2200nits Daylight Viewable User Manual...
- Page 2 Product Overview Thank you for using our 7 inch ultra bright touch screen monitor. This monitor has SDI (optional), HDMI input and output, auxiliary power output, touch screen menu operation, HDR monitoring and support user 3D LUT upload and other features. Advanced features include Parade, Vector, Histogram, Audio Meter, Focus Assist, False Color, Zebra Exposure, Pixel to Pixel, Center Marker, Safety Marker, Marker Mat, Monochrome, Image Freeze, Zoom,...
- Page 3 5. No adjustable components are in the monitor. Please do not take apart or repair the unit by yourself, to avoid the damage of the product. Features ● Touch screen menu operation ● Support HDR monitoring ● Support 3D LUT Log to REC.709 and user 3D LUT upload ●...
-
Page 4: Table Of Contents
CONTENTS 1. Product Description ----------------------------------------- 4 1.1 Button Instruction --------------------------------------------- 4 1.2 Port Instruction ------------------------------------------------ 5 1.3 Power Supply Way ------------------------------------------- 6 1.4 Mount Points --------------------------------------------------- 7 2. Menu Operation Instruction ------------------------------- 8 3. Menu Function Instruction -------------------------------- 10 4. Support Formats --------------------------------------------- 14 5. -
Page 5: Product Description
1. Product Description 1.1 Button Instruction ①. Indicator Light: After connecting the power, the indicator light is on (red). Long Press button to turn on the monitor, it turns yellow. After the signal is connected, it turns green. ②. MENU: See details: 3.1 MENU Wheel Menu Operation in 3. Menu Operation Instruction ③. -
Page 6: Port Instruction
1.2 Port Instruction ①. Dual F970 Battery Plates ⑥. DC 12V Power Input ②. Power / Touch Function Button ⑦. DC OUT 8.4V Power Output Long press to turn on / off; short press to Connect the optional dummy battery turn on / off the screen touch function. -
Page 7: Power Supply Way
1.3 Power Supply Way (1) The rear cover of the monitor is equipped with dual F970 battery plate, which is applicable to F970 series of batteries. Sony F970 battery plate for battery of Sony DV: Sony F970 F960 F950 F930 F770 F750 F730 F570 F550 F530 series Remark: It is recommended to use standard original F970 batteries. -
Page 8: Mount Points
(3) DC OUT 8.4V: DC power output interface, polarity as the output power Barrel output for powering your camera with a separately available DC coupler via adaptor (NP-FW50 Sony & LP-E6 Canon&DMW-BLF19 Panasonic). More adapters coming soon. 1.4 Mount Points There are (3) ¼-20 thread points (bottom, right &... -
Page 9: Menu Operation Instruction
wireless receiver) that would otherwise be displaced from the camera's accessory shoe. 2. Menu Operation Instruction After the monitor is properly connected to the power supply, the indicator light is on (red). Long press button to turn on the monitor, the indicator light turns yellow. After the signal is connected, the indicator light turns green. - Page 10 ②.When the menu is not displayed, swipe up from the bottom of the screen to open the shortcut menu, and click on the corresponding menu box to open or set the corresponding function. ③.When the menu is not displayed, on the left side of the screen (1/2 split screen), you can directly adjust the brightness of the screen backlight;...
-
Page 11: Menu Function Instruction
③.Short press the MENU wheel to open the shortcut menu (below the screen), rotate the wheel to select the shortcut menu option, press the wheel to directly turn on/off the function, if you press the parameter selection, repeat the above operation. The shortcut menu will automatically exit after about 5 seconds without operation. - Page 12 Nine Grid OFF, ON Safety Marker OFF, 70%, 80%, 90%, 16:9, 16:10, 4:3, 5:4, 1.85:1, 2.35:1 Center Marker OFF, ON OFF, 16:9, 16:10, 4:3, 1.85:1, 2.35:1 Marker Mat After the Marker Mat is turned on, the Marker Mat Alpha (0%, 25%, 50%, 75%) can be adjusted.
- Page 13 OFF, ON All Waves OFF, RGB, YUV, Y Parada OFF, ON Vector OFF, ON RGB Histogram OFF, ON Histogram Audio Meter OFF, ON Return Back to the previous OSD menu OFF, ON Lut Switch After the LUT Switch is turned on, you can use the Lut (SLOG2, SLOG3, LOGC, VLOG).
- Page 14 Under "Auto", the brightness is automatically adjusted by the light sensor. Brightness 0~100 Contrast 0~100 Saturation 0~100 0~100 Sharpness 0~100 Return Back to the previous OSD menu Backlight, Volume, Zoom Times After selecting the wheel option, you can click the “<” or “>” Wheel button in the wheel option, or rotate the wheel to select one of the shortcut keys to set it to the rotary wheel adjustment (when...
-
Page 15: Support Formats
After selecting the reset option, you can click the “<” or “>” key Reset in the reset option or rotate the wheel to restore the factory settings. Input HDMI, SDI (With SDI interface version) After copying the update file to the SD card and inserting it into the SD card slot, you can click the “<”... -
Page 16: Technical Parameters
480i/480p/576i/576p 720p (60/59.94/50/30/29.97/25/24/23.98) 1080i (60/59.94/50) HDMI Input/ Output 1080p (60/59.94/50/30/29.97/25/24/23.98) Support Format 3840x2160p (30/29.97/25/24/23.98) 4096×2160p (30/29.97/25/24/23.98) 5. Technical Parameters Panel Size 7” touch screen Resolution 1920 × 1200 pixels Dot Pitch 0.07875 (H) x 0.07875 (W) (mm) Aspect Ratio 16:10 Brightness 2200cd/m (Light Sensor) - Page 17 ② Please check "Monochrome" is in black, white or monochrome image or other condition. NO Image after put on the power ① Check if signal cable connecting is in good condition. ② Check signal cable connecting, and make sure to use the standard adapter to connect the monitor.


Need help?
Do you have a question about the LUT7S and is the answer not in the manual?
Questions and answers