
Related Manuals for Feelworld Master MA6


Summary of Contents for Feelworld Master MA6
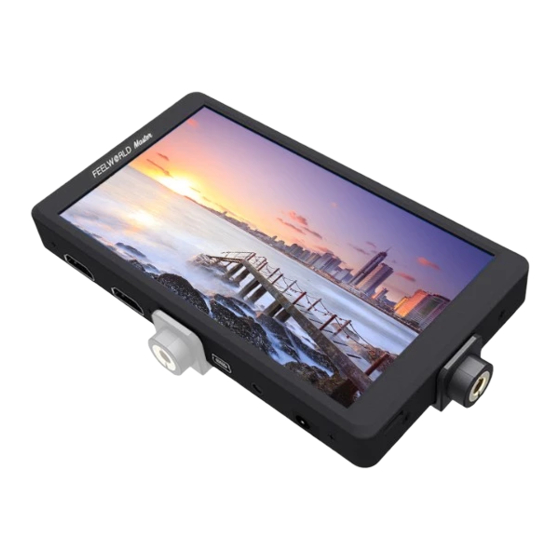
- Page 1 5.7" Full HD On-camera Monitor Support 4K HDMI Input/ Output Guide Manual Thank you for choosing Feelworld monitor. Please read this manual carefully before you use.
-
Page 3: Table Of Contents
Contents Caring For Your MA6 Monitor What Should Be In The Box Product Description Button Instruction Port Instruction 1/4" Screw Lock Installation Sunshade Battery Plate Menu Operation Instruction Menu Function Instruction Technical Parameters Trouble Shooting... -
Page 5: Caring For Your Ma6 Monitor
CARING FOR YOUR MA6 MONITOR Caring For Your MA6 Monitor • Do not attempt to disassemble the monitor. Doing so voids warranty. • Water damage is not covered by warranty, but taking the right precautions when a water event occurs can sometimes preserve unit functionality. -
Page 6: What Should Be In The Box
WHAT SHOULD BE IN THE BOX What Should Be In The Box • MA6 Monitor • HDMI to Mini HDMI Cable • HDMI to Micro HDMI Cable • Tilt Arm • 1/4’’ Screw Lock • F970 Battery Plate • Carrying bag •... -
Page 7: Product Description
PRODUCT DESCRIPTION Product Description • Front Panel • Back Panel... -
Page 8: Button Instruction
PRODUCT DESCRIPTION • Button Instruction ① / ② F1/F2: Customized settings. : Volume adjustment; value adjustment of ③ / ④ selected item. ⑤ MENU: Menu entry and exit; confirmation of item adjustment. : Item selection in OSD operation ⑥ / ⑦ : Power On/Off ⑧... -
Page 9: Port Instruction
PRODUCT DESCRIPTION • Port Instruction ① DC12V: DC power input interface, as the input polarity : Earphone port output ② ③ USB upgrade port ④ 1/4" screw lock ⑤ HDMI-OUT: HDMI signal output ⑥ HDMI-IN: HDMI signal input... -
Page 10: 1/4" Screw Lock Installation
PRODUCT DESCRIPTION • 1/4" Screw Lock Installation You can install it either at the bottom or on the right side of the monitor . ① Fasten the 1/4" screw lock with the monitor. ② Tighten the screws to fix the 1/4" screw lock on the monitor. -
Page 11: Sunshade
PRODUCT DESCRIPTION • Sunshade ① Sunshade ② Sunshade Frame ③ Fixed Frame ④ Sunshade Application First open the Sunshade Frame ① , and match the sticker on the sunshade inside to the marked part of the sunshade frame ② , smooth and press 3 sides on the sunshade ③ , and then complete the sunshade installation ④... -
Page 12: Battery Plate
PRODUCT DESCRIPTION • Battery Plate There is a battery plate on the back of the monitor, a corresponding battery needs to be installed to power the monitor. We offer several portable powering options to help our customers reduce the amount of charging equipment that is plugged in the set. - Page 13 PRODUCT DESCRIPTION Battery Plate Model Picture Battery Camera Model F970 for F970 F960 F950 F930 F770 F750 F730 F570 Sony DV F550 F530 QM91D QM91 QM90D QM90 QM71D QM71 QM70D QM70 QM51D QM51 FM71 FM70 series LP-E6 for LP-E6 Canon DV D28S for D55 554S D54SE D40 Panasonic DV...
- Page 14 PRODUCT DESCRIPTION Remark: Different specifications of the battery result in different capability and working time. Please remove the battery from the monitor if you don’t use it for a long time. CAUTION: RISK OF EXPLOSION IF AN INCORRECT BATTERY IS REPLACED. PLEASE DISPOSE USED BATTERIES ACCORDING TO INSTRUCTIONS.
-
Page 15: Menu Operation Instruction
MENU OPERATION INSTRUCTION Menu Operation Instruction After correctly connect to the power supply, press to turn on the monitor, the monitor turns to working state. • Press “MENU” button to enter OSD main menu, and press “ ” or “ ”... -
Page 16: Menu Function Instruction
MENU FUNCTION INSTRUCTION Menu Function Instruction • Image Pic. Mode Dynamic, Standard, Mild, User Brightness 0~100 Contrast 10~100 Image Saturation 0~100 Sharpness 0~100 Color Temp 6500, 9300, User Tint 0~100... - Page 17 MENU FUNCTION INSTRUCTION • Setting English, 简体中文 , Español, Português, Language Français, Nederlands, Deutsch, 日本語 , 繁體中文 Aspect Ratio Just Scan, Panorama, Auto., 4:3, 16:9, P2P White Screen, Blue Screen, Red Screen, No Signal Green Screen, Black Screen OSD Trans. Off, Low, Middle, High OSD H 0~100...
- Page 18 MENU FUNCTION INSTRUCTION • Zoom Nine Grid Zoom Off, On Zoom Off, 4X, 9X, 16X Image Off, Mode1, Mode2 (Zoom All, L/R Zoom Mode Zoom and U/D Zoom for choice) Scan Mode Under Scan, Over Scan • Function Center Marker Off, On Safe Frames Off, 80%, 85%, 90%, 96%, 93%, 2.35:1...
- Page 19 MENU FUNCTION INSTRUCTION Check Field Off, Mono, Red, Green, Blue Histogram Off, On False Colors Off, On Focus Assist Off, On Peaking Color Red, Green, Blue Over Exposure Off, On Function Exposure Lever 1 ~ 100 IRE Off, 4:3, 13:9, 14:9, 15:9, 16:9, 1.85:1, Ratio Marker 2.35:1 Mark Color...
- Page 20 MENU FUNCTION INSTRUCTION • Custom Button Setting F1~F2 Available functions: Center Marker, Safe Frames, Check Field, Focus Assist, Aspect Ratio, Image Flip, Image Freeze, Histogram, False Colors, Over Exposure, Nine Grid, Zoom, Anamorphic. ★ Users can self-define maximum 2 shortcut keys F1 and F2 on the panel.
-
Page 21: Technical Parameters
TECHNICAL PARAMETERS Technical Parameters Panel Size 5.7 inch IPS Resolution 1920 x 1080 pixels Dot Pitch 0.0657 (H) x 0.0219 (W)mm Aspect Ratio 16:9 Brightness 460cd/m Contrast 1400:1 Viewing Angle 85°/85° (L/R) 85°/85° (U/D) Backlight Input Signal HDMI Output Signal HDMI... - Page 22 TECHNICAL PARAMETERS 480i /480p /576i /576p 720p (60/59.94/50/30/29/25/24/23.98) 1080i (60/59.94/50) HDMI Input / Output 1080p (60/59.94/50/30/29.97/25/24/24sF/23.98/ Support Format 23.98sF) 4K UHD 3840×2160p (30/29.97/25/24/23.98 Hz) 4096×2160p (24Hz) Headphone Output stereo 3.5mm Input Voltage DC: 7~24V Power Consumption ≦ 8W Unit Size (mm) 148Lx82Hx18.6D (mm) Unit Weight 280g/310g (With F970 Battery Plate)
-
Page 23: Trouble Shooting
TROUBLE SHOOTING Trouble Shooting • Only black and white or monochrome picture display: ① Please check if Saturation, Brightness and Contrast are properly setup or not. ② Please check if "Check Field" is in Black and White or other monochrome image condition. •... - Page 24 TROUBLE SHOOTING ② Check the HDMI input and ensure there is HDMI signal. ■ If you have more questions, please contact Feelworld at support@feelworld.cn ★ As we are improving product features and product performance, so if there is any change on the specification...
Need help?
Do you have a question about the Master MA6 and is the answer not in the manual?
Questions and answers