
Related Manuals for peerless-AV Modular Series


Summary of Contents for peerless-AV Modular Series
- Page 1 MOD-PJF2KIT100-CPF-B, MOD-PJF2KIT150-CPF-B 50 lb (22.7 kg) ČEŠ TÜR 2019-03-25 #:056-9108-1...
- Page 2 WARNING ENG - This product is designed to be installed on wood joist/beam or solid concrete ceilings. Hardware is included for wood joist/beam and solid concrete installation. Before installing make sure the supporting surface will support the combined load of the equipment and hardware. Screws must be tightly secured. Do not overtighten screws or damage can occur and product may fail.
- Page 3 AVVERTENZA ITL - Questo prodotto è indicato per l’installazione su soffitti in calcestruzzo solido o a travi/traverse di legno. Sono compresi i dispositivi di fissaggio per l’installazione su calcestruzzo solido e a travi/traverse di legno. Prima di iniziare l’installazione, accertarsi che la superficie di supporto sia in grado di sorreggere il carico combinato unità/dispositivi di fissaggio.
- Page 4 Symbols Símbolos Symboles Symbole Symbolen WARNING Simboli ADVERTENCIA ČEŠ Symboly Skip to step. ADVERTISSEMENT Symboly Continúe con el ACHTUNG Screws must get at least three Símbolos paso. WAARSCHUWING full turns and fit snug. Semboller TÜR Passez à l’étape. AVVERTENZA Los tornillos tienen que dar, Weiter mit Schritt.
- Page 5 Tools Needed for Assembly. Herramientas necesarias para el ensamblaje. Outils nécessaires au montage. To properly tighten screws: Tighten until screw Für den Zusammenbau erforderliche Werkzeuge. head makes contact, then tighten another 1/2 Voor montage benodigd gereedschap. turn. Do not overtighten screws. Attrezzi necessari per l’assemblaggio.
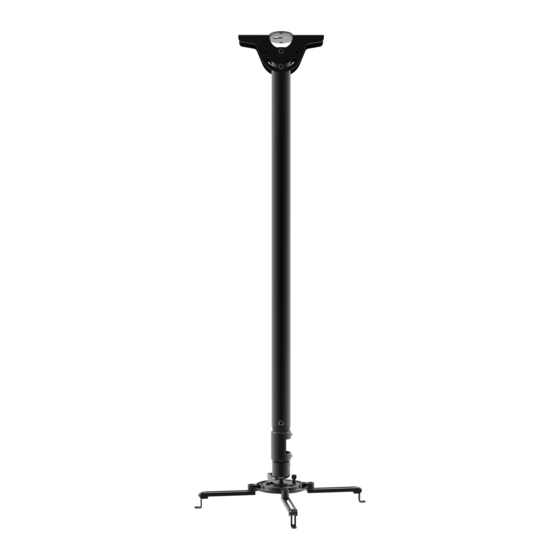
- Page 6 Parts (Before beginning, make sure you have all parts shown below). Piezas (antes de iniciar, asegúrese de tener todas las piezas siguientes). Pièces (avant de commencer, assurez-vous d’avoir toutes les pièces illustrées ci-dessous). Teile (Achten Sie vor Beginn der Arbeiten darauf, dass alle unten abgebildeten Teile vorhanden sind). Onderdelen (hoort u zich ervan te overtuigen dat u alle onderdelen hebt, die hieronder te zien zijn).
- Page 7 X ( 4 ) 10mm concrete anchor Y (1) Z ( 1 ) 5mm allen M8 x 55mm wrench AA ( 4 ) BB ( 1 ) M10 set screw 3" wood screw E ( 2 ) F ( 1 ) D (2) #14 x 2-1/2"...
- Page 8 P ( 4 ) Q ( 4 ) R ( 4 ) S ( 4 ) T ( 4 ) U ( 4 ) small washer M3 x 8mm M4 x 10mm M5 x 10mm M6 x 10mm M5 x 20mm O (1) 2mm allen wrench L ( 1 )
- Page 9 This page intentionally left blank. Página en blanco. Cette page a été laissée en blanc intentionnellement. Diese Seite wurde absichtlich freigelassen. Deze pagina is met opzet blanco gelaten. Pagina lasciata intenzionalmente vuota. Tato strana je záměrně prázdná. ČEŠ Táto strana je zámerne prázdna. Esta página foi intencionalmente deixada em branco.
- Page 10 Wood joist/beam Concrete Ceiling Vigueta de madera Techo de concreto Solive de bois Plafond en béton Holzbalken Betondecke Houten dwarsbalk Plafond van beton Travetto di legno Soffitto in calcestruzzo ČEŠ Dřevěný nosník ČEŠ Betonový strop Drevený nosník Betónový strop Trave de madeira Teto em betão Ahşap kiriş...
- Page 11 UYARI TÜR - Peerless tavan kaidelerini alçı panelle (alçıpan) kaplı ahşap bir kirişe monte ederken söz konusu kirişin nominal ebadının en azından 2" x 4" olmasına dikkat ediniz. 5/8" den daha kalın alçı panellerin üzerine monte etmeyiniz. 1a-1 Use stud finder to locate and mark stud center lines.
- Page 12 1a-3 7/32" 3" (5.5mm) (76mm) Mounting hole must center on stud. El orificio debe quedar centrado en el montante. Le trou doit être centré sur le Drill mounting holes into supporting surface 7/32" montant. (3" (76mm) minimum depth required). (5.5mm) Das Loch muss am Ständer Taladre los agujeros de montaje en la superficie zentriert sein.
- Page 13 WARNING ENG - When installing Peerless ceiling mounts on a concrete ceiling, the ceiling must be at least 8" thick with a minimum compressive strength of 2000 psi. Never attach concrete expansion anchors to concrete covered with plaster, drywall, or other finishing material. ADVERTENCIA ESP - Cuando vaya a instalar soportes de techo de Peerless en techos de concreto, los techos tienen que tener, por lo menos, 8"...
- Page 14 1b-1 Mark mounting holes. Marque los orificios de montaje. Marquez les trous de fixation. Markieren Sie die Montagelöcher. Markeer montagegaten. Contrassegna I fori di montaggio. Vyznačte montážní otvory. ČEŠ Vyznačte montážne otvory. Marque os furos de montagem. Montaj deliklerini işaretleyin. TÜR 1b-2 3/8"...
- Page 15 1b-3 Insert anchor flush to concrete. Inserte el anclaje a ras con el concreto. Insérez la cheville d’ancrage au ras du béton. Setzen Sie den Dübel bündig mit dem Beton abschließend ein. Breng anker aan gelijk met beton. Inserire il fermo a paro col calcestruzzo.
- Page 16 Optional: Cut pole to desired length. Cut end must be perpendicular to pole within 1/16" (1.5mm). Must use drill template MOD-ADF (sold separately) to drill new holes in pole. Refer to accompanying instructions. Opcional: Corte el poste a la longitud deseada. El extremo cortado tiene que quedar perpendicular al poste a 1/16”...
- Page 17 Measure distance from top of projector to ceiling (X), subtract 8-5/16" (211mm) then mark pole and cut away excess material. Mida la distancia desde parte superior del proyector el techo (X), reste 8-5/16" (211mm), marque el poste y corte el exceso. Mesurez la entre haut du projecteur et le plafond (X), soustrayez 8-5/16 po (211mm), puis marquez le montant et coupez l’excédent de longueur.
- Page 18 K (2) 2019-03-25 #:056-9108-1...
- Page 19 x5 MIN. x8 MAX. x5 MIN. x7 MAX. 2019-03-25 #:056-9108-1...
- Page 20 If projector does not have at least three mounting holes, do not use this adaptor. Some projectors have feet which can be removed and the corresponding threaded insert can be used as a mounting hole. Si el proyector no tiene, por lo menos, tres agujeros de montaje, no utilice este adaptador. Algunos proyectores tienen patas que se pueden quitar y entonces el inserto roscado correspondiente se puede utilizar como un agujero de montaje.
- Page 21 Loosen. Afloje. Desserrez. Lösen. Losdraaien. Allentare. Uvolnit. ČEŠ Uvoľniť. Desaperte. Gevşetin. TÜR Position feet of adaptor bracket over mounting holes. Coloque las patas del soporte adaptador sobre los agujeros de montaje. Placez les pattes du support adaptateur sur les trous de fixation. Positionieren Sie die Füße der Adapterhalterung über den Montagelöchern.
- Page 22 Tighten all screws while keeping center of gravity. Apriete todos los tornillos, sin cambiar el centro de gravedad. Serrez toutes les vis, tout en maintenant le centre de gravité. Ziehen Sie unter Beibehaltung des Schwerpunkts alle Schrauben an. Draai alle schroeven aan terwijl u het zwaartepunt in stand houdt.
- Page 23 It is the responsibility of the installer to ensure that the projector is properly ventilated per manufacturer's requirements. El instalador es responsable de asegurarse de que el proyector tenga una ventilación adecuada. Il incombe à l'installateur de s'assurer que le projecteur est correctement ventilé. Die für die Montage zuständige Person ist dafür verantwortlich, dass der Projektor ausreichend belüftet ist.
- Page 24 2019-03-25 #:056-9108-1...
- Page 25 Tighten. Apretar. Serrer. Anziehen. Aandraaien. Stringere. Utáhněte. ČEŠ Utiahnite. Apertar. Sıkmak. TÜR 360° Loosen, adjust, tighten. Afloje, ajuste, apriete. Desserrez, réglez, puis serrez. Lösen, einstellen, anziehen. Losdraaien, aanpassen, aandraaien. Allentare, regolare, stringere. ČEŠ Uvolnit, nastavit, přitáhnout. Uvoľniť, nastaviť, pritiahnuť. Desaperte, ajuste, aperte. Gevşetin, ayarlayın, sıkın.
- Page 26 Loosen, adjust, tighten. Afloje, ajuste, apriete. Desserrez, réglez, puis serrez. Lösen, einstellen, anziehen. Losdraaien, aanpassen, aandraaien. Allentare, regolare, stringere. ČEŠ Uvolnit, nastavit, přitáhnout. Uvoľniť, nastaviť, pritiahnuť. Desaperte, ajuste, aperte. TÜR Gevşetin, ayarlayın, sıkın. +/- 15° +/- 15° 2019-03-25 #:056-9108-1...
- Page 27 Cable management. Manejo de cables. Gestion des câbles. Kabelführung. Kabelbeheer. Gestione dei cavi. Vedení kabelů. ČEŠ Vedenie káblov. Gestão de cabos. Kablo yönetimi. TÜR 2019-03-25 #:056-9108-1...
- Page 28 This page intentionally left blank. Página en blanco. Cette page a été laissée en blanc intentionnellement. Diese Seite wurde absichtlich freigelassen. Deze pagina is met opzet blanco gelaten. Pagina lasciata intenzionalmente vuota. Tato strana je záměrně prázdná. ČEŠ Táto strana je zámerne prázdna. Esta página foi intencionalmente deixada em branco.
- Page 29 (from date of the original installation of the product). At its option, Peerless-AV will repair or replace, or refund the purchase price of, any product which fails to conform with this warranty.
- Page 30 (dalla data dell’installazione originale del prodotto). A sua discrezione, Peerless-AV sostituirà o riparerà, o restituirà il prezzo pagato se il prodotto non è conforme a questa garanzia.
- Page 31 (a partir da data da primeira instalação do produto). A seu critério, a Peerless-AV reparará ou substituirá (ou reembolsará o preço de compra de) qualquer produto que não esteja em conformidade com esta garantia.
- Page 32 Peerless-AV Peerless-AV Europe Peerless-AV de Mexico 2300 White Oak Circle Unit 3 Watford Interchange, Ave de las Industrias 413 Aurora, IL 60502 Colonial Way, Watford, Herts, Parque Industrial Escobedo Email: tech@peerlessmounts.com WD24 4WP, United Kingdom Escobedo N.L Mexico 66062 Ph: (800) 865-2112...
Need help?
Do you have a question about the Modular Series and is the answer not in the manual?
Questions and answers