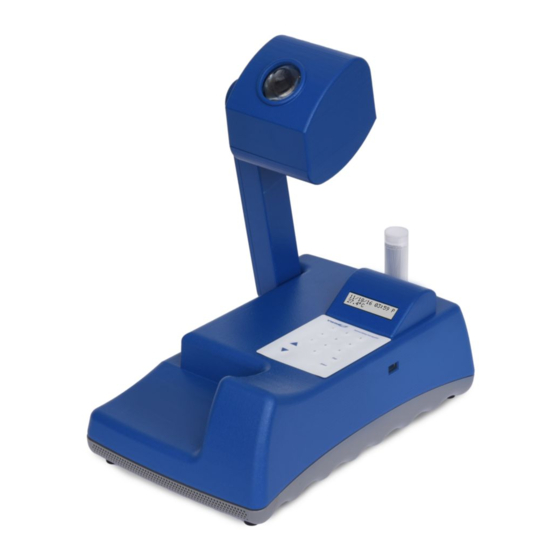
Summary of Contents for VWR Basic Melting Point Apparatus
- Page 1 Instruction Manual Basic Melting Point Apparatus Advanced Melting Point Apparatus...
-
Page 2: Package Contents
able of ontents Package Contents ....Warranty ....Installation ....Maintenance &... -
Page 3: Installation
Upon receiving the VWR Melting Point Apparatus, check to ensure that no damage The VWR Melting Point Apparatus intended for general laboratory use. Safety cannot has occurred in shipment. It is important that any damage that occurred in transport be guaranteed if used outside of the intended use. -
Page 4: Safety Instructions
& r afety nstrUctIons tandards egUlatIons Please read the entire instruction manual before operating the Melting Point Apparatus. The manufacturer hereby declares under it’s sole responsibility that the construction of this product conforms in accordance with the following standards: WARNING! DO NOT use the Melting Point Apparatus in a hazardous atmosphere or with hazardous materials for which the unit was not designed. -
Page 5: Instructions De Sécurité
nstrUctIons de sécUrIté orMes et régleMentatIons Veuillez lire le manuel d’utilisation dans sa totalité avant de faire fonctionner le appareil à Le fabricant déclare par la présente, sous sa seule responsabilité, que la construction point de fusion. de ce produit est conforme aux normes suivantes : ATTENTION ! Ne pas se servir d’un appareil à... - Page 6 - 120/230v eltIng oInt PParatUs PecIfIcatIons Basic Advanced 10.75 x 7.5 x 4.25” 14 x 7.5 x 4.25” Dimensions (L x W x H): (27.3 x 19.1 x 10.8cm) (35.6 x 19.1 x 10.8cm) 120V, 0.75 amps, 85 watts Electrical 50/60 Hz: 230V, 0.50 amps, 110 watts Fuses: 5mm x 20mm, 250V, 5 amp quick acting...
- Page 7 The touch pad and the LCD display contain all of the controls needed to operate the Basic Melting Point Apparatus. A. “Set” button: Set temperature; set date; set time B. “Start” button: Start heating to set temperature; start ramping to melt temperature; view data C.
- Page 8 asIc eltIng oInt PParatUs PeratIng nstrUctIons 5. Insert Sample into Oven: This unit is ideal for high throughput applications that require accurate results. It heats at a fixed ramp rate of 2°C per minute after the set temperature is reached. Touch a.
- Page 9 ’ asIc eltIng oInt PParatUs PeratIng nstrUctIons SET DATE AND TIME – BASIC ONLY: e. Press “Start” to record the fourth and final temperature in the melting range. 1) Hold “Set” button and press Up Arrow for 3 seconds Ramping will stop and the oven temperature will immediately start decreasing 2) When “Set Date/Time?”...
- Page 10 dvanced eltIng oInt PParatUs ontrol anel The touch pad and the LCD display contain all of the controls needed to operate the Advanced Melting Point Apparatus. A. “Select” button: Select temperature; select ramp rate; select date; select time; start heating to set temperature; start ramping to melt temperature; save Melt 1; save Melt 2;...
- Page 11 dvanced eltIng oInt PParatUs PeratIng nstrUctIons 3. Standby Mode: This unit can be used for a variety of applications that require accurate and repeatable results. It heats at the selected ramp rate after the set temperature is reached. Touch a. When the unit is plugged in, the date/time and actual temperature will be pad controls are used to operate the heater, and the temperature values are displayed shown on the LCD screen.
- Page 12 ’ dvanced eltIng oInt PParatUs PeratIng nstrUctIons 11. Save Data to Unit: b. The temperature will increase at the ramp rate selected in Step 5 until the user presses “Stop” or until the oven reaches a maximum temperature of a. After “Stop” is pressed, “Save Data to Unit?” will be shown on the display. 400°C, whichever comes first.
- Page 13 ’ dvanced eltIng oInt PParatUs PeratIng nstrUctIons CALIBRATE TO EXTERNAL TEMPERATURE PROBE: 7) Use numeric buttons or Up and Down Arrows to select the minute, and press “Select” 1) Turn unit on. 8) Use Up and Down Arrows to select “A” for AM or “P” for PM, and press “Select” 2) Insert Calibration USB Accessory.
-
Page 14: Troubleshooting
Please contact your VWR representative for repair. Use Single Point Calibration instructions to calibrate to external temperature device Unit cannot reach set-point (Advanced option only). If problem persists, please contact your VWR representative for repair. Errors will cause heating function to cease. - Page 15 asIc eltIng oInt PParatUs ePlaceMent arts escrIPtIon UMber 1. Oven Assembly 849700-00 2. Membrane Switch 349325-00 3. Quick Start Guide Label 549622-00 4. Control Board 349323-00 5. Display Board 349320-00 6. Power Supply 349322-00 7. Power Entry Module Assembly 349330-00 8.
- Page 16 dvanced eltIng oInt PParatUs ePlaceMent arts escrIPtIon UMber 1. Oven Assembly - Advanced 849702-00 2. Arm Cap 549618-00 3. Lower Arm, Bottom 249404-00 4. Lower Arm, Top 249408-00 5. Adjustment Knob, Large 549620-00 6. Membrane Switch 349326-00 7. Control Board 349323-00 8.
- Page 17 ccessorIes for eltIng oInt PParatUs Accessory Type Description Compatibility Part Number Capillary Tube (pack of 100) Capillary tubes with one end open. Basic, Advanced 949VWMPCAP Cooling Block Metal block for oven to reduce cooling time. Basic, Advanced 949VWMPCOOL Allows single point calibration to an external temperature Calibration USB Advanced 949VWCALUSB...


Need help?
Do you have a question about the Basic Melting Point Apparatus and is the answer not in the manual?
Questions and answers