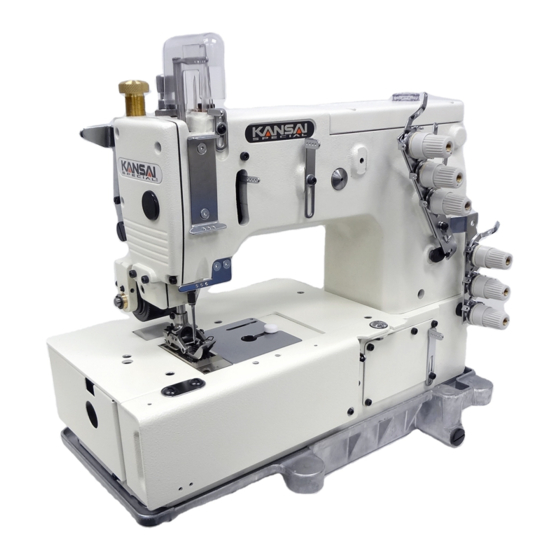
Summary of Contents for KANSAI SPECIAL DLR Series
- Page 1 PARTS LIST & INSTRUCTION Industrial Sewing Machines 2022 年 3 月 第 18 版 発行 18th edition: March 2022 No. 220029...
- Page 40 INDEX 1 REF. PART NO. REF. PART NO. REF. PART NO. REF. PART NO. REF. PART NO. REF. PART NO. REF. PART NO. REF. PART NO. REF. PART NO. REF. PART NO. REF. PART NO. REF. PART NO. 品 番 品...
- Page 41 INDEX 2 REF. PART NO. REF. PART NO. REF. PART NO. REF. PART NO. REF. PART NO. REF. PART NO. REF. PART NO. REF. PART NO. MEMO 品 番 品 番 品 番 品 番 品 番 品 番 品 番 品...
- Page 42 series Instruction Manual...
-
Page 43: Table Of Contents
CONTENTS INTRODUCTION 1. SPECIFICATIONS 10. ADJUSTING THE REAR PULLER DEVICE Thank you for your purchasing Kansai Special's DLR series. 1-1 Stitch type ················································ 1 10-1 Manual lever ········································· 12 1-2 Model ······················································ 1 10-2 To adjust the puller pressure ··················· 12... -
Page 44: Specifications
【1】SPECIFICATIONS 2-3 To thread the machine Thread the machine correctly by referring to the next page. 1-1 Stitch type Incorrect threading may cause skip stitching, thread breakage and/or uneven stitch JIS401 double chainstitch machines formation. When threading the looper, tilt the looper holder toward the front of the machine by means of the looper drawing bar. -
Page 45: Machine Speed
【3】MACHINE SPEED ■A,B,C,D : Needle threads E,F,G,H : Looper threads 3-1 Machine speed & direction in which the machine pulley runs Maximum speed : 4,500 rpm Standard speed : 4,000 rpm extend machine life, machine approximately 15-20% below the maximum speed for the first 200 hours of operation (approx. -
Page 46: Oil
【4】LUBRICATION 【5】SEWING MACHINE INSTALLATION 4-1 Oil 5-1 Cutting the machine able Use Kansai Special’s genuine oil. (Part No. 28-611) 4-2 To fill the machine with oil Remove oil plug A. Fill the machine with oil until the oil level is at the top line (see H in the illustration) on oil gauge C. -
Page 47: To Install The Machine
6-2 Looper left-to-right movement 5-2 To install the machine When the point of the looper, moving to the left or Install the brackets on the underside of the table board (see the illustration below). right, has reached the center of the needle, the point Fit the rubber cushions onto the brackets. -
Page 48: Needle Height
6-4 Needle height 6-6 Length of the looper connecting bar When the point of the looper has reached the center On 1501 to 1504, the distance between the centers of of the back side of the needle with the machine both connecting rods should be 100mm. -
Page 49: Adjusting The Feed Dog & Stitch Length
【8】ADJUSTING THE FEED DOG & STITCH LENGTH 【9】ADJUSTING THE PRESSER FOOT 8-1 Feed dog height & tilt 9-1 Presser foot pressure When the feed dog is at the top of its stroke, the feed dog The presser foot pressure should be as light as possible, teeth should be 1.0~1.2mm above the top surface of the yet be sufficient to feed the fabric and produce uniform needle plate. -
Page 50: Adjusting The Feeding Amount Of The Rear Puller
10-3 Adjusting the feeding amount of the rear puller 10-6 Guide plate adjustment (Model SPF) The feeding amount of the rear puller should be the same as that of the feed dog. Adjust guide plate M & T according to the width of Loosen nut A to decrease the amount, move waist band. -
Page 51: Position Of The Needle Thread Eyelet
11-2 Position of the needle thread eyelet 11-5 Position of the looper thread take-up Secure needle thread eyelet C at the bottom end of Adjust thread guide E so that the clearance the slot. between thread guide E and the top surface of the guide plate is 6~7mm. - Page 52 MORIMOTO MFG. CO., LTD. 1-4-17, SUNA, SHIJONAWATE-CITY, OSAKA 575-0001, JAPAN TEL: +81-72-877-1221 FAX: +81-72-878-9649 E-MAIL: hqeigyo@kansai-special.com URL:www.kansai-special.com FOREIGN AFFILIATED COMPANIES KANSAI SPECIAL AMERICAN MACHINE CORP. 476 HAMPSHIRE DR., GAFFNEY, SC 29341. USA E-MAIL: ksam@kansaispecial.net KANSAI SPECIAL EUROPE GMBH QUIRINSTR. 19, 40545 DUSSELDORF, GERMANY TEL: +49-211-577-9090 FAX: +49-211-558-1477 E-MAIL: contact@kansai-special.de...


Need help?
Do you have a question about the DLR Series and is the answer not in the manual?
Questions and answers