
Related Manuals for KANSAI SPECIAL JJ Series


Summary of Contents for KANSAI SPECIAL JJ Series
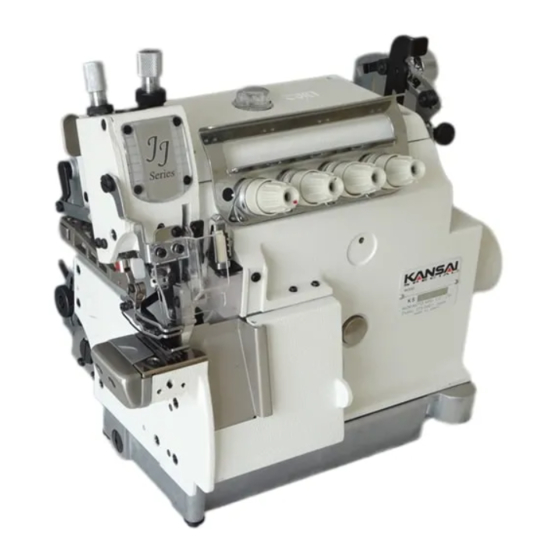
- Page 1 PARTS LIST & INSTRUCTION Industrial Sewing Machines JJ50 2019 年 07 月 第 二 版 発 行 Second edition: July 2019 No.KX19008...
- Page 27 INDEX 1 REF. PART NO. REF. PART NO. REF. PART NO. REF. PART NO. REF. PART NO. REF. PART NO. REF. PART NO. REF. PART NO. REF. PART NO. REF. PART NO. REF. PART NO. REF. PART NO. 品 番 品...
- Page 28 INDEX 2 REF. PART NO. REF. PART NO. REF. PART NO. REF. PART NO. REF. PART NO. REF. PART NO. REF. PART NO. MEMO 品 番 品 番 品 番 品 番 品 番 品 番 品 番...
- Page 29 INSTRUCTION Industrial Sewing Machines JJ50 First edition : July 2016 No.KX16017...
- Page 30 INTRODUCTION Thank you for purchasing Kansai Special’s JJ series machine. Please study this instruction manual carefully before operating the machine. This instruction manual describes adjustments and maintenance on this machine. Before operating the machine, check the pulley cover and safety cover, etc.
-
Page 31: Table Of Contents
CONTENTS 1. NEEDLES & THREADING . PRESSER FOOT ADJUSTMENT 1-1 Needles ··········································· 1 9-1 Presser foot pressure adjustment ········ 14 1-2 Needle replacement ··························· 1 9-2 Position & maximum lift height ·········· 14 1-3 Correct threading the machine ············ 2 10. -
Page 32: Needles
【 1】 INTRODUCTION 1-1 Needles Standard needles are Schumetz B-27 and Organ DC×27. 1-3 Correct threading the machine Needle numbers vary in each model, so standard needles are highly recommended. Thread the machine correctly by referring to the illustrations below. <Needle maker &... -
Page 33: Machine Speed
2-1 Machine speed & operating direction 3-1 Oil specification Refer to maximum and average speed of the Kansai Special’s genuine oil is highly recommended. machine at the table below. If your machine is (Parts number 54-045 : 700cc) new, you have to operate the machine at 15~20%... -
Page 34: Oiling Respective Parts
■ Oil in use Kansai Special’s genuine silicon oil is highly recommended (Parts number 28-612: 20cc) ■ Oiling process Fill the silicon oil reservoir with Kansai Special’s genuine oil. Periodical oil reservoir check is essential to prevent needle thread breakage and fabric damage. -
Page 35: Installation Process
4-2 Installation process Refer to the illustration below. Semi-submerged table (For Cloth Tension Roller set) Install the frame support plate underneath the table. Fit the rubber cushions onto the frame support plate. Mount the machine head on the rubber cushions correctly. -
Page 36: Initial Needle Bar Height
【 5】 NEEDLE BAR HEIGHT ADJUSTMENT 【 6】 LOWER LOOPER AND NEEDLE TIMING 5-1 Initial needle bar height 6-1 Distance between lower looper and needle Initial needle bar height is set by the height between the needle plate and the tip of the The distance is relation between the looper and the needle when the lower looper is at the center needle when the needle bar is at its highest position of travel. -
Page 37: Lower Looper Gauge
【 7】 UPPER LOOPER ADJUSTMENT 【 8】 FEED DOG & STITCH LENGTH ADJUSTMENT 7-1 Gauge of upper looper and needle 8-1 Feed dog height adjustment ■The gauge of the upper looper and the needle is the distance between the point of the When the feed dogs are at the highest point of travel, 2 or 3 teeth from the back of the looper and the center needle when the upper looper is at the extreme left of its travel. -
Page 38: Stitch Length Adjustment
【 9】 PRESSER FOOT ADJUSTMENT 8-3 Stitch length adjustment Press the push-button A softly with your left hand on the front of the machine. 9-1 Presser foot pressure adjustment Rotate the pulley with your right hand while pressing the button A softly, the Maintain the presser foot pressure as light as possible push-button A will stop at the notch inside making a click sound. -
Page 39: Stitch Formation Adjustment
【 10】 STITCH FORMATION ADJUSTMENT 10-3 Looper thread take-up adjustment 10-1 Thread tension adjustment Thread tension varies according to sewing The below table is the dimension when the lower looper is at the right position. conditions such as kinds of fabrics, threads, sewing width, and stitch length. -
Page 40: Upper & Lower Knife Adjustment
The upper knife is made of super hard compound metals. When the knife gets blunt and cannot cut clean, it needs to be sharpened like the illustration on the right. When sharpening doesn’t work anymore, replace the knife with a genuine Kansai Special’s upper knife. - Page 41 【 13】 SPECIFICATION < JJ50 > 型 式 MODEL JJ5004GS-01M 10.5 4.4~4.7 JJ5005GS-10M JJ5004GE-01H 11.9 JJ5014GH-01M 10.5 5.4~5.7 JJ5014GE-01H 11.9 4.9~5.2 JJ5014GS-90M 10.5...
- Page 42 MORIMOTO MFG. CO., LTD. 1-4-17, SUNA, SHIJONAWATE-CITY,OSAKA 575-0001, JAPAN TEL: +81-72-877-1221 FAX: +81-72-878-9649 E-MAIL: hqeigyo@kansai-special.com URL:www.kansai-special.com FOREIGN AFFILIATED COMPANIES KANSAI SPECIAL AMERICAN MACHINE CORP. 476 HAMPSHIRE DR., GAFFNEY, SC 29340. USA E-MAIL: ksam@kansaispecial.net KANSAI SPECIAL EUROPE GMBH QUIRINSTR. 19, 40545 DUSSELDORF, GERMANY TEL: +49-211-577-9090 FAX: +49-211-558-1477 E-MAIL: contact@kansai-special.de...
Need help?
Do you have a question about the JJ Series and is the answer not in the manual?
Questions and answers