
Related Manuals for Avigilon HD-NVR3-STD-36TB


Summary of Contents for Avigilon HD-NVR3-STD-36TB
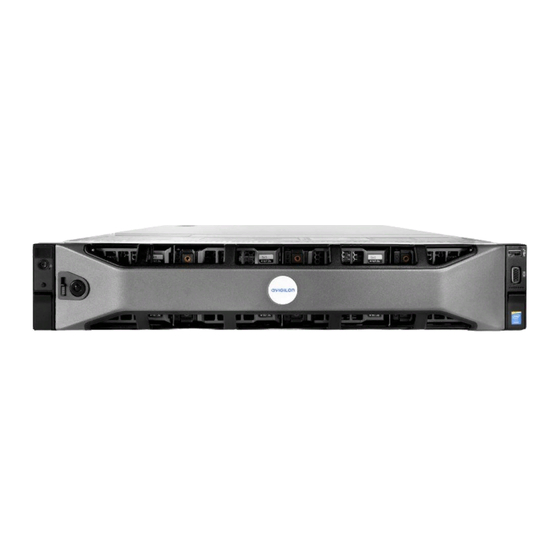
- Page 1 Installation Guide Avigilon™ HD Network Video Recorder HD-NVR3-STD-24TB and HD-NVR3-STD-36TB...
- Page 2 Avigilon Corporation reserves the right to make any such changes without notice. Neither Avigilon Corporation nor any of its affiliated companies: (1) guarantees the completeness or accuracy of the information contained in this document; or (2) is responsible for your use of, or reliance on, the information.
-
Page 3: Table Of Contents
Manual Activation Adding Licenses Networking Configuring the Avigilon Control Center Software Starting Up and Shutting Down the Avigilon Control Center Client Software Starting Up the Client Software Shutting Down the Client Software Logging Into and Out of a Site Logging In... - Page 4 Replacing Front or Back Hard Drives LED Indicators Diagnostic Indicators Power Status Indicators Network Link Status Indicators Hard Drive RAID Status Indicators Specifications Limited Warranty and Technical Support...
-
Page 5: Introduction
Introduction The Avigilon HD Network Video Recorder is preloaded with Avigilon Control Center™ software and is configured for maximum performance and reliability. The HD Network Video Recorder can be easily integrated into any existing Avigilon surveillance system, or act as the base of a new site. -
Page 6: Back View
For more information, see LED Indicators on page 21. 6. Information tag Provides the product service details, MAC addresses and a copy of the Windows license key. Back View 1. Serial connector Accepts connections to serial devices. 2. Video connector Accepts a VGA monitor connection. 3. -
Page 7: Installation
Installation Package Contents Ensure the package contains the following: Avigilon HD Network Video Recorder Rack sliding rail assembly kit Cable management arm assembly kit Bezel and key Power cable Recovery USB — contains Windows recovery software and supporting materials. Installing the Rack Rails and Cable Management Arm If the recorder will be kept in a server rack, install the Rack Sliding Rails and the Cable Management Arm provided in the recorder package. -
Page 8: Installing The Bezel
9. Select the network mode for the appliance. The recommended option is Work Network. Next, the Windows software restarts and applies your settings. Once restarted, you will need to license your Avigilon Control Center system. Installing the Bezel The bezel can be installed on the front of the recorder to help protect the power button and hard drives against unauthorized access. -
Page 9: Licensing The Avigilon Control Center (Acc)™ System
After the recorder restarts, the first screen you see is the Avigilon Control Center software license wizard. Other parts of the ACC system may start while you perform this procedure, but you will not be able to use any of the features until after license activation is complete. -
Page 10: Manual Activation
If you choose to upgrade your existing license to a different edition, you will need to perform the licensing procedure again. In this case, you can access the Add License wizard from the Avigilon Control Center Server Admin Tool software. -
Page 11: Networking
3. Click Add License. 4. Complete either the Internet Activation Manual Activation procedure to add the new license to your current system. Networking By default, the HD Network Video Recorder acquires an IP address on the network through DHCP. If you need to set up the recorder to use a static IP address or any specific network configuration, see the Windows Help and Support files for more information. -
Page 12: Configuring The Avigilon Control Center Software
After you set up and license the HD Network Video Recorder, it is recommended that you complete the following steps to configure the ACC system. For more information about any of the following procedures, see the help files provided with the Avigilon Control Center Client software. -
Page 13: Logging Into And Out Of A Site
Logging Into and Out of a Site After you start the Client software, you are immediately asked to log in to a site. By default, the ACC ES Analytics ApplianceHD Network Video Recorder is automatically added to the system as a server within a site of the same name. -
Page 14: Changing The Administrator Password
To avoid this issue, it is highly recommended that you create at least one other administrator level user as a backup. Connecting Cameras to the Avigilon Control Center System After all the cameras in your system have been physically connected to the ACC ES Analytics Appliancenetwork, you need to connect the cameras to the ACC system so that video can be recorded and indexed for search. -
Page 15: Setting The Recording Schedule
Secure — The system will protect and secure the camera's configuration and login details. This option is selected by default. Unsecure — The camera's configuration and login details will not be secured and may be accessible to users with unauthorized access. Cameras with a secure connection are identified with the icon in the Status column. -
Page 16: Setting Up A Weekly Recording Schedule
Continuous — record video constantly. Motion — only record video when motion is detected. POS Transactions — only record video when a point of sale (POS) transaction is made. License Plates — only record video when a license plate is detected. 5. -
Page 17: Adding Users And Groups
High Bandwidth keeps the original high quality video and the secondary stream of low resolution video. Low Bandwidth only keeps the secondary stream of low resolution video. NOTE: The data aging can only occur when the secondary stream is enabled. For H.264 cameras that do not support data aging, only the High Bandwidth video is kept. -
Page 18: Adding Groups
Administrators — has access to everything in the system. Power Users — has access to most features in the system except for the ability to import and export settings. Restricted Users — has access to live video only and can control audio and digital outputs. Standard Users —... -
Page 19: Advanced Settings
5. In the Login Timeout area, select the Enable login timeout check box to set the maximum amount of time the Avigilon Control Center Client software can be idle before the user is automatically logged out of the application. 6. In the Password area, complete the following fields: Password: —... - Page 20 Self-Learning Video Analytics If you have an Avigilon self-learning video analytics device, use the Video Analytics Configuration dialog box to configure classified object motion detection. Once configured, you can receive events, trigger alarms, define rules, and record video when specific object motion requires your attention.
-
Page 21: Advanced Features
Advanced Features Checking System Health The Server Administrator software is pre-installed on the recorder. The software provides information about the recorder’s system operation status, and gives you remote access to the recorder for recovery operations. If one of the LED indicators on the recorder is flashing an error warning, the Server Administrator will display details about the problem. - Page 22 1. Remove the bezel. a. Unlock the bezel. b. Lift the release latch next to the lock. c. Pull the left end of the bezel then unhook the right end to remove the bezel. 2. Press the release button and slide the blank out of the hard drive slot. 3.
-
Page 23: Replacing Front Or Back Hard Drives
4. Open the Server Administrator application and expand the System Tree. The new hard drive should be automatically added to the Physical Disks list. The list is typically available here: System > Storage > PERC H730 > Connector 0 >Enclosure > Physical Disks. 5. - Page 24 6. Insert a new hard drive into the carrier then screw it into place. The hard drive connectors should face the back. 7. When the hard drive is secured in the carrier, insert the hard drive back into the recorder. 8.
-
Page 25: Led Indicators
LED Indicators The following tables describe what the LEDs on the recorder indicate. Diagnostic Indicators The diagnostic indicators on the front of the recorder highlight system issues during system startup. NOTE: The diagnostic indicators only light-up when the recorder is powered. LED Indicator Description Blue —... -
Page 26: Network Link Status Indicators
The recorder is connected to a network at less than the maximum Link LED is orange port speed. The recorder is working with other parts of the Avigilon Control Connection Status LED is blinking green Center software. Network Link Status Indicators... -
Page 27: Hard Drive Raid Status Indicators
Hard Drive RAID Status Indicators Each hard drive has its own set of LED indicators to show its activity and status. Figure 5: (1) Status LED. (2) Activity LED. The Activity LED flashes green when the hard drives are working. The following table describes what the Status LEDs indicate: LED Indicator Description... -
Page 28: Specifications
Specifications System Avigilon Control Center Software Enterprise, Standard and Core Operating System Windows Embedded Standard 7 software Hard Disk Drive Configuration Near-line SAS, hot swappable, RAID 6 Mechanical Dimensions (H x W x D) 8.73 cm (3.44 in.) x 48.24 cm (18.99 in.) x 71.6 cm (28.19 in.) Weight 22.3 kg (49.20 lb) - Page 29 EN 61000-3-2:2006 +A1:2009 +A2:2009/IEC 61000-3-2:2005 +A1:2008 +A2:2009 (Class D) EN 61000-3-3:2008/ IEC 61000-3-3:2008 Electromagnetic Immunity EN 55024:2010/CISPR 24:2010 Directives RoHS, Reach (SVHC), WEEE Specifications...
-
Page 30: Limited Warranty And Technical Support
Limited Warranty and Technical Support Avigilon warranty terms for this product is provided at avigilon.com/warranty. Warranty service and technical support can be obtained by contacting Avigilon Technical Support: avigilon.com/contact-us/. Limited Warranty and Technical Support...
Need help?
Do you have a question about the HD-NVR3-STD-36TB and is the answer not in the manual?
Questions and answers