
Related Manuals for Avigilon HD-NVR3-PRM-32TB


Summary of Contents for Avigilon HD-NVR3-PRM-32TB
-
Page 1: Installation Guide
Installation Guide Avigilon™ HD Network Video Recorder HD-NVR3-PRM-32TB, HD-NVR3-PRM-48TB, HD-NVR3- PRM-56TB and HD-NVR3-PRM-84TB... - Page 2 The absence of the symbols ™ and ® in proximity to each trademark in this document is not a disclaimer of ownership of the related trademark. Avigilon Corporation protects its innovations with patents issued in the United States of America and other jurisdictions worldwide: http://www.avigilon.com/patents.
-
Page 3: Table Of Contents
Manual Activation Adding Licenses Networking Configuring the Avigilon Control Center Software Starting Up and Shutting Down the Avigilon Control Center Client Software Starting Up the Client Software Shutting Down the Client Software Logging Into and Out of a Site Logging In... - Page 4 Replacing a Hard Drive Blank Replacing Hard Drives Replacing Front or Back Hard Drives Replacing Center Hard Drives LED Indicators Diagnostic Indicators Power Status Indicators Network Link Status Indicators Hard Drive RAID Status Indicators Specifications Limited Warranty and Technical Support...
-
Page 5: Introduction
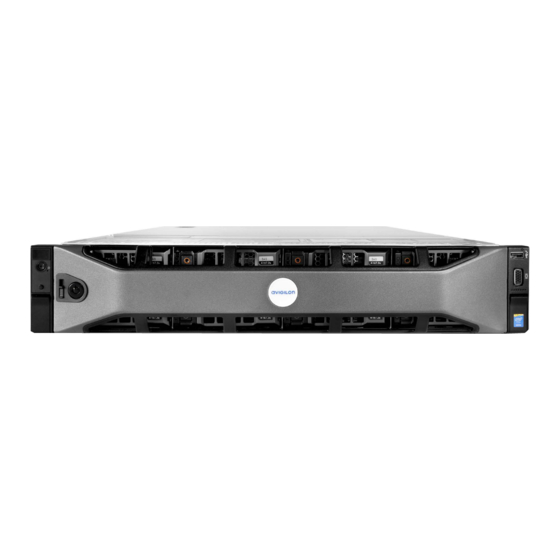
Introduction The Avigilon HD Network Video Recorder is preloaded with Avigilon Control Center™ software and is configured for maximum performance and reliability. The HD Network Video Recorder can be easily integrated into any existing Avigilon surveillance system, or act as the base of a new site. -
Page 6: Back View
5. Diagnostic indicators Provides information about system operations. For more information, see LED Indicators on page 22. 6. Information tag Provides the product service details, MAC addresses and a copy of the Windows license key. Back View 1. Serial connector Accepts connections to serial devices. 2. -
Page 7: Installation
Installation Package Contents Ensure the package contains the following: Avigilon HD Network Video Recorder Rack sliding rail assembly kit Cable management arm assembly kit Bezel and key Power cables Recovery USB — contains Windows® recovery software and supporting materials. Installing the Rack Rails and Cable Management Arm If the recorder will be kept in a server rack, install the Rack Sliding Rails and the Cable Management Arm provided in the recorder package. -
Page 8: Logging Into Windows For The First Time
After the recorder restarts, the first screen you see is the Avigilon Control Center software license wizard. Other parts of the ACC system may start while you perform this procedure, but you will not be able to use any of the features until after license activation is complete. -
Page 9: Internet Activation
6. Find the saved activation file and copy the file to a computer with internet access. 7. Open a web browser and go to http://activate.avigilon.com. 8. At the Avigilon License Activation web page, click Browse to locate your activation file, then click Upload. -
Page 10: Adding Licenses
If you choose to upgrade your existing license to a different edition, you will need to perform the licensing procedure again. In this case, you can access the Add License wizard from the Avigilon Control Center Server Admin Tool software. -
Page 11: Configuring The Avigilon Control Center Software
After you set up and license the HD Network Video Recorder, it is recommended that you complete the following steps to configure the ACC system. For more information about any of the following procedures, see the help files provided with the Avigilon Control Center Client software. -
Page 12: Logging Into And Out Of A Site
Logging Into and Out of a Site After you start the Client software, you are immediately asked to log in to a site. By default, the HD Network Video Recorder is automatically added to the system as a server within a site of the same name. The default username is administrator with no password. -
Page 13: Connecting Cameras To The Avigilon Control Center System
To avoid this issue, it is highly recommended that you create at least one other administrator level user as a backup. Connecting Cameras to the Avigilon Control Center System After all the cameras in your system have been physically connected to the network, you need to connect the cameras to the ACC system so that video can be recorded and indexed for search. -
Page 14: Setting The Recording Schedule
6. If it is not displayed, click to display the Site View Editor and choose where the device appears in the System Explorer. If your site includes virtual sub-sites, select a location for the device. The list on the right updates to show what is stored in that directory. -
Page 15: Setting Up A Weekly Recording Schedule
Setting Up a Weekly Recording Schedule You can set up a weekly recording schedule by applying templates to cameras for each day of the week. 1. In the server Setup tab, click . The Recording Schedule dialog box is displayed. 2. -
Page 16: Adding Users And Groups
1. In the server Setup tab, click The Recording and Bandwidth dialog box is displayed. The Data Aging column shows an estimate of the recording time that is available at each image rate, given the amount of space on the recording device. 2. -
Page 17: Adding Groups
5. In the Login Timeout area, select the Enable login timeout check box to set the maximum amount of time the Avigilon Control Center Client software can be idle before the user is automatically logged out of the application. -
Page 18: Advanced Settings
Alarms tab and in the ACC Mobile App. Self-Learning Video Analytics If you have an Avigilon self-learning video analytics device, use the Video Analytics Configuration dialog box to configure classified object motion detection. Once configured, you can receive events, trigger alarms, define rules, and record video when specific object motion requires your attention. -
Page 19: Advanced Features
6. On the next page, scroll down the language list then double-click your preferred language. NOTE: Only the languages supported by the Avigilon Control Center software are pre-installed. You can choose to download and install any extra languages supported by Windows. -
Page 20: Checking System Health
Checking System Health The Server Administrator software is pre-installed on the recorder. The software provides information about the recorder’s system operation status, and gives you remote access to the recorder for recovery operations. If one of the LED indicators on the recorder is flashing an error warning, the Server Administrator will display details about the problem. - Page 21 1. Remove the bezel. a. Unlock the bezel. b. Lift the release latch next to the lock. c. Pull the left end of the bezel then unhook the right end to remove the bezel. 2. Press the release button and slide the blank out of the hard drive slot. 3.
-
Page 22: Replacing Hard Drives
The operating system and the Avigilon Control Center software are mirrored on two hard drives at the back of the recorder. If one of the hard drives fail, you can replace the failed drive while the recorder continues to run from the other. -
Page 23: Replacing Front Or Back Hard Drives
Replacing Front or Back Hard Drives Replacing Center Hard Drives Replacing Front or Back Hard Drives 1. Locate the failed hard drive at the front or back of the recorder. 2. Press the release button on the front left of the hard drive. 3. - Page 24 1. At the top of the recorder, unlock the latch release then lift and rotate the latch towards the back of the recorder. The cover slides back and is released from the recorder body. 2. Hold the cover on both sides and lift it off the recorder. 3.
- Page 25 4. Lift the handles on either side of the hard drive tray. 5. Press the orange release tab on the hard drive tray then lift up the hard drive carrier handle to release the hard drive. 6. Hold the handle and lift the hard drive out of the tray. 7.
-
Page 26: Led Indicators
LED Indicators The following tables describe what the LEDs on the recorder indicate. Diagnostic Indicators The diagnostic indicators on the front of the recorder highlight system issues during system startup. NOTE: The diagnostic indicators only light-up when the recorder is powered. LED Indicator Description Blue —... -
Page 27: Network Link Status Indicators
The recorder is connected to a network at less than the maximum Link LED is orange port speed. The recorder is working with other parts of the Avigilon Control Connection Status LED is blinking green Center software. Network Link Status Indicators... -
Page 28: Hard Drive Raid Status Indicators
Hard Drive RAID Status Indicators Each hard drive has its own set of LED indicators to show its activity and status. Figure 4: (1) Status LED. (2) Activity LED The Activity LED flashes green when the hard drives are working. The following table describes what the Status LEDs indicate: LED Indicator Description... -
Page 29: Specifications
Specifications System Avigilon Control Center Software Enterprise, Standard and Core Operating System Windows Server 2012 R2 Hard Disk Drive Configuration Near-line SAS, hot swappable, RAID 6 Mechanical Dimensions (H x W x D) 8.73 cm (3.44 in.) x 48.24 cm (18.99 in.) x 71.6 cm (28.19 in.) Weight 32.5 kg (71.65 lb) when fully populated with hard disk drives... - Page 30 EN 55022:2010/CISPR 22:2010 EN 61000-3-2:2006 +A1:2009 +A2:2009/IEC 61000-3-2:2005 +A1:2008 +A2:2009 (Class D) EN 61000-3-3:2008/ IEC 61000-3-3:2008 Electromagnetic Immunity EN 55024:2010/CISPR 24:2010 Directives RoHS, Reach (SVHC), WEEE Specifications...
-
Page 31: Limited Warranty And Technical Support
Limited Warranty and Technical Support Avigilon warrants to the original consumer purchaser that this product will be free of defects in material and workmanship for a period of 3 years from date of purchase. The manufacturer’s liability hereunder is limited to replacement of the product, repair of the product or replacement of the product with repaired product at the discretion of the manufacturer.
Need help?
Do you have a question about the HD-NVR3-PRM-32TB and is the answer not in the manual?
Questions and answers