Table of Contents
Advertisement
Quick Links
Advertisement
Table of Contents

Subscribe to Our Youtube Channel
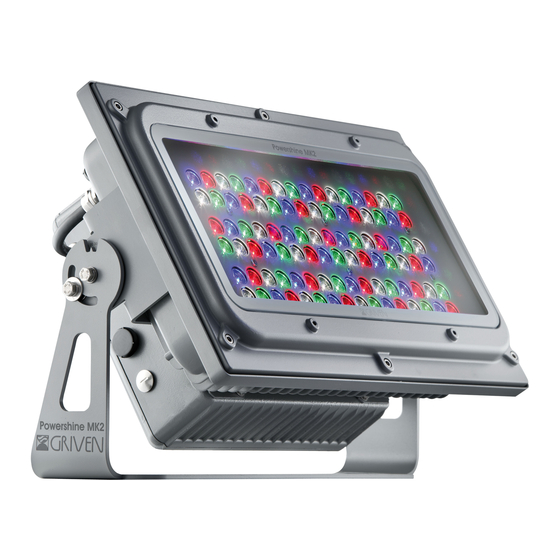
Summary of Contents for Griven Powershine MK2 S
- Page 1 Powershine MK2 S Manuale di istruzioni Instructions manual...
-
Page 2: Table Of Contents
INDEX 1.0 Introduction .................................18 1.1 Safety information...............................18 1.1.1 Protecting against electric shock ..........................18 1.1.2 Installation ................................18 1.1.3 Protection against burns and fire ...........................18 1.1.4 Weather protection..............................18 1.2 Compliance ................................18 2.0 Size ....................................19 3.0 Packaging and transport ............................19 3.1 Packaging ...................................19 3.2 Transport ..................................19 4.0 Installation ...................................20 4.1 Fixing ....................................20... -
Page 3: Introduction
1.0 Introduction 1.1 Safety information Warning! This unit is suitable for professional use only, not for domestic use. 1.1.1 Protecting against electric shock • Disconnect the unit from mains supply before servicing it or performing any other action. • Always ground/earth the unit electrically. •... -
Page 4: Size
• Griven S.r.l. will accept claims for broken or missing goods only within seven days of receipt of the goods. • Returns of equipment will not be accepted without prior authorization granted by Griven S.r.l. and if not duly ac- companied by relevant shipping documents. -
Page 5: Installation
4.0 Installation 4.1 Fixing The unit can be used both rested on floor and fixed onto a structure. The unit can operate in any position. Use the holes Ø16 (0.6”) or Ø6.5 (1/4”) in the bracket to fix the unit. 4.2 Adjusting light beam direction 1. -
Page 6: Connection To Mains Power
4.3 Connection to mains power The unit can operate with voltage from 100-277Vac and with frequency of 50 and 60Hz. Warning! • Before connecting the unit, verify that power supplies features are compatible with the unit features. • The unit must never be installed if not grounded electrically. •... -
Page 7: Use Of The Unit
5.0 Use of the unit 5.1 Setting operating mode By the control panel it is possible to select one of the following operating modes: • using DMX512 signal control mode Each fixture is controlled from DMX512 signal control. (see chapter 8.0 DMX function) •... -
Page 8: Dmx Function Mode
6.0 DMX function mode 6.1 Setting DMX channels The number of DMX channels used by the unit to operate will depend from the selected operating mode. Each RGBW unit will use 4, 5 or 6 DMX channels. Each DW unit will use 2 or 3 DMX channels. Each monochrome unit will use 1 DMX channel. -
Page 9: Dmx Functions With Dmx Mode = 6 Channels
6.3.3 DMX functions with DMX MODE = 6 channels Channel Function Value Description 0-255 Proportional control 0-100% of the Red color Green 0-255 Proportional control 0-100% of the Green color Blue 0-255 Proportional control 0-100% of the Blue color White 0-255 Proportional control 0-100% of the White color Luminous output intensity 0%... -
Page 10: Dmx Functions Monochrome
7.0 Master-Slave and Automatic function (only RGBW and DW) Powershine MK2 S can operate without DMX signal (in AUTOMATIC mode) and can be set so that a single MAS- TER unit will command a series of SLAVE units. This function is particularly useful when more units are desired to ex- ecute the same programme in synchrony. -
Page 11: Master Configuration
onto the desired programme, press “ENTER” to confirm. By the keys “UP”and “DOWN” select “ON” or “OFF”. It is possible to activate or disactivate the programme. Press ENTER to confirm. Now the unit is in AUTOMATIC mode and the diplay will keep reading “AUT”. To exit from the AUTOMATIC mode, press the “MENU”... -
Page 12: Slave Configuration
“DOWN” keys select “COL”. Press “ENTER” to confirm. Through the “UP” and “DOWN” keys select “ACT”. Through the “UP” and “DOWN” keys select “ON” or “OFF” to activate or deactivate the FIXED COLOUR mode. Press “ENTER” to confirm. Now, through the “UP” and “DOWN” keys, it is possible scroll the colours. 1. -
Page 13: Default Setting
This command is used to identify the projector you want to get access to (the identification happens by swit- ching on at full intensity all the LEDs). • Manufacturer The name of the manufacturer (Griven) is displayed. • Model description The projector model is displayed. -
Page 14: Maintenance
• Check that the unit is not damaged mechanically. Replace those components which have got deteriorated. 19.0 Spare parts All components of the unit are available as spare parts at Griven dealers. Exploded views, wiring diagrams, electronic layouts and advertising brochures are available on request. -
Page 15: Troubleshooting
21.0 Troubleshooting Inconvenience Possibile Cause Action Incorrect DMX cable Check connections and wires. Rectify inefficient connec- connection. tions. Repair or replace damaged wires. Insert a terminal plug in the output jack of the last Unfinished data connection. unit of the connection. Incorrect address Check the addresses of the units and the protocol settings. - Page 16 NOTE English...
- Page 17 Via Bulgaria, 16 - 46042 CASTEL GOFFREDO (MN) - Italy Telefono 0376/779483 - Fax 0376/779682 - 0376/779552 http://www.griven.com/ e-mail griven@griven.com http://www.griven.it/ e-mail griven@griven.it User’s manual rel. 2.30...


Need help?
Do you have a question about the Powershine MK2 S and is the answer not in the manual?
Questions and answers