Table of Contents
Advertisement
Quick Links
Owner's Manual
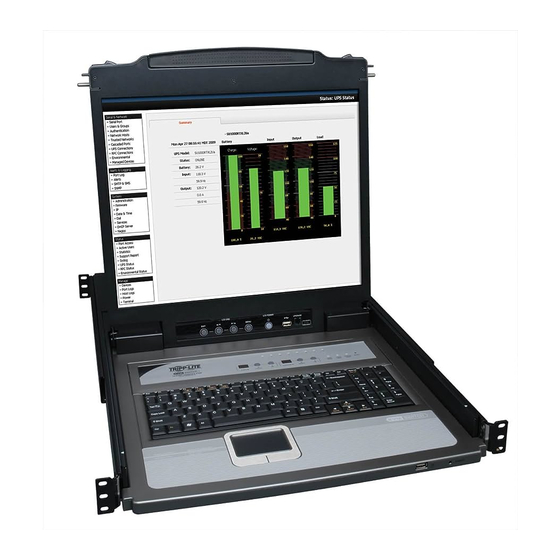
Console KVM Switch
with IP Access
Models: B020-U08-19-IP, B020-U16-19-IP
PROTECT YOUR INVESTMENT!
Register your product for quicker service and ultimate peace of mind.
You could also win an ISOBAR6ULTRA surge protector—a $100 value!
www.tripplite.com/warranty
1111 W. 35th Street, Chicago, IL 60609 USA • www.tripplite.com/support
Copyright © 2018 Tripp Lite. All rights reserved.
1
Advertisement
Table of Contents

Subscribe to Our Youtube Channel
Related Manuals for Tripp Lite B020-U16-19-IP


Summary of Contents for Tripp Lite B020-U16-19-IP
- Page 1 Register your product for quicker service and ultimate peace of mind. You could also win an ISOBAR6ULTRA surge protector—a $100 value! www.tripplite.com/warranty 1111 W. 35th Street, Chicago, IL 60609 USA • www.tripplite.com/support Copyright © 2018 Tripp Lite. All rights reserved.
-
Page 2: Table Of Contents
Table of Contents 1. FCC Information 7. Administration 7.1 Local Console OSD 2. User Notice 7.1.1 Local Console OSD F2 LIST Function 3. Package Contents 7.1.2 Local Console OSD F3 Settings (SET) Page 7.1.3 Local Console OSD F4 Administration 4. Introduction (ADM) Page 4.1 Overview 7.1.4... -
Page 3: Fcc Information
The user must use shielded cables and connectors with this equipment. Any changes or modifications to this equipment not expressly approved by Tripp Lite could void the user’s authority to operate this equipment. -
Page 4: Features
Combo KVM Cable Kits – no need for separate cable kits. user-friendly operation. • Control up to 8 (B020-U08-19-IP) or 16 (B020-U16-19-IP) • 3-level security (Admin, User and Select) – up to 64 accounts can computers on a single KVM switch. -
Page 5: Operating Systems
4. Introduction ( continued ) 4.3.6 Operating Systems Supported operating systems are shown in the table, below: Operating System Versions Supported Operating System Versions Supported Windows 2000 and higher UNIX Free BSD 4.2 and higher Linux RedHat 7.1 and higher UNIX Sun Solaris 8 and higher Linux SuSE... -
Page 6: Rear View
( continued ) 4.4.2 Rear View Note: The B020-U08-19-IP model is shown in the below diagram. The B020-U16-19-IP model differs only in the number of KVM ports. Power Socket: This is a standard C14 AC power socket. The KVM Ports: The custom wired KVM cable kits that connect to the power cord that comes with the unit plugs in here. -
Page 7: Installation
• To help protect your system from sudden, transient increases and • Use caution when pressing the device rail release latches and sliding a decreases in electrical power, use a Tripp Lite Surge Protector, Line device into or out of a rack; the slide rails can pinch your fingers. -
Page 8: Standard Rack Mounting
5. Installation ( continued ) 5.2 Standard Rack Mounting The NetDirector Console KVM Switch with IP Access is designed for 2-Post Rack Mounting mounting in a 1U rack system. For convenience, a rack-mount kit is The console KVM switch can also be mounted in a 2-post rack included with your console KVM switch for quick installation. -
Page 9: Single-Station Installation
Cat5e/6 cable. Connect the included power cord to the C14 jack on the back of the unit, and then plug it into a Tripp Lite Surge Protector, PDU or Uninterruptible Power Supply (UPS). First power ON the KVM switch, and then power on the connected computers. -
Page 10: Network Setup-Ip Address Configuration
CD to assign an IP address to the KVM. 19-IP and B020-U16-19-IP KVM Switches it finds in the device list. Note: The IP Installer Settings section located in the Network page If your device does not show up in the list, click the Enumerate of the KVM’s web management interface must be enabled in order to... -
Page 11: Browser/Non-Browser Client
5. Installation ( continued ) 5.7.3 Browser/Non-Browser Client By default, the KVM switch is set to have an IP address assigned 5. By default, the Obtain IP address automatically [DHCP] checkbox automatically via DHCP server. If this is the case, you will need to is checked. -
Page 12: Kvm Operation
6. KVM Operation Computers connected to the KVM switch can be accessed via the local console or over IP . This chapter discusses the basic operation of the KVM switch, both locally and remotely. 6.1 Sharing USB Peripheral Devices The USB 1.1 port on the LCD panel of the console KVM switch can be used to share USB peripherals between connected computers. Simply connect a USB device to this port, and any connected computer you switch to will have access to the device. -
Page 13: Local Console Port Access
6. KVM Operation ( continued ) 6.4 Local Console Port Access Once logged into the KVM, you can access connected computers via the local console using the Local Console OSD, Local Console Pushbuttons or Hotkey Commands. The following sections describe all of the ways in which you can access connected computers via the local console. 6.4.1 Local Console OSD Invocation Sequence Once logged into the KVM switch and accessing a connected computer, you will need to use one of two sequences to re-open the OSD Main Menu;... -
Page 14: Local Console Osd F6 Broadcast Mode (Brc)
6. KVM Operation ( continued ) 6.4.6 Local Console OSD F6 Broadcast Mode (BRC) Broadcast Mode is an Administrator-ONLY function. Clicking the F6 at the top of the OSD or pressing the [F6] key invokes Broadcast Mode. When this function is in effect, commands sent from the console are broadcast to all available computers on the installation. This function is particularly useful for operations that need to be performed on multiple computers, such as performing a system-wide shutdown, installing or upgrading software, etc. - Page 15 6. KVM Operation ( continued ) • The Station Number precedes the Port Number. Hotkey Beeper Control To toggle the Beeper on and off, key in the following hotkey combination: • Station and Port numbers are always 2 digits, so 1 - 9 becomes 01 - 09.
-
Page 16: Logging Into The Kvm Over Ip
6. KVM Operation ( continued ) Hotkey Summary Table Note: All of the hotkey commands in this table require Hotkey Mode to be invoked prior to implementing the hotkey command. (See page 14 for details on invoking Hotkey Mode.) Hotkey Operation Hotkey Command Description Selecting the active port... -
Page 17: Windows Client Login
6. KVM Operation ( continued ) b) Click Install Certificate. c) Follow the Installation Wizard to complete the installation. Unless you have a specific reason to choose otherwise, accept the default options. d) When the Wizard presents a caution screen, click Yes. e) Click Finish to complete the installation and click OK to close the dialog box. -
Page 18: Ap Java Client Login
6. KVM Operation ( continued ) The Connection Screen A description of the contents of the Connection Screen is given in the following table: Item Description Menu Bar The Menu Bar contains two menus; File and Help. The File Menu allows the operator to Create, Save, and Open Work files. Server List Each time the WinClient.exe file is run, it searches the User’s LAN segment for B020-Series KVM Switches, and lists the ones it finds in this box. -
Page 19: Remote Session Operation
6. KVM Operation ( continued ) 1. If your KVM is displayed in the Server List, connect to it by highlighting it and clicking on the Connect button. Note: For a switch to show up in the Server List, the Enable Device List checkbox in the Operating Mode page (see 7.2.13 Operating Mode for details) must be checked and the Program server port must match what is set in the Network page (see 7.2.14 Network for details) 2. - Page 20 6. KVM Operation ( continued ) Hotkeys Various configuration actions related to the keyboard, video and mouse can be performed via hotkey combinations. The Hotkey setup utility is accessed by clicking on the Hotkey / Macros icon and then clicking on the Hotkeys button at the top of the screen. The Hotkeys screen displays the available hotkeys and their corresponding hotkey combinations.
- Page 21 6. KVM Operation ( continued ) User Macros The table below describes the contents of the Video Settings screen: Setting Description The User Macros page allows you to add macros to the KVM switch Screen Position Adjust the horizontal and vertical position of the screen that can be performed on any of the connected computers using the using the Screen Position arrows.
- Page 22 6. KVM Operation ( continued ) Gamma Adjustment Snapshot – Clicking this icon will take a screenshot of the remote computer and save it to the local computer. By default, If it is necessary to correct the gamma level for the remote computer, snapshots are saved to the local computer’s desktop.
- Page 23 6. KVM Operation ( continued ) Compose Panel Mouse Sync Mode – Click to toggle between automatic and manual mouse sync modes. When set to automatic, a green Type your message into this panel and then click the Send button or checkmark appears on the icon.
- Page 24 6. KVM Operation ( continued ) Mouse Synchronization Procedures Customize Control Panel – Click this icon to bring up the Customize Control Panel screen, which allows you to choose If you are having syncing problems after adjusting the mouse which icons are displayed in the control panel, as well as edit properties, try the following methods to help synchronize the local and some of its features.
-
Page 25: The Osd Toolbar
6. KVM Operation ( continued ) Bus Info – The KVM Switch allows multiple users to access the Snapshot – The Snapshot section allows you to determine where connected computers simultaneously, with each user accessing one snapshots are sent to, what file type they are saved as; and, if saved bus. -
Page 26: Auto Scanning
6. KVM Operation ( continued ) Toolbar Hotkeys • If the computer connected to a port is on line, its screen displays in the panel. If not, the panel remains blank. When the Toolbar is displayed, hotkeys can be used to switch between •... -
Page 27: Administration
7. Administration Administration of the KVM switch can be done through three different interfaces; Local Console OSD, Web Interface and Remote OSD. The Web Interface and Remote OSD give you the most administrative access to the KVM, whereas the settings in the Local OSD are more limited. The table details which settings are available in each interface, and whether those settings are accessible to Administrators, ordinary Users or both. -
Page 28: Local Console Osd
7. Administration ( continued ) 7.1 Local Console OSD Upon logging into the Local Console OSD, the main page appears (see figure). Administrators have access to all features in the OSD, whereas Users have access to everything except the F4 Admin page and the F6 Broadcast (BRC) function. - Page 29 7. Administration ( continued ) The settings in the F3 SET page are explained in the following table: Setting Description OSD HOTKEY Select the hotkey sequence that invokes the OSD (both Local Console OSD and Remote OSD); [Scroll Lock, Scroll Lock] or [Ctrl, Ctrl].
-
Page 30: Local Console Osd F4 Administration (Adm) Page
7. Administration ( continued ) 7.1.3 Local Console OSD F4 Administration (ADM) Page This Administrator-only page allows administrators to configure the settings of the KVM switch. To change a setting: 1) Double-click on it, or highlight it and press the [Enter] key. 2) After you select an item, a submenu with more choices will appear. -
Page 31: Local Console Firmware Upgrade
7. Administration ( continued ) Setting Description KEYBOARD Sets the language for an external keyboard connected to the KVM’s external keyboard port. To select a keyboard language, double-click on LANGUAGE the desired language or highlight it and hit the [Enter] key. You can choose between US English, UK English, German, Swiss German, French, Hungarian, Italian, Japanese, Korean, Russian, Spanish, Swedish and Traditional Chinese. -
Page 32: Osd Operation
7. Administration ( continued ) Firmware Upgrade Recovery In the event of a firmware upgrade failure, or an aborted firmware upgrade, perform a firmware upgrade recovery by doing the following: 1. Power OFF the switch. If it is part of a daisy-chain, disconnect it from the chain. 2. -
Page 33: Osd Tab Bar
7. Administration ( continued ) AP Client Main Page When logging into the KVM switch via the non-browser AP Windows • In addition to the Filter button at the bottom of the Sidebar, there or Java client, the following page is displayed. is a Scan button and an Array Mode button. -
Page 34: Connections
If this is the case, click on the option to continue to the web page anyway. 2. You will then be prompted to run the Java Viewer, and trust the publisher (Tripp Lite). Click Run. - Page 35 7. Administration ( continued ) The Port Selection List Port Configuration • Users only see the switches and ports they have been given access When accessing the KVM via AP Windows or Java Client, right-click on any port in the Sidebar to configure a connected computer or switch.
- Page 36 7. Administration ( continued ) Interactive Display Panel Filter The Connections sub-section will display port status information on Filter allows you to control which ports are displayed in the Port the Device Level and port connection and configuration options at Selection List, as well as which ports are scanned when Auto Scan the Port Level.
-
Page 37: Favorites
7. Administration ( continued ) 7.2.5 Favorites Favorites is similar to a bookmarks feature. Frequently visited ports can be listed on this page. Open this page and select the port instead of searching for it in the tree view. This feature is especially useful for larger, cascaded installations. Note: Each Favorites bookmark that you create is a folder in which multiple ports can be saved. -
Page 38: User Preferences
7. Administration ( continued ) 7.2.6 User Preferences The User Preferences page allows users to set up their own individual working environments. The B020-Series KVM Switch stores a separate record for each user profile, and sets up the working environment according to the Username that was used to access the KVM switch. -
Page 39: Access
7. Administration ( continued ) 7.2.8 Access The Access sub-section allows Super Administrators and Administrators to set user access and configuration rights for switches and ports. As with the Sessions sub-section, Super Administrators can see all accounts, whereas Administrators can only see Administrator, User and Group accounts. -
Page 40: Port Configuration
7. Administration ( continued ) 7.2.9 Port Configuration The Port Configuration sub-section allows Super Administrators and Administrators to edit port properties settings, assign system macros to a port, and add/remove associated links. When the master KVM is highlighted and the Port Configuration sub-section is selected, the following screen appears. -
Page 41: User Management
7. Administration ( continued ) 7.2.10 User Management The User Management section allows Super Administrators, and Administrators and Users who have been given User Management permission, to add/edit accounts on the KVM switch. If an account has not been given User Management permission, the User Management icon will not show up in the OSD when they log in. - Page 42 7. Administration ( continued ) Field Description Username Enter a username for the account here. The username can contain up to 16 characters, and must meet the Account Policy requirements set in the Security sub-section. (See Security section under Device Management for details.) Password Enter a password for the account here.
- Page 43 7. Administration ( continued ) At this point you can do any of the following: • Assign port access rights for a user by selecting the Devices tab. • Add more users and/or create groups and finish configuring the user account later. Modifying User Accounts To modify a user account, do the following: 1.
-
Page 44: Device Management
7. Administration ( continued ) 7.2.11 Device Management The Device Management section allows Super Administrators, and Administrators/Users who have been given permission, to configure and control the KVM switch. When the Device Management icon is selected, it opens with the Device Information page displayed. Note: If you do not have permission to configure the KVM switch, the Device Management icon will not appear when you log onto the KVM. -
Page 45: Network
7. Administration ( continued ) 7.2.14 Network The Network sub-section is where the KVM’s network settings are entered. The settings in this sub-section are described in the table below. Item Description IP Installer The B020-Series KVM switch comes with an IP Installer application that allows Windows computers to easily view and edit the KVM’s network settings. -
Page 46: Advanced Network Management Settings
7. Administration ( continued ) 7.2.15 Advanced Network Management Settings The ANMS sub-section is used to set up login authentication and authorization management from external sources. It is split up into two pages; Event Destination and Authentication, which are explained in the sections that follow. Event Destination The Event Destination page allows the KVM to be set up to record and send notifications of events that take place on the system. - Page 47 7. Administration ( continued ) LDAP / LDAPS Authentication and Authorization Settings To allow authentication and authorization for the B020-Series KVM Switch via LDAP / LDAPS, refer to the information in the table, below: Character Meaning Enable Put a check in the Enable checkbox to allow LDAP / LDAPS authentication and authorization. LDAP / LDAPS Click to specify whether to use LDAP or LDAPS.
- Page 48 7. Administration ( continued ) Step 2 - Extend the Object Class With the New Attribute: Extend and Update the Active Directory Schema a) Open Control Panel Administrative Tools Active Step 1 - Create a New Attribute: Directory Schema. a) Open Control Panel Administrative Tools Active b) In the left panel of the screen that comes up, select Classes.
- Page 49 7. Administration ( continued ) f) In the list that comes up, select userprofile, then click OK to com- f) Click Edit to bring up the String Attribute Editor: plete step 2 of the procedure. g) Replace the value shown with su/xxxx, where xxxx represents the username assigned to the user in the KVM switch.
- Page 50 7. Administration ( continued ) OpenLDAP Server Installation Starting the OpenLDAP Server After downloading the program, launch the installer, select your To start the OpenLDAP Server, run slapd (the OpenLDAP Server exe- language, accept the license and choose the target installation cutable file) from the command line.
- Page 51 7. Administration ( continued ) LDAP DIT Design and LDIF File The following figure illustrates an LDIF file that defines the OpenLDAP group for the B020-Series KVM Switch. LDAP Data Structure An LDAP Directory stores information in a tree structure known as the Directory Information Tree (DIT).
-
Page 52: Security
7. Administration ( continued ) 7.2.16 Security The following section describes the settings found in the Security sub-section. Login Failures The Login Failures section allows you to set up the parameters for what occurs when an account fails to login successfully. To enable the settings entered here, check the Enable checkbox. - Page 53 7. Administration ( continued ) Login String MAC Filtering To add a MAC filter: The Login String allows the KVM’s IP address to be more secure by adding extra text to the end of it. When text is entered into the Login 1.
- Page 54 Panel in Remote Session Operation for details). If not selected, the KVM switch can only be simultaneously accessed by the number of users the unit has buses for. B020-U08-19-IP and B020-U16-19-IP have 2 buses each (1 local, 1 remote). Browser Service When this box is checked, browser access to the KVM switch can be limited by selecting one of the three options in the drop- down menu.
-
Page 55: Date/Time
7. Administration ( continued ) 2. Fill in the form with the appropriate information for your company. The table below is an example of a filled out form. Field Example Country (2 letter code) State or Province Taiwan Locality Taipei Organization Your Company, Ltd. -
Page 56: Log
7. Administration ( continued ) 7.2.18 Log The B020-Series KVM switches log all the events that take place and writes them to a log file. The Log section is split into two sub-sections; Log Information and Notification Settings. Log Information The Log Information page can store up to 512 events, at which time The Log Information sub-section is where you can view the contents the oldest files are deleted and replaced with newer files. -
Page 57: Maintenance
4. Click the Browse button, and then navigate to and select the To restore the KVM switch using a backup file, follow the steps firmware upgrade file you downloaded from the Tripp Lite website. below. When selected, the Upgrade Firmware button becomes active. -
Page 58: Download
7. Administration ( continued ) Ping Host The Ping Host subsection lets you check the network status of devic- es on the KVM installation. To ping a device, follow the instructions below. 1. Key in the IP address or Host Name of the device into the IP address/Host Name field. -
Page 59: Log Server
7. Administration ( continued ) 7.3 Log Server The Windows-based Log Server is an administrative utility that records Menu Bar all the events that take place on selected KVM switch units and The Menu bar consists of four drop-down menus: writes them to a searchable database. - Page 60 7. Administration ( continued ) Events Maintenance The Events menu consists of two items; Search and Maintenance. This function allows the Administrator to remove all records that have passed their expiration limit. (See Limit on page 52 for details.) In Search order to delete old files from the log server, the maintenance function Search allows you to search for events containing specific words or...
- Page 61 7. Administration ( continued ) The List Panel The List panel contains the following fields: Field Description Recording Determines whether the Log Server records log events for the corresponding KVM switch. If this checkbox is checked, the field displays Recording, and log events are recorded. If this checkbox is not checked, the field displays Paused, and log events are not recorded for the cor- responding KVM.
-
Page 62: Specifications
8. Specifications Specification B020-U08-19-IP B020-U16-19-IP Computer Ports HD18 Female (8) HD18 Female (16) KVM Cable Kit Model P778-Series P778-Series KVM Cable Kit Connectors KVM Side: HD18 Male KVM Side: HD18 Male Computer Side: HD15 Male, USB-A Male, PS/2 Computer Side: HD15 Male, USB-A Male, PS/2... -
Page 63: Keyboard Emulation
8. Specifications ( continued ) 8.2 Keyboard Emulation Mac Keyboard Sun Keyboard The PC compatible (101/104 key) keyboard can emulate the The PC compatible (101/104 key) keyboard can emulate the functions of the Mac keyboard. The emulation mappings are listed in functions of the Sun keyboard when the [Ctrl] key is used in the table: conjunction with other keys. -
Page 64: Warranty And Product Registration
1-YEAR LIMITED WARRANTY TRIPP LITE warrants its products to be free from defects in materials and workmanship for a period of one (1) year from the date of initial purchase. TRIPP LITE’s obligation under this warranty is limited to repairing or replacing (at its sole option) any such defective products. To obtain service under this warranty, you must obtain a Returned Material Authorization (RMA) number from TRIPP LITE or an authorized TRIPP LITE service center.
Need help?
Do you have a question about the B020-U16-19-IP and is the answer not in the manual?
Questions and answers