Table of Contents
Advertisement
Quick Links
Owner's Manual
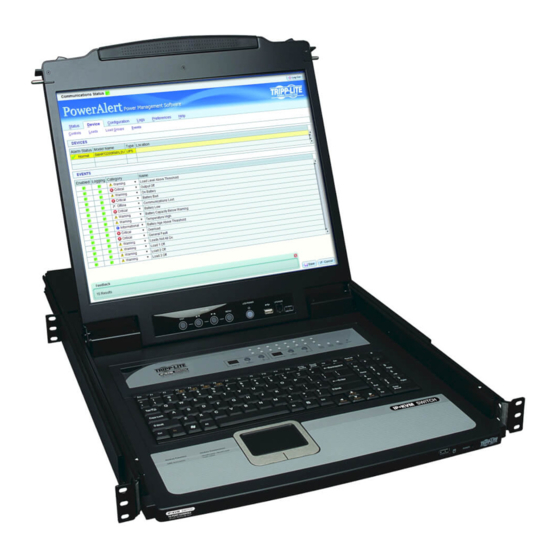
Console KVM Switch
with IP Access
Model # B020-U08-19-IP
1111 W. 35th Street, Chicago, IL 60609 USA
www.tripplite.com/support
Copyright © 2010 Tripp Lite. All rights reserved. All trademarks are the property of their respective owners.
The policy of Tripp Lite is one of continuous improvement. Specifications are subject to change without notice.
1
201009236 93-2985.indd 1
11/18/2010 4:21:28 PM
Advertisement
Chapters
Table of Contents

Related Manuals for Tripp Lite B020-U08-19-IP


Summary of Contents for Tripp Lite B020-U08-19-IP
- Page 1 1111 W. 35th Street, Chicago, IL 60609 USA www.tripplite.com/support Copyright © 2010 Tripp Lite. All rights reserved. All trademarks are the property of their respective owners. The policy of Tripp Lite is one of continuous improvement. Specifications are subject to change without notice.
-
Page 2: Table Of Contents
Table of Contents 1. FCC Information 6.4.5 Local Console OSD F5 Skip Function 6.4.6 Local Console OSD F6 Broadcast Mode (BRC) 2. User Notice 6.4.7 Local Console OSD F7 Auto Scan Function 3. Package Contents 6.4.8 Local Console OSD F8 Logout Function 4. -
Page 3: Fcc Information
1. FCC Information This is an FCC Class A product. In a domestic environment this product may cause radio interference in which case the user may be required to take adequate measures. This equipment has been tested and found to comply with the limits for a Class A digital device, pursuant to Part 15 of the FCC Rules. These limits are designed to provide reasonable protection against harmful interference when the equipment is operated in a commercial environment. -
Page 4: Features
4. Introduction ( continued ) 4.2 Features • 1U Console KVM Switch with built-in IP access – integrated 19 in. LCD • Console lock enables the console to be locked in place when not in use, monitor, keyboard and touchpad. preventing it from sliding out of the rack. -
Page 5: Operating Systems
4. Introduction ( continued ) 4.3 System Requirements ( continued ) 4.3.6 Operating Systems Supported operating systems are shown in the table, below: Operating System Versions Supported Operating System Versions Supported Windows 2000 and higher UNIX Free BSD 4.2 and higher Linux RedHat 7.1 and higher UNIX Sun... -
Page 6: Rear View
Power Switch: This is a standard rocker switch that powers the unit Note: The shape of these connectors has been specifically modified to work only with Tripp Lite P778-Series USB/PS2 KVM Cable Kits. on and off. Daisychain-Out Port: A P772-Series Daisychain Cable (sold... -
Page 7: Installation
• To help protect your system from sudden, transient increases and decreases in electrical power, use a Tripp Lite Surge Suppressor, Line Conditioner, or • After a device is inserted into the rack, carefully extend the rail into a Uninterruptible Power Supply (UPS). -
Page 8: Standard Rack Mounting
5. Installation ( continued ) 5.2 Standard Rack Mounting The NetDirector Console KVM Switch with IP Access is designed for mounting in a 1U rack system. For convenience, a rack mounting kit is included with your console KVM switch for quick installation. The various mounting options are explained in the sections that follow. -
Page 9: Opening Together
Cat5e/6 cable. Connect the included power cord to the C14 jack on the back of the unit, and then plug it into a Tripp Lite Surge Suppressor, PDU or Uninterruptible Power Supply (UPS). First power ON the KVM switch, and then power on the connected computers. -
Page 10: Lcd Osd Configuration
Connect the included power cord to the C14 jack on the back of the first stage unit, and then plug it into a Tripp Lite Surge Suppressor, PDU or Uninterruptible Power Supply (UPS). Turn on the first stage KVM switch. -
Page 11: Network Setup-Ip Address Configuration
5. Installation ( continued ) 5.9.1 Local Console ( continued ) 2. Press the [F4] key to bring up the OSD Admin page. 3. In the OSD Admin page, highlight SET IP ADDRESS and press the [Enter] key. 4. DHCP – The first field allows you to enable or disable DHCP. When enabled, the KVM is assigned an IP address by the DHCP server. This setting is enabled by default. -
Page 12: Browser
5. Installation ( continued ) 5.9.3 Browser ( continued ) 3. If accessing the KVM for the first time, enter in the username displayed: administrator and the password password. For security purposes, it is strongly recommended that you change the username and password on this account to something unique. -
Page 13: Kvm Operation
6. KVM Operation Computers connected to the B020-U08-19-IP can be accessed via the local console or over IP. This chapter discusses the basic operation of the KVM switch, both locally and remotely. 6.1 Sharing USB Peripheral Devices The USB 1.1 port on the LCD panel of the console KVM switch can be used to share USB peripherals between connected computers. Simply connect a USB device to this port, and any connected computer you switch to will have access to the device. -
Page 14: Local Console Port Access
6. KVM Operation ( continued ) 6.4 Local Console Port Access Once logged into the KVM, you can access connected computers via the local console using the Local Console OSD, Local Console Pushbuttons or Hotkey Commands. The following sections describe all of the ways in which you can access connected computers via the local console. 6.4.1 Local Console OSD Invocation Sequence Once logged into the KVM switch and accessing a connected computer, you will need to use one of two sequences to re-open the OSD Main Menu;... -
Page 15: Local Console Osd F6 Broadcast Mode (Brc)
6. KVM Operation ( continued ) 6.4.6 Local Console OSD F6 Broadcast Mode (BRC) Broadcast Mode is an Administrator-ONLY function. Clicking the F6 at the top of the OSD or pressing the [F6] key invokes Broadcast Mode. When this function is in effect, commands sent from the console are broadcast to all available computers on the installation. This function is particularly useful for operations that need to be performed on multiple computers, such as performing a system-wide shutdown, installing or upgrading software, etc. - Page 16 6. KVM Operation ( continued ) 6.4.10 Local Console Hotkey Commands ( continued ) • The Station Number precedes the Port Number. Hotkey Beeper Control To toggle the Beeper on and off, key in the following hotkey combination: • Station and Port numbers are always 2 digits, so 1 - 9 becomes 01 - 09. For example, a computer attached to Port 7 of Station 15 has a Port ID 1.
-
Page 17: Logging Into The Kvm Over Ip
6. KVM Operation ( continued ) 6.4.10 Local Console Hotkey Commands ( continued ) Hotkey Summary Table Note: All of the hotkey commands in this table require Hotkey Mode to be invoked prior to implementing the hotkey command. (See page 15 for details on invoking Hotkey Mode.) Hotkey Operation Hotkey Command... -
Page 18: Logging In Via The Ap Windows Client
6. KVM Operation ( continued ) 6.5.2 Logging In via the AP Windows Client In the event you do not want to connect to the KVM switch via web browser, you can use the AP Windows Client located on the CD to provide non-browser access to the KVM switch via a Windows computer. -
Page 19: Logging In Via The Ap Java Client
6. KVM Operation ( continued ) 6.5.3 Logging In via the AP Java Client Computers not running Windows can use the AP Java Client located on the 4. A prompt appears asking you to enter your username and password. CD to provide non-browser access to the KVM switch. If accessing the KVM for the first time, enter in the username administrator and the password password. -
Page 20: Port Access Via Remote Osd
6. KVM Operation ( continued ) 6.6.1 Port Access via Remote OSD The remote OSD displays the ports and KVM stations in the installation in a tree format. KVM stations are displayed with a +/- sign next to them, which when clicked will display or hide the ports on that KVM. To access a port in the installation, you can double-click on the desired port or use the [ ] and [ ] keys to highlight it and hit the [Enter] key. -
Page 21: Mouse Synchronization
6. KVM Operation ( continued ) 6.6.3 Mouse Synchronization When accessing connected computers over IP, there are two mouse pointers; one for the local computer accessing the KVM and one for the remote computer connected to the KVM. When remotely accessing computers connected to the KVM switch, a Video Auto Sync is performed, at which time the local and remote mouse pointers are automatically aligned. -
Page 22: Remote Auto Scan
6. KVM Operation ( continued ) 6.6.4 Remote Auto Scan When Auto Scan Mode is invoked via the remote OSD toolbar, the KVM begins scanning according to the Scan Select and Scan Duration settings in the Configuration tab of the remote OSD (see page 32 for details). -
Page 23: Remote Control Panel
6. KVM Operation ( continued ) 6.6.6 Remote Control Panel When accessing connected computers over IP, a control panel appears in Configuring the Hotkeys the lower-right corner of your screen. The remote control panel allows If you find the default hotkey commands inconvenient, you can configure you to perform tasks and edit settings related to the remote session. - Page 24 6. KVM Operation ( continued ) 6.6.6 Remote Control Panel ( continued ) The table describes each of the settings in the Video Settings screen: Setting Description Screen Position Adjust the horizontal and vertical position of the remote computer window by clicking the arrow buttons. Auto-Sync Click the Auto-Sync button to automatically synchronize the remote screen with the local screen.
- Page 25 6. KVM Operation ( continued ) 6.6.6 Remote Control Panel ( continued ) The buttons on the button bar are toggles. Their actions are explained in the table: Button Description Enable/Disable Chat: When disabled, this icon displays next to the disabled user’s name in the User List panel of all users’ message boards. Messages directed to the disabled user are not displayed on the message board.
-
Page 26: Administration
7. Administration Administration of the KVM switch can be done through three different interfaces; Local Console OSD, Web Interface and Remote OSD. The Web Interface and Remote OSD give you the most administrative access to the KVM, whereas the settings in the Local OSD are more limited. The table details which settings are available in each interface, and whether those settings are accessible to Administrators, ordinary Users or both. -
Page 27: Local Console Osd
7. Administration ( continued ) 7.1 Local Console OSD Upon logging into the Local Console OSD, the main page appears (see figure). Administrators have access to all features in the OSD, whereas Users have access to everything except the F4 Admin page and the F6 Broadcast (BRC) function. -
Page 28: Osd Hotkey
7. Administration ( continued ) 7.1.2 Local Console OSD F3 Settings (SET) Page ( continued ) The settings in the F3 SET page are explained in the following table: Setting Description OSD HOTKEY Select the hotkey sequence that invokes the OSD (both Local Console OSD and Remote OSD); [Scroll Lock, Scroll Lock] or [Ctrl, Ctrl]. -
Page 29: Local Console Osd F4 Administration (Adm) Page
7. Administration ( continued ) 7.1.3 Local Console OSD F4 Administration (ADM) Page This Administrator-only page allows administrators to configure the settings of the KVM switch. To change a setting: 1) Double-click on it, or highlight it and press the [Enter] key. 2) After you select an item, a submenu with more choices will appear. -
Page 30: Local Console Firmware Upgrade
7. Administration ( continued ) 7.1.3 Local Console OSD F4 Administration (ADM) Page ( continued ) Setting Description KEYBOARD Sets the language for an external keyboard connected to the KVM’s external keyboard port. To select a keyboard language, double- LANGUAGE click on the desired language or highlight it and hit the [Enter] key. -
Page 31: Remote Osd
7. Administration ( continued ) 7.1.4 Local Console Firmware Upgrade ( continued ) Firmware Upgrade Recovery In the event of a firmware upgrade failure, or an aborted firmware upgrade, perform a firmware upgrade recovery by doing the following: 1. Power OFF the switch. If it is part of a daisy-chain, disconnect it from the chain. 2. -
Page 32: Remote Osd Configuration Tab
7. Administration ( continued ) 7.2.2 Remote OSD Configuration Tab The Configuration tab (see diagram) allows administrators and users to set up their working environment. A separate profile for each is stored by the OSD and is activated according to the username and password provided during login. - Page 33 7. Administration ( continued ) 7.2.3 Remote OSD Administration Tab ( continued ) General Information The General Information screen displays the Device Name, MAC Address and Firmware Version of the KVM switch. The Device Name can be customized by an administrator, but defaults at the KVM model name. The Firmware Version displayed is that of the IP Access firmware.
- Page 34 7. Administration ( continued ) 7.2.3 Remote OSD Administration Tab ( continued ) User Management – Permissions Network – Access Ports The following permissions are included in the Add User and Edit User If a firewall is being used, these fields allow administrators to specify port screens of the User Management tab, and determine what access rights numbers that the firewall will allow.
- Page 35 7. Administration ( continued ) 7.2.3 Remote OSD Administration Tab ( continued ) ANMS On the RADIUS server, set the access rights for each user according to The Advanced Network Management Settings (ANMS) screen box allows the information in the table: you to set up login authorization management from an external source.
- Page 36 7. Administration ( continued ) 7.2.3 Remote OSD Administration Tab ( continued ) ANMS – LDAP/S Configuration 4. A warning message appears. Click Continue to bring up the Create To allow authentication and authorization via LDAP or LDAPS, the active New Attribute dialog box.
- Page 37 7. Administration ( continued ) 7.2.3 Remote OSD Administration Tab ( continued ) 4. Select the Attributes tab of the person Properties screen and click the 4. Right-click on the user’s name and select properties. Add button. 5. Select the Attribute Editor tab of the screen that appears. Select permission from the list and then click Edit.
- Page 38 7. Administration ( continued ) 7.2.3 Remote OSD Administration Tab ( continued ) Access rights examples are given in the table: Access Rights String Description 10.0.0.166&w,v The corresponding account can access the KVM assigned to IP address 10.0.0.166 via the Windows browser and non- browser applications, but only has view-only access to the connected computers.
- Page 39 7. Administration ( continued ) 7.2.3 Remote OSD Administration Tab ( continued ) Starting the OpendLDAP Server To start the OpenLDAP Server, run slapd (the OpenLDAP Server executable file) from the command line. slapd supports a number of command line options, the most important option is the d switch that triggers debug information.
- Page 40 7. Administration ( continued ) 7.2.3 Remote OSD Administration Tab ( continued ) Using the New Schema If any filters have been configured, they appear in the IP filter and/or To use the new schema, do the following: MAC filter list boxes. 1.
- Page 41 Enabled. Note: This does not allow multiple users to simulta- 1. Download the firmware upgrade file from the Tripp Lite website. neously access different ports on the KVM switch, it 2. Open the Remote OSD and navigate to the Customization tab.
-
Page 42: Web Management Interface
7. Administration ( continued ) 7.2.3 Remote OSD Administration Tab ( continued ) Customization – I/O The first column to the right of the port numbers specifies the operating system of the computer connected to the corresponding port. Click on this field to toggle between PC, Mac1, Mac2 and Sun. -
Page 43: General Information
7. Administration ( continued ) 7.3.1 General Information As previously mentioned, the General Information page is the first page you see upon logging into the Web Management Interface. When navigating through the Web Management Interface, you can always display the General Information page by clicking on the icon at the top of the screen. The information on this page is discussed in the table: Field Description... -
Page 44: Security
7. Administration ( continued ) 7.3.2 Network ( continued ) IP Installer Settings An IP Installer utility is provided on the CD that comes with the KVM switch, which gives you a simple way to ascertain and configure the KVM’s IP address. -
Page 45: Anms
7. Administration ( continued ) 7.3.4 ANMS LDAP Authentication Settings The Advanced Network Management Settings (ANMS) page allows you To allow authentication and authorization via LDAP/S, do the following: to set up login authorization management from an external source. From this screen, administrators can set up remote management via RADIUS 1. - Page 46 7. Administration ( continued ) 7.3.4 ANMS ( continued ) Extend and Update the Active Directory Schema – Create a New Attribute Extend and Update the Active Directory Schema – Extend the Object Class with the New Attribute 1. Open Control Panel Administrative Tools Active Directory Schema.
- Page 47 7. Administration ( continued ) 7.3.4 ANMS ( continued ) 5. Select permission from the list that appears and then click OK. Extend and Update the Active Directory Schema – Edit Active Directory Users with the Extended Schema 6. Replace the value shown with the desired KVM permission attribute 1.
- Page 48 7. Administration ( continued ) 7.3.4 ANMS ( continued ) OpenLDAP Server Access rights examples are given in the table: OpenLDAP is an open source LDAP server designed for UNIX platforms. Access Rights String Description A Windows version can be downloaded from: http://download.bergmans. us/openldap/openldap-2.2.29/openldap-2.2.29-db-4.3.29-openssl- 10.0.0.166&w,v The corresponding account can access...
- Page 49 7. Administration ( continued ) 7.3.4 ANMS ( continued ) Starting the Open LDAP Server DIT Creation To start the OpenLDAP Server, run slapd (the OpenLDAP Server The LDAP Data Interchange Format (LDIF) is used to represent LDAP executable file) from the command line. slapd supports a number of entries in a simple text format (please refer to RFC 2849).
-
Page 50: User Management
7. Administration ( continued ) 7.3.4 ANMS ( continued ) Using the New Schema 3. Restart the LDAP server. To use the new schema, do the following: 4. Write the LDIF file and create the database entries in init.ldif with the 1. -
Page 51: Customization
7. Administration ( continued ) 7.3.6 Customization Client Timeout Control The Customization screen allows administrators to configure settings related to KVM operation. The sections that follow discuss the settings If there is no keyboard/mouse input for the amount of time specified here, you will find on this page. -
Page 52: Maintenance
Backup User Accounts or Backup All. 3. Click the Browse button and select the firmware upgrade file you just downloaded from the Tripp Lite website. 3. Click the Save button to create the backup file. 4. Click the Upload button. A prompt appears to inform you the 4. -
Page 53: Log Server
7. Administration ( continued ) 7.4 Log Server Menu Bar The Windows-based Log Server is an administrative utility that records all the events that take place on selected B020-U08-19-IP units and writes The Menu bar consists of four drop-down menus: them to a searchable database. - Page 54 7. Administration ( continued ) 7.4 Log Server ( continued ) Events Maintenance The Events menu consists of two items; Search and Maintenance. This function allows the Administrator to remove all records that have passed their expiration limit. (See Limit on page 53 for details.) In order Search to delete old files from the log server, the maintenance function must be Search allows you to search for events containing specific words or...
- Page 55 7. Administration ( continued ) 7.4 Log Server ( continued ) The List Panel The List panel contains the following fields: Field Description Recording Determines whether the Log Server records log events for the corresponding KVM switch. If this checkbox is checked, the field displays Recording, and log events are recorded.
-
Page 56: Specifications
8. Specifications Specification B020-U08-19-IP Computer Ports HD18 Female (8) KVM Cable Kit Model P778-Series KVM Cable Kit Connectors KVM Side: HD18 Male Computer Side: HD15 Male, USB A Male, (2) PS/2 Male Included Cable Kits P778-006 6ft Cables (2) Port Expansion Daisy-chain Daisy-chain Ports DB25 Male... -
Page 57: Keyboard Emulation
8. Specifications ( continued ) 8.2 Keyboard Emulation Mac Keyboard Sun Keyboard The PC compatible (101/104 key) keyboard can emulate the functions of The PC compatible (101/104 key) keyboard can emulate the functions of the Mac keyboard. The emulation mappings are listed in the table: the Sun keyboard when the [Ctrl] key is used in conjunction with other keys. -
Page 58: Warranty Registration
Regulatory Compliance Identification Numbers For the purpose of regulatory compliance certifications and identification, your Tripp Lite product has been assigned a unique series number. The series number can be found on the product nameplate label, along with all required approval markings and information. When requesting compliance information for this product, always refer to the series number. - Page 59 1111 W. 35th Street, Chicago, IL 60609 USA www.tripplite.com/support 201009236 93-2985.indd 59 11/18/2010 4:21:52 PM...
Need help?
Do you have a question about the B020-U08-19-IP and is the answer not in the manual?
Questions and answers