Table of Contents
Advertisement
Quick Links
Advertisement
Table of Contents

Related Manuals for Thermo Scientific PRECISION 2878


Summary of Contents for Thermo Scientific PRECISION 2878
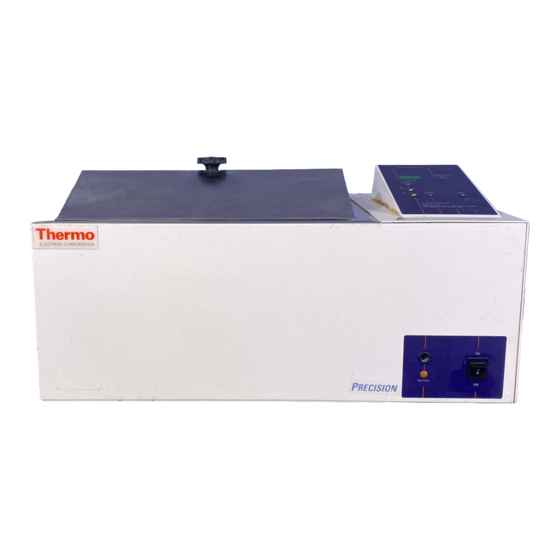
- Page 1 Installation/Service Manual Chiron Circulating Water Baths Model 2878 (120V) Model 2879 (230V) Hig h Te mp . 401 Millcreek Road Marietta, Ohio 45750 Phone: 740-373-4763 Toll Free: 800-438-4851 FAX: 740-373-4189 Manual P/N 3183922 (36100178) Rev. D Dated 15APR09...
- Page 2 THE MATERIAL IN THIS MANUAL IS FOR INFORMATION PURPOSES ONLY. THE CONTENTS AND THE PRODUCT IT DESCRIBES ARE SUBJECT TO CHANGE WITHOUT NOTICE. THERMO SCIENTIFIC MAKES NO REPRESENTATIONS OR WARRANTIES WITH RESPECT TO THIS MANUAL. IN NO EVENT SHALL THERMO BE LIABLE FOR ANY DAMAGES, DIRECT OR INCIDENTAL, ARISING OUT OF OR RELATED TO THE USE OF THIS MANUAL.
- Page 3 REVISION STATUS INDEX DATE AMENDED PAGES NOTES 4/04 Initial release 9/04 Update warranty info 10/05 Removed Screen Assembly Option and other changes ECR 22856 4/09 UL required info ECR25448/BA-670...
-
Page 4: Table Of Contents
Contents INTRODUCTION ........................1 UNPACKING AND DAMAGE ....................1 GENERAL INFORMATION ....................2 PERFORMANCE ......................... 2 INSTALLATION ........................2 WATER LEVEL REGULATOR ................... 3 EXPLANATION OF CONTROLS ..................5 OPERATION ........................6 MAINTENANCE ........................7 TROUBLESHOOTING ......................7 PARTS REPLACEMENT ....................12 TEMPERATURE CALIBRATION .................. -
Page 6: Introduction
UNPACKING AND DAMAGE INTRODUCTION Save all packing material until unit is put into Your satisfaction and safety are important to service. This merchandise was carefully packed THERMO and a complete understanding of this and thoroughly inspected before leaving our factory. unit is necessary to attain these objectives. -
Page 7: General Information
GENERAL INFORMATION PERFORMANCE DATA Precision Circulating Baths are widely used in The following table identifies the specifications for research and quality control. Their superb the Circulating Baths. temperature uniformity and stability makes them especially desirable for legal or reference tests. The microprocessor control panel houses all functions necessary to operate the bath. -
Page 8: Water Level Regulator
ELECTRICAL CONNECTIONS ELECTROLYSIS CAN DAMAGE STAINLESS STEEL. THIS CAN OCCUR IF AN OBJECT IS ALLOWED TO REST DIRECTLY ON THE IMPORTANT SURFACE, TRAPPING MOISTURE THAT For personal safety, this apparatus must be BECOMES OXYGEN STARVED BUT IS properly grounded. SURROUNDED BY WATER CONTAINING The power cord provided on this unit is equipped with a three-prong (grounding) plug which mates with standard three-prong grounding... - Page 9 WATER LEVEL REGULATOR ASSEMBLY NOTE WATER LINE MARKING ON THE WATER LEVEL REGULATOR IS AN INDICATOR OF THE APPROX. WATER LEVEL THAT WILL BE MAINTAINED IN BATH. THE ASS'Y HAS BEEN SET TO MAINTAIN APPROX. 1-3/4" OF WATER. TO RAISE THE SET WATER LEVEL, LOOSEN THUMBSCREW &...
-
Page 10: Explanation Of Controls
EXPLANATION OF CONTROLS 1. LED Display 4-digit display used to show both actual and set point values for the temperature. Also shows Power Switch - The power switch is located on configuration parameters when in configuration the lower right hand side of the bath, it provides mode. -
Page 11: Operation
d. Display will return to actual temperature. OPERATION e. If ENTER is not pressed, new value will not CAUTION: be set and display will return to actual EXERCISE CARE WHEN USING ACIDIC OR temperature. CAUSTIC SOLUTIONS AS THEY WILL ATTACK THE GALVANIZED STEEL BATH BODY IF SPILLED To adjust temperature offset: INTO THE BATH. -
Page 12: Maintenance
MAINTENANCE Removing Discoloration: Should the stainless Cleaning: Stainless steel will resist corrosion; steel ever become discolored by iron rust, use the however, it is not impervious to it. Proper following procedure to remove all traces of the rust maintenance of the stainless steel bath chamber and restore the stainless steel. - Page 13 Tools Needed: the power supply board at J102 and then repeat steps 3 through 6. Do not connect the • Phillips or Flat Blade Screwdriver connector to the CPU board at this time . If the • 7/16" Socket or adjustable wrench above voltages are not measured again, the •...
- Page 14 Open the control cover and familiarize yourself with the POWER SUPPLY assembly #3176677. C ° C ° Locate the triac (Q2), the opto-isolator (U1), the resistor (R4), and the test point #2 (TP2-COM). The first measurements will be DC voltage measurements.
- Page 15 e. Switch the voltmeter to an AC volts scale If it is not, then most likely the triac Q2 is bad, and the POWER SUPPLY board will capable of reading 120 volts. have to be replaced. Measure the voltage between U1-PIN 4 and U1-PIN 6.
- Page 16 ** Problem D: Display Reads NNNN or UUUU ** *** Problem F: Pump Does Not Circulate *** The control boards have the ability to detect an Water OPEN or SHORTED temperature sensor. These two conditions are shown on the display as follows: 1.
-
Page 17: Parts Replacement
PARTS REPLACEMENT WARNING BEFORE REPLACING ANY PART, TURN POWER SWITCH TO OFF, THEN UNPLUG Before removing any parts for replacement, verify THE UNIT FROM ITS POWER SOURCE. part in question by following the instructions listed SERVICE SHOULD BE PERFORMED BY A in the troubleshooting guide. - Page 18 PARTS REPLACEMENT (CONT'D) Replace Heater 1. From inside control housing, remove 2 nuts and disconnect wires from heater leads. 2. Remove two hex nuts from heater ends using a 13/16" socket and remove heater. 3. Reverse above procedure to install new heater. Replace "HI LIMIT"...
- Page 19 PARTS REPLACEMENT (CONT'D) 6. The software must be configured to match the Bath model. Replace CPU or To enter configuration mode, press the upper left push-button Display/Keyboard Board switch while applying power. The upper left switch is labeled See note below ** "Set Point."...
-
Page 20: Temperature Calibration
The display will now show cXX.X (XX.X is the TEMPERATURE CALIBRATION actual bath temperature) - this is Low Temperature Calibration. The following instructions provide a step-by-step procedure for temperature calibration. Do not Place the temperature probe and a calibrated deviate from the procedure or the calibration of reference thermometer into an ice bath. -
Page 21: Replacement Parts List
REPLACEMENT PARTS LIST f f i , t i , y l , y l a t l , t i " " t i c t i , t h &... - Page 22 ACCESSORY PARTS LIST , t i t a l i t i f f i f l e...
-
Page 23: Assembly & Schematic Dwgs
ASSEMBLY AND SCHEMATIC DRAWINGS...
Need help?
Do you have a question about the PRECISION 2878 and is the answer not in the manual?
Questions and answers