Advertisement
Quick Links
VERSION # 21-02-22
1 / 15
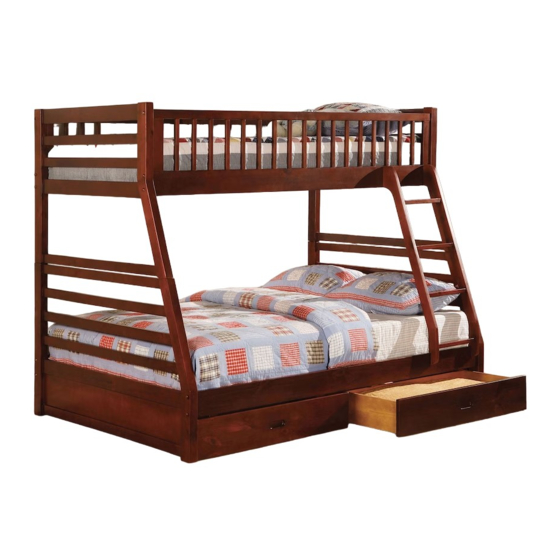
MODEL #
CM-BK601
Questions?
GIVE US CALL: 1-888-980-5122
MON-FRI 8:30AM - 5:30PM (PST)
Allen Wrench
(Included)
Phillips
Screwdriver
(Not Included)
3 - People
Recommended
EASY
The Assembly Rating is a
5-point system showing the
level of effort needed to
assemble a specific product.
DIFFICULT
Advertisement

Related Manuals for Furniture of America CM-BK601


Summary of Contents for Furniture of America CM-BK601
- Page 1 MODEL # CM-BK601 Questions? GIVE US CALL: 1-888-980-5122 MON-FRI 8:30AM - 5:30PM (PST) Allen Wrench (Included) Phillips Screwdriver (Not Included) 3 - People Recommended EASY DIFFICULT The Assembly Rating is a 5-point system showing the level of effort needed to assemble a specific product.
- Page 2 America Furniture FOA Intro Thank you for your purchase! We hope you enjoy this new addition to your home for many years to come. Our commitment to providing quality products does not simply end when you purchase our product. We fully stand behind our products from start to finish. Our customer service department is available Monday –...
- Page 3 PRE ASSEMBLY INTRODUCTION We understand building ready-to-assemble furniture can be a challenging experience for some. To help avoid confusion, we have provided some helpful tips that may speed up the process. Teamwork ALWAYS have at least two people to help with transporting and assembling the product to avoid potential injury and/or damage.
- Page 4 4 / 15...
- Page 5 BUNK BED CM-BK601 #1 1pc #2 1pc #3 1pc #4 1pc Lower End Upper End Upper End Lower End Guardrail Guardrail Guardrail Guardrail #5 1pc #6 1pc #7 1pc #8 1set Lower Back Full Slats Kit Lower Front Side Rail...
- Page 6 #17 1pc Upper Back Side Rail #D 4pcs #A 16pcs #B 16pcs #C 4pcs Bolt Bolt Barrel Nut Screw Ø1/4" Ø1/4" x 1-9/16" Ø1/4" x 3-1/4" Ø1/4" x 3-1/8" #H 20pcs #E 4pcs #F 8pcs #G 16pcs Screw Screw Metal Dowel Wood Dowel #4x30mm ɸ...
-
Page 7: Exploded View
Exploded View 7 / 15... - Page 8 CM-BK601 is packed in 2 cases Carton Disignation Part Hardware Lower End Guardrail Lower End Guardrail Upper End Guardrail Upper End Guardrail Front Panel CM-BK601-1 Side ( Left ) Side ( Right ) Back Panel Bottom Panel Center Support Lower Front Side Rail...
- Page 9 ASSEMBLY INSTRUCTIONS 2. Insert the barrel nuts (#B) into the rails, and align the hole for the bolt. Part #1 x 1pc Part #2 x 1pc Part #5 x 1pc Part #6 x 1pc Hardware #A x 8pcs Hardware #B x 8pcs 1.
- Page 10 ASSEMBLY INSTRUCTIONS 2. With the help of another person, carefully place the top bunk onto those metal dowels (#E). Hardware #E x 4pcs 1. Insert a metal dowel (#E) into the large pre- drilled holes along the top corners of the bottom bunk.
- Page 11 ASSEMBLY INSTRUCTIONS Part #8 x 1set Part #9 x 1set Hardware #G x 16pcs Apply the twin slat kit (#9) onto the top bunk. Apply the full slat kit Insert a screw (#G) into (#8) onto the top bunk. each end and secure Insert a screw (#G) into using a screwdriver.
- Page 12 ASSEMBLY INSTRUCTIONS Insert 2 screws (#H) into the holes along the sides of (#11/12). Secure using Hardware #H x 4pcs a Phillips screwdriver. Align the bottom panel (#14) to the ridges along the sides and carefully slide in. Part #14 x 1pc 12 / 15...
- Page 13 ASSEMBLY INSTRUCTIONS Place the back panel (#13) and insert 2 screws (#H) into each end. Secure using a Phillips screwdriver. Part #13 x 1pc Hardware #H x 4pcs Align the center support (#15) to the pre-drilled holes along the center of the front and back panel (#10/13).
- Page 14 ASSEMBLY INSTRUCTIONS Make sure all screws and bolts are firmly secured. 14 / 15...
- Page 15 15 / 15...
Need help?
Do you have a question about the CM-BK601 and is the answer not in the manual?
Questions and answers