Advertisement
Quick Links
For more information contact our team: service.ec@foagroup.com
ASSEMBLY RATING
The Assembly Rating is a 5-point system that
shows the degree of effort needed in
assembling a specific product (with 1 being
easy and 5 being difficult). For some
products, two persons are recommended.
EASY
Assembly Instructions
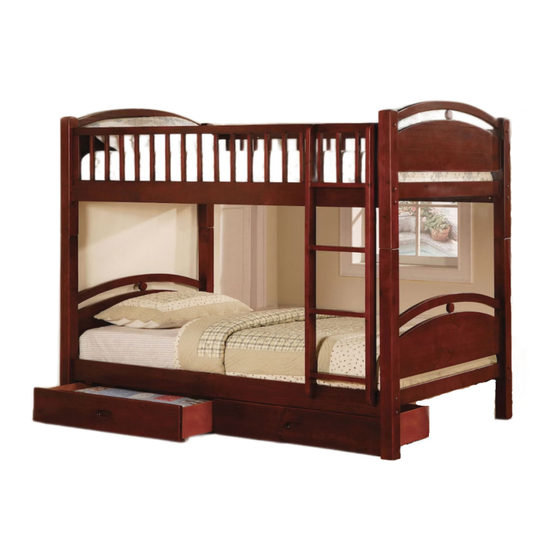
CM-BK600A
DIFFICULT
Tools Required For Assembly:
Allen Wrench
Phillips Screwdriver
2 PERSONS RECOMMENDED
Page 1 of 12
(Included)
(Not Included)
Rev: 17-01-05
Advertisement

Related Manuals for Furniture of America CM-BK600A


Summary of Contents for Furniture of America CM-BK600A
- Page 1 Assembly Instructions For more information contact our team: service.ec@foagroup.com CM-BK600A ASSEMBLY RATING Tools Required For Assembly: The Assembly Rating is a 5-point system that shows the degree of effort needed in Allen Wrench assembling a specific product (with 1 being (Included) easy and 5 being difficult).
- Page 2 LOOSEN OVER TIME AND MAY CAUSE THE FURNITURE TO BE WOBBLY AND UNABLE TO SUPPORT ITS INTENDED WEIGHT CAPACITY. THIS MAY LEAD TO COLLAPSE AND MAY CAUSE SERIOUS INJURY. FAILURE TO FOLLOW THE GUIDELINES ABOVE MAY RESULT IN INJURY AND/OR PROPERTY DAMAGE. FURNITURE OF AMERICA.ALL RIGHTS RESERVED. Page 2 of 12...
- Page 3 Before you begin, please read Page 2 of "Assembly and Care Advice". And remember, do not tighten until each step is completed or instructed. #1 x 2pcs #8 x 1pc Ladder Lower HB/FB #2 x 2pcs #9 x 2pcs Front Panel Upper HB/FB #3 x 1pc #10 x 2pcs...
- Page 4 Before you begin, please read Page 2 of "Assembly and Care Advice". And remember, do not tighten until each step is completed or instructed. #A x 16pcs #F x 40pcs Screw 3/16" x 1-3/16" Bolt 1/4" x 4" #B x 16pcs #G x 20pcs Barrel Nut Screw 3/16"...
- Page 5 Before you begin, please read Page 2 of "Assembly and Care Advice". And remember, do not tighten until each step is completed or instructed. Page 5 of 12...
- Page 6 #A x 8pcs #B x 8pcs Insert barrel nuts (#B) to the holes of the side rails (#3,4). Align side rails (#3,4) to the holes of the lower HBs (#1), then secure with bolts (#A). Make sure bolts (#A) connects to barrel nuts (#B). Insert barrel nuts (#b) to the holes of the upper side rails (#5,6).
- Page 7 #E x 4pcs Insert metal dowels (#E) to the holes of the lower HBs (#1). Align the upper HBs (#2) to the holes metal dowels (#E), then carefully place onto it. Align the ladder (#8) to the holes of the front side rails, then secure with bolts (#C).
- Page 8 Align twin slat kits (#7) to the bunk bed side rails. Secure with screws (#F). #F x 40pcs Insert wood dowels (#H) to the holes of the front panel (#9). Align the left and right side panel (#10,11) to the wood dowels (#H) attached to front panel (#9).
- Page 9 Secure the side panels (#10,11) with screws (#G). There will be no pre- drilled holes for screws (#G). #G x 4pcs Slide bottom panel (#13) through the little linear gaps of the panels (#9,10,11). Page 9 of 12...
- Page 10 Align the linear gaps of the back panel (#12) to bottom panel (#13), then secure with screws (#G). #G x 4pcs Align center support (#14) to the holes of the front and back panel (#9,12). Secure with screws (#G). #G x 2pcs Page 10 of 12...
- Page 11 Place the drawers and the bottom of the bunk bed. ASSEMBLY IS COMPLETED Page 11 of 12...
- Page 12 Safety Warnings for Bunk Beds Read and follow the information on the WARNINGS shown on the end structure of the upper bunk and on the carton. Do not remove warning label from the bed. Keep these instructions for future reference. Always use the recommended size mattress or mattess support, or both, to help prevent the likelihood of entrapment or falls.
Need help?
Do you have a question about the CM-BK600A and is the answer not in the manual?
Questions and answers