
Subscribe to Our Youtube Channel
Related Manuals for Eneo MEP-62M2812M0A


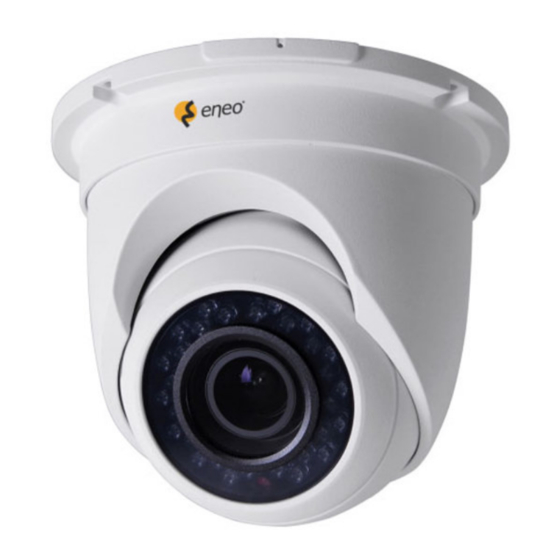
Summary of Contents for Eneo MEP-62M2812M0A
- Page 1 Quick Installation Guide 1/2.9” HD Dome, Day&Night, Fixed, 2.8-12mm, 1920x1080, Infrared, 12VDC, IP66 MEP-62M2812M0A...
-
Page 2: Table Of Contents
Table of contents Components........................5 Installation ........................6 Installation ...................................6 Extension Cable .................................7 Connections ..................................7 Connecting the video output connector ......................7 Connecting the Power ...............................7 Setting the Camera ................................8 OSD Menu Structure ..............................9 Further information .................................9... - Page 3 Safety instructions General safety instructions • Before switching on and operating the system, first read this safety advice and the operating instructions. • Keep the operating instructions in a safe place for later use. • Installation, commissioning and maintenance of the system may only be carried out by authorised individuals and in accordance with the installation instructions - ensuring that all applicable standards and guidelines are followed.
- Page 4 Class A device note This is a Class A device. This device can cause malfunctions in the living area; in such an event, the operator may need to take appropriate measures to compensate for these. WEEE (Waste Electronical & Electronic Equipment) Correct Disposal of This Product (Applicable in the European Union and other European countries with separate collection systems).
-
Page 5: Components
Components This system comes with the following components; • Camera • Installation Guide/CD • Template Sheet • Accessory Kit... -
Page 6: Installation
Installation Installation The camera is for use in surface or pendent mounting applications, and the mounting member must be capable of supporting loads of up to 4.5 kg. (Pendent mounting must use pendent mount accessory.) The camera should be attached to a structural object, such as hard wood, wall stud or ceiling rafter that supports the weight of the camera. -
Page 7: Extension Cable
Extension Cable Connector Description DC Jack 12VDC BNC Jack Video output Connections Connecting the video output connector Connect the video output (BNC) connector to the video input. Connecting the Power Connect power of 12VDC for the camera. When using a 12VDC adapter, connect the positive (+) pole to the ’ + ’ position and the negative (-) pole to the ’... -
Page 8: Setting The Camera
Setting the Camera Switch S1 Switch S1 You can set the video signal output with the switch S1: Position. Left Center Right Video Signal AHD Output HD-TVI Output CVBS Output... -
Page 9: Osd Menu Structure
INDOOR RETURN OUTDOOR MANAUL SYSTEM EXIT CAM TITLE AF MODE SAVE&END MONITOR ONE SHOT AF RESET VIDEO.OUT TDN AF NOT SAVE LANGUAGE LENS INIT RETURN RETURN Further information The manual is also available from the eneo web site at www.eneo-security.com. - Page 10 Inhaltsverzeichnis Komponenten ......................13 Installation ........................14 Installation ..................................14 Verlängerungskabel ..............................15 Anschlüsse ..................................15 Videoausgang verbinden ............................15 Anschluss der Stromversorgung ......................... 15 Kameraeinstellungen ..............................16 Aufbau des Bildschirmmenüs ..........................17 Weitere Informationen ..............................17...
- Page 11 Sicherheitsanweisungen Sicherheitshinweise allgemein • Bevor Sie das System anschließen und in Betrieb nehmen, lesen Sie zuerst diese Sicherheitshinweise und die Betriebsanleitung. • Bewahren Sie die Betriebsanleitung sorgfältig zur späteren Verwendung auf. • Montage, Inbetriebnahme und Wartung des Systems darf nur durch dafür autorisierte Personen vorgenom- men und entsprechend den Installationsanweisungen - unter Beachtung aller mitgeltenden Normen und Richtlinien - durchgeführt werden.
- Page 12 • Bei abgedunkelter Umgebung und direktem Blick in den IR-Scheinwerfer ist ein Sicherheitsabstand von > 1 m zum Scheinwerfer einzuhalten. • Unsichtbare LED Strahlung nicht direkt mit optischen Instrumenten (z.B. Lupe, Vergrößerungsglas oder Mikroskop) betrachten, da dies Augen gefährden kann, LED Klasse 1M. •...
-
Page 13: Komponenten
Komponenten Das System wird mit den folgenden Komponenten geliefert: • Kamera • Installationsanleitung/CD • Bohrschablone • Montageset... -
Page 14: Installation
Installation Installation Die Kamera ist für den Einsatz in Anwendungen mit Aufbau- oder Abhängungsmontagen geeignet und das Befestigungselement muss Tragelasten bis 4,5 kg unterstützen. (Für Abhängungsmontage wird Hängemontagezubehör benötigt). Die Kamera sollte an einem Bauelement wie etwa Hartholz, einem Wandständer oder Deckenbalken befestigt werden, welches das Gewicht der Kamera trägt. -
Page 15: Verlängerungskabel
Verlängerungskabel Anschluss Beschreibung Netzteilanschluss 12 VDC BNC-Anschluss Videoausgang Anschlüsse Videoausgang verbinden Verbinden Sie den Videoausgang-Stecker (BNC) mit dem Videoeingang. Anschluss der Stromversorgung Schließen Sie die Dome-Kamera an eine 12 V DC Stromversorgung an. Bei Verwendung eines 12VDC-Netzteils die Plus-Leitung (+) an "+" und die Minus-Leitung (–) an "-"... -
Page 16: Kameraeinstellungen
Kameraeinstellungen Schalter 1 Schalter 1 Das Videosignal kann mit dem S1-Schalter eingestellt werden: Position Links Mitte Rechts Videosignal AHD-Ausgang HD-TVI-Ausgang FBAS-Ausgang... -
Page 17: Aufbau Des Bildschirmmenüs
DEFECT DET INDOOR RETURN OUTDOOR MANAUL SYSTEM EXIT CAM TITLE AF MODE SAVE&END MONITOR ONE SHOT AF RESET VIDEO.OUT TDN AF NOT SAVE LANGUAGE LENS INIT RETURN RETURN Weitere Informationen Dieses Handbuch ist auch auf der eneo-Webseite unter www.eneo-security.com verfügbar. - Page 18 Contenu Composants .........................21 Installation ........................22 Installation ..................................22 Câble d’extension ................................23 Raccordements ................................23 Connexion du connecteur de sortie vidéo ...................... 23 Connexion de l´alimentation ..........................23 Installation de la caméra .............................. 24 Structure du menu OSD ............................25 Complément d'information ............................
- Page 19 Instructions de sécurité Consignes de sécurité générales • Avant de brancher et de mettre en service le système, veuillez lire d'abord ces consignes de sécurité ainsi que la notice d'instructions. • Conservez soigneusement la notice d'instructions en vue d'une utilisation ultérieure. •...
- Page 20 • Une distance de sécurité > 1 m doit être respectée par rapport au projecteur dans un environnement sombre, quand on regarde directement dans le projecteur IR. • Les rayons invisibles des LED ne doivent pas être observés directement avec des instruments optiques (par ex.
-
Page 21: Composants
Composants Le système est fourni avec les composants suivants : • Caméra • Guide d'installation / CD • Gabarit de montage • Kit d'accessoires... -
Page 22: Installation
Installation Installation La caméra est conçue pour un montage en saillie ou encastré, à condition que l´ensemble de montage puisse supporter une charge max. de 4,5 kg. (Pour un montage en saillie, utiliser absolument les accessoires de fixation livrés.) La caméra doit être fixée à une surface solide, comme du bois dur, un mur, un pilier ou une poutre au plafond apte à... -
Page 23: Câble D'extension
Câble d’extension N° Connecteur Description Connecteur Jack 12V CC Connecteur BNC Sortie vidéo Raccordements Connexion du connecteur de sortie vidéo Branchez le connecteur de sortie (BNC) vidéo à l'entrée vidéo. Connexion de l´alimentation Connecter l'alimentation 12V CC pour la caméra. Avec un adaptateur 12 VCC, connecter le pôle positif (+) à... -
Page 24: Installation De La Caméra
Installation de la caméra Commutateur S1 Commutateur S1 Vous pouvez régler la sortie du signal vidéo avec le commutateur S1 : Position. Gauche Centre Droite Signal vidéo Sortie AHD Sortie HD-TVI Sortie CVBS... -
Page 25: Structure Du Menu Osd
OUTDOOR MANAUL SYSTEM EXIT CAM TITLE AF MODE SAVE&END MONITOR ONE SHOT AF RESET VIDEO.OUT TDN AF NOT SAVE LANGUAGE LENS INIT RETURN RETURN Complément d'information Le manuel complet est également proposé sur le site Web d’eneo : www.eneo-security. com. - Page 26 Indice Componenti .........................29 Installazione .........................30 Installazione ..................................30 Cavo di prolunga ................................31 Collegamenti ..................................31 Collegamento del connettore di uscita video ....................31 Collegamento dell'alimentazione ........................31 Impostazione della telecamera..........................32 Struttura del menu OSD ............................33 Altre informazioni ................................. 33...
- Page 27 Istruzioni per la sicurezza Istruzioni generali per la sicurezza • Prima di collegare e mettere in funzione il sistema, leggete le istruzioni per la sicurezza e le istruzioni per l'uso. • Conservate con cura le istruzioni per l'uso per un eventuale utilizzo futuro. •...
- Page 28 • Deve essere mantenuto un margine di sicurezza di > 1 m dal proiettore se si guarda direttamente nel proiettore IR in un ambiente buio. • Non guardare direttamente le radiazioni LED invisibili utilizzando strumenti ottici (ad es. lente, lente di ingrandimento o microscopio) per prevenire danni agli occhi ( LED classe 1M).
-
Page 29: Componenti
Componenti Il sistema viene fornito con i componenti seguenti: • Telecamera • Guida/CD di installazione • Dima • Kit di accessori... -
Page 30: Installazione
Installazione Installazione La telecamera è destinata all'uso in applicazioni con installazione a muro o a sospen- sione; l'elemento di installazione deve essere in grado di sostenere carichi fino a 4,5 kg (per l'installazione a sospensione deve essere utilizzato l'accessorio per il montaggio a sospensione). -
Page 31: Cavo Di Prolunga
ATTENZIONE: applicare sigillante al silicone per assicurare la tenuta all'acqua dell'alloggiamento. NON provare manualmente a far compiere movimenti di panora- mica e inclinazione alla testa della telecamera. Si rischia di danneggiare il meccanismo di panoramica/inclinazio- ne della telecamera. Cavo di prolunga Connettore Descrizione Jack CC... -
Page 32: Impostazione Della Telecamera
Impostazione della telecamera. Interruttore S1 Interruttore S1 È possibile impostare l'uscita del segnale video con l'interruttore S1: Posizione. Sinistra Centro Destra Segnale video Uscita AHD Uscita HD-TVI Uscita CVBS... -
Page 33: Struttura Del Menu Osd
INDOOR RETURN OUTDOOR MANAUL SYSTEM EXIT CAM TITLE AF MODE SAVE&END MONITOR ONE SHOT AF RESET VIDEO.OUT TDN AF NOT SAVE LANGUAGE LENS INIT RETURN RETURN Altre informazioni Il manuale è disponibile anche sul sito web di eneo all'indirizzo www.eneo-security.com. - Page 36 VIDEOR E. Hartig GmbH Exclusive distribution through specialised trade channels only. VIDEOR E. Hartig GmbH Carl-Zeiss-Straße 8 63322 Rödermark/Germany Tel. +49 (0) 6074 / 888-0 Technical changes reserved Fax +49 (0) 6074 / 888-100 www.videor.com...
Need help?
Do you have a question about the MEP-62M2812M0A and is the answer not in the manual?
Questions and answers