Fac F 350I Use And Maintenance Manual
Professional automatic slicer
Hide thumbs
Also See for F 350I:
- Use and maintenance manual (80 pages) ,
- Installation, use and maintenance manual (32 pages) ,
- Use and maintenance manual (62 pages)
Table of Contents
Advertisement
Quick Links
Advertisement
Table of Contents

Related Manuals for Fac F 350I


Summary of Contents for Fac F 350I
- Page 1 EC PROFESSIONAL AUTOMATIC SLICERS AUTOMATIC F 350I- F 370I USE AND MAINTENANCE MANUAL FAC SRL macchine affettatrici industriali e familiari Via Morazzone, 137 - 21044 CAVARIA (VA) Tel. +39 0331 212252 - Fax. +39 0331 216443 www.slicers.it info@slicers.it 100% Made in Italy...
- Page 3 EC PROFESSIONAL AUTOMATIC SLICERS AUTOMATIC F 350I- F 370I USE AND MAINTENANCE MANUAL 100% Made in Italy...
-
Page 5: Table Of Contents
INDEX • GENERAL WARNINGS ....................Pag. 4 • USE WARNINGS ......................Pag. 10 • MANUFACTURER’S WARRANTY AND RESPONSIBILITIES ........Pag. 11 • PACKING ........................Pag. 12 • NAMEPLATES - CONFORMITY MARKINGS ............. Pag. 13 • SUPPLIED ACCESSORIES ..................Pag. 14 • TECHNICAL DESCRIPTION AND INTENDED USE ..........Pag. 14 • ELECTRICAL AND MECHANICAL SAFETY DEVICES ..........Pag. 16 • SPACE REQUIREMENT ..................... Pag. 17 • MAIN TECHNICAL DATA .................... Pag. 17 • MAIN COMPONENTS ....................Pag. 18 • INSTALLATION AND PRELIMINARY CHECKS . -
Page 6: General Warnings
GENERAL WARNINGS Meaning of warning signs found in booklet DANGER: Indicates an imminently hazardous situation which, if not avoided, could result in serious injury or even death. The use of this term is limited to the most extreme situations. ATTENTION: Indicates a potentially hazardous situation ☞... - Page 7 GENERAL WARNINGS In case of sale of the slicer, deliver to the new owner this manual too. ☞ The installation must be performed following the instructions of the manufacturer. A wrong installation can cause damages to people, animals or things, in respect of which the manufacturer cannot be considered responsable. Children should not use the device as a toy and should neither clean nor use the equipment.
- Page 8 GENERAL WARNINGS • Before plugging the appliance make sure that the data on the label correspond to those of the electrical distribution network. • The plate is on the bottom of the appliance. • For your safety, it is recommended to power the device through a circuit breaker (DRC) with trip current not exceeding 30 mA. • In case of incompatibility between the socket and the plug of the appliance have the die-cast wire and plug with another one suitable by an authorized retailer. In case of tampering the manufacturer doesn’t answer neither for safety, nor for warranty. Alternatively have the socket replaced with a suitable type by a qualified professional.
- Page 9 GENERAL WARNINGS • If you decide not to use a device of this type any more, it must be made inoperative by cutting the power cord after removing the plug from the socket. It is also recommended to make harmless those parts of the equipment which may constitute a danger, especially for children who might use an abandoned appliance for their games. • To avoid dangerous overheating, it is recommended to extend the power cord to its full length and use the appliance as recommended in “USING THE MACHINE”. ☞ During the functioning, the socket must be easily accesible in the event that becomes necessary to unplug the appliance. Do not place the appliance under a socket so that the wire doesn’t interfere with the correct use of the machine.
- Page 10 GENERAL WARNINGS ☞ Place the appliance on a horizontal and firm supporting plane, whose surface is not sensitive (eg. Lacquered furniture, tablecloths etc.). Make sure that the appliance is safely supported. ☞ Do not place the appliance on or near heat sources. Place the appliance far from sinks and faucets.
- Page 11 GENERAL WARNINGS Do not remove safety devices and do not alter or remove mechanical and electrical guards. ☞ Always use protective scratchproof gloves for cleaning and maintenance. ☞ Do not operate the empty appliance. ☞ In case of problems with the appliance, contact an authorized service center.
-
Page 12: Use Warnings
USE WARNINGS • Do not remove, cover or alter the rating plates fitted to the machine body and ensure their prompt replacement in case of damage. • Ensure that the product tray, receiving tray, surrounding areas and floor are kept clean and dry at all times. • Do not use the slicer as a supporting surface or lay any object on it that is extraneous to normal slicing operations. • Place and remove the goods to be sliced on the sliding plate only with the platter completely retracted (away from the blade) and the cart totally towards the operator. ☞ DO NOT use slicing accessories that have not been supplied by the slicer manufacturer. • Do not damage the blade by cutting hard objects (bones, etc.). • If the size of the food to be sliced are higher than those indicated under “Working cut” in the table “Technical data”, reduce its size to work safely. -
Page 13: Manufacturer's Warranty And Responsibilities
MANUFACTURER’S WARRANTY AND RESPONSIBILITIES • This device is guaranteed for 24 - incorrect installation. months. - failure to comply with the specific The purchase date must be proven with power techniques the relevant document. - insufficient or incomplete periodic In the absence of valid fiscal document, maintenance. the warranty claim can not be exercised. - use by people under the age of 18. - use by people whose physical, • In case of non-compliance the claim sensory or mental skills are reduced. -
Page 14: Packing
PACKING Check that all components spec- .1 - UNPACKING ified in the delivery note and this instruction booklet are present When taking delivery of the slicer, ensure and fully intact. that the packaging is fully intact; if this is not the case, please advise the courier or • Should any faults be noted, such as: local dealer immediately. - dents to the frame or guards; In order to remove the slicer from the - controls that are either not working packaging, please proceed as follows: or broken; • Cut and remove the plastic bands. -
Page 15: Nameplates - Conformity Markings
DISPOSE OF WASTE assimilable to the urban solid refusals. RESPONSIBLY! Fig. 1 AFFETTATRICI AUTOMATICHE CE PROFESSIONALI F 350I- F 370I AUTOMATICA ISTRUZIONI PER L’USO E LA MANUTENZIONE 100% Made in Italy NAMEPLATES - CONFORMITY MARKINGS The plate must never be re- The device described in this manual is... -
Page 16: Supplied Accessories
SUPPLIED ACCESSORIES Unless otherwise defined at the • CE conformity declaration; moment of order, the machines are • instructions manual for installation, supplied together with the following: use and maintenance; • oiler. TYPE /ANNO IPX1 CE USO PROFESSIONALE M A D E I N I T A L Y Fig. - Page 17 for food products. 2.3.a - Intended use The cutting blade is driven by an (sliceable products) electric motor and motion transmission is obtained thanks to a longitudinally The following products may be sliced: grooved belt. • All types of cold cuts (raw and cooked Stat-up and stop are performed using ham, bacon). a button connected to the auxiliary • Boneless meat (cooked or raw at a control circuit which prevents accidental temperature of not less than +3°C).
-
Page 18: Electrical And Mechanical Safety Devices
ELECTRICAL AND MECHANICAL SAFETY DEVICES • Start up and stop are performed with The mechanical safety devices taken the button connected to a control are the following: auxiliary network that prevents • A series aluminium and accidental start ups of the appliance transparent plastic guards on the after a possible electrical power cut. product carriage. Do not tamper, remove The electrical safety devices taken nor bypass, under no are the following:... -
Page 19: Space Requirement
SPACE REQUIREMENT MAIN TECHNICAL DATA Version F 350 I F 370 I Motor 0,50 0,50 Blade ø 100 CR6 100 CR6 Slice thickness 0/16 0/16 310 x 260 300 x 275 L x H Weight 61,2 62,2 Sharpener built-in built-in Tray blocker standard standard... -
Page 20: Main Components
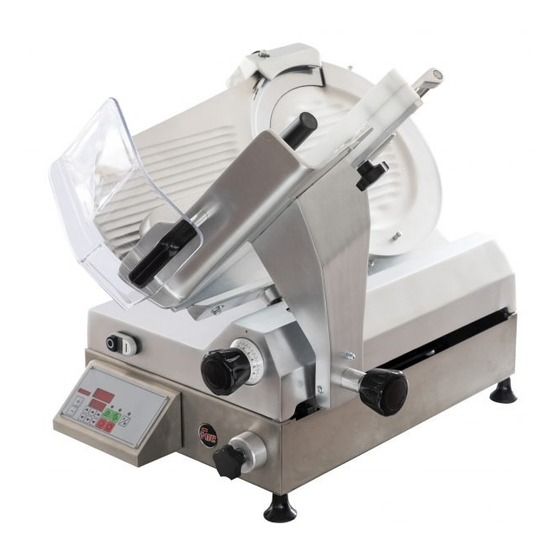
MAIN COMPONENTS AUTOMATIC MANUAL A U T O M A T M A N U A L A U T O M A T M A N U A L Fig. 3 Start button (white) Blade cover Stop button (black) 10. Food holder 11. Blade Machine in operation indicator light 3a. Panel for automatic setting 12. Product tray hand guard 13. Product tray grip... -
Page 21: Installation And Preliminary Checks
INSTALLATION AND PRELIMINARY CHECKS • Check that the blade (11) rotates in .1 - Installation the direction indicated by the arrow (counterclockwise looking at the Place the slicer on a well leveled, smooth, machine from the blade plate side). dry and stable plane ,suitable to support its weight. • For slicers with three-phase supply: if the blade (11) rotates in the opposite direction, immediatly stop .2 - Electric connection the machine pressing the button “0” (2) and require the intervention Install the slicer in the immediate vicinity of of qualified personnel to reverse an outlet to CEE standards derived from... -
Page 22: Commands Description
COMMANDS DESCRIPTION .1 - Start and stop button • Press the white or green button (1) to give voltage to the slicer board; • The indicator light (3) switches on signalling that the slicer is powered with mains voltage; • Press the red or black button (2) to stop the slicer. The thickness of the slices is adjustable rotating the knob (4), with graduated scale, anticlockwise. Regulation field: see the “Technical description and intended use conditions”. 0 0 0 CONT 0 0 0 B3 B2 B1 C AUTOMATIC MANUAL Fig. 4 A. Stroke/support adjustment key D. Tray movement start and stop key B. Keys for setting the number of slices E. Slice counter switching on/off key to cut: F. Stroke/support adjustment display... -
Page 23: Using The Machine
USING THE MACHINE relative indicator light turns on. .1 - Automatic use of the machine • The machine starts cutting; the count of the slices appears on the After placing the product to be sliced on display (H). the product tray, proceed as follows: PAY T H E U T M O S T • Rotate the selector... - Page 24 USING THE MACHINE .3 - Loading the product on the tray and slicing ☞ Check that the slice thickness regulation knob (4) is correctly placed on ‘0’; • Draw back the carriage completely (8) (towards the operator) to loading position. • Lift the product grip (10) by pulling it away by 10 cm from the blade and put it in rest position;...
- Page 25 USING THE MACHINE • Adjust the slice thickness with the knob (4). Start the blade by pressng on the white or green button (1); Fig. 7 • In case of manual use, grab the grip (10) fixed to the tray and start the forward and backward cutting movement. Food progress towards the gauge plate occurs by its own weight (gravity). In case of automatic use, the forward and backward cutting movement occurs automatically by means of a motor. • When food weight or size won’t allow to perform a satisfactory cut anymore due to the sole effect of gravity, use the machine in manual mode only, using the grip of the food holder (10);...
-
Page 26: Slicer Cleaning
SLICER CLEANING The machines have to be carefully cleaned at least once a day; if it is necessary more frequently. After a shorter or longer period of inactivity clean the slicer before use. WARNING: Cutting hazard! Use protective cut- and tear-resistant gloves and perform all operations with extreme care. - Page 27 SLICER CLEANING • Fully unscrew (counterclockwise • Remove the tie rod (17) and remove rotation) the blade guard locking tie the blade guard (9) using only the rod (17); special lateral knobs (23); • If the blade guard (9) is blocked, press on the rod knob (17) to move it; Fig. 10 • Loosen and remove the two screws • Remove the deflector (25). with knurled head (24); Fig. 11...
- Page 28 SLICER CLEANING • Loosen the knob (20a) and remove • Take the sharpener (20) from the the sharpener (20). knob (20b) and remove it by lifting it. Fig. 12 For the machine’s body and blade cleaning use only a cloth dampened in water or alcohol and a biodegradable frothy dishwasher cleanser at pH 7-8, at a temperature at least of +30°C.
- Page 29 SLICER CLEANING .2 - Base cleaning After removing all the components as • Use a soft cloth, spongy and described in the previous pages: possibly a nylon brush for the sharp zones of the product tray (8) and of • Clean all the disassembled parts the product grip (10). and the machine’s body usimg only hot water (at a temperature at least • Rinse only with hot water and dry of 30°C) and biodegradable frothy with soft and spongy cloths.
- Page 30 SLICER CLEANING .4 - Safety ring cleaning • Damp a cloth in a solution of water and alcohol. • Place the damp cloth between the safety ring (S) and blade (11) • Take the two ends of the cloth between your hands and slide it along the safety ring (S). ☞ Do not use detergents to clean the blade (11). Fig. 14 .5 - Removing the product tray with tray blocker system (in the versions where it’s provided) To remove the product tray (8), work as follows: • Rotate on “0” the graduated knob (4).
- Page 31 SLICER CLEANING • Bring the tray next to the graduated • Strongly pull the tray towards the knob. operator until you hear the coupling “click” safety pivot. In this position the • Completely unscrew the knob (6a). gauge plate (15) and the product tray (8) cannot be moved. Fig. 16...
- Page 32 SLICER CLEANING • Lift the tray (8) and remove it (Figure 17). ☞ The product tray (8) is particularly heavy, work carefully, possibly with two operators. Fig. 17 To reassemble it: • Correctly reposition the tray (8) on Fig. 18 the tray support (6). • Tighten the knob (6a) until you free the tray (8). .6 - Machine reassembling Proceed in the opposite direction to what indicated in the previous operations. .7 - Store the slicer • When you finish using it, after carefully • Is advised to cover the slicer with a...
-
Page 33: Maintenance
MAINTENANCE .1 - Generalities In addition to the above-mentioned cleaning operations, you should also perform routine maintenance in order to guarantee the slicer’s operating efficiency over time. The operator may perform the following maintenance operations: • Blade sharpening: periodically (periodicity and duration depend obviously on the equipment use; working times and processed material type). • Lubrication of carriage sliding guides: weekly. • Lubrication of product grip sliding bar: weekly. • Visual check of the power cord and of the gland on the machine’s base conditions: periodically. -
Page 34: Execution Of The Sharpening
EXECUTION OF THE SHARPENING .2 - Execution of the sharpening WARNING: Cutting hazard! Use protective cut- and tear- resistant gloves and perform all operations with extreme care. PAY ATTENTION AT ALL TIMES! The blade sharpening should be performed periodically, as soon as you feel a decrease in the ability of cutting blade, it should follow the instructions below: 1. Carefully clean the blade (11) with denatured alcohol to degrease it after disconnecting the plug from the socket;... - Page 35 EXECUTION OF THE SHARPENING 3. Trigger the switch (1) and press the little button (x2); 4. Allow the blade to rotate for about 30 to 40 seconds and then use the switch (1) to stop it checking with a slight shift (using a pencil) to the outside of the blade if the burr is formed. We reccomend to perform this check very carefully as the blade is very sharp. Fig. 20 30÷40 sec. 5. Ascertained the formation of the burr, trigger the switch again (1) for 3/4 seconds pressing the little buttons at the same time (x2 and x3); ☞ DO NOT PROLONG THIS OPERATION BEYOND THE FEW ABOVEMENTIONED SECONDS TO PREVENT THAT THE BLADE EDGE WILL TWIST.
-
Page 36: Lubrication
EXECUTION OF THE SHARPENING 6. After completing sharpening, we 8. Accurately clean the blade and the advise cleaning the wheels using a machine as indicated in the previous small brush soaked in alcohol; paragraphs 7. After the sharpening operation return the sharpener to its original position. LUBRICATION .1 - Food holder sliding bar (weekly) ☞ Only use the fitted oil; if you don’t have one use vaseline white oil. -
Page 37: Taking The Slicer Out Of Service
TAKING THE SLICER OUT OF SERVICE .1 - Correct procedure A machine compromises: • Aluminium-alloy frame. • Stainless-steel inserts and components. • Electrical parts and electrical cables. • Electrical motor • Plastics, etc. - When commissioning third parties to perform dismantling and demolition, only businesses authorised to dispose of these materials should be employed. - When demolishing without outside assistance, sort the various types of material and hand over to authorised businesses for disposal. ALWAYS comply with the current legislation of the country in which the slicer is utilised. -
Page 38: Troubleshooting
TROUBLESHOOTING • The following information is intended to aid in identifying and correcting defects and faults that may occur during use of the machine. ☞ Some failures can be resolved by the user; others require precise technical skills or special skills, and must be carried out by qualified personnel with recognized expertise and experience in the specific area of intervention. Do not disassemble the internal parts of the slicer. -
Page 39: User Note
PROBLEM CAUSES SOLUTION Pressing the green or Defective indicator. Do not use the machine with white button the machine light indicator off; consult starts, but will not turn the promptly the customer operation light on. service. The machine starts but Defective motor or Do not use the machine, vibrates, the motor is very transmission. consult promptly the hot and there is bad smell. customer service. The machine under load Defective transmission. -
Page 40: Electrical Scheme
ELECTRICAL SCHEME TG 00MINI for versions F 350I - F 370I RELAY Line White multipoint connector Line RELAY 10A-250V Motor (black) Motor (black) To the TG AFF SMP2 card blue blue tighten on slicer’s chassis MOTOR 230V - Hz 50 N.B.: In versions F300I - F330I - F350I - F370I, n°2 condensers of 6,3 µF Only for personnel authorized by the manufacturer... - Page 41 BOARD mod. TG AFF SMP2 Auto FLAT connector for board Emergency button (TG-Aff-Std4 new version) (if existing) (TAFCPU2 old version) fuse 500 mA SUPPORT MOTOR BLADE + FAN POWER SUPPLY 230 Vac SUPPORT BLADE motor motor Only for personnel authorized by the manufacturer...
-
Page 42: Moca Declaration
MOCA DECLARATION DECLARATION OF CONFORMITY OF THE MATERIALS AND OBJECTS DESTINED TO COME INTO CONTACT WITH FOOD PRODUCTS 1. W ith this document, it is declared that the product/article/machinery: V ERTICAL GRAVITY SLICER WITH ANODISED ALUMINIUM STRUCTURE s upplied for prolonged contact with foodstuffs; IS COMPLIANT WITH THE FOLLOWING EUROPEAN COMMUNITY LEGISLATION: • Regulation 1935/2004 CE • Regulation 1895/2005 CE • Regulation 10/2011 CE AND THE FOLLOWING ITALIAN LEGISLATION:... - Page 43 To perform the analysis, a specimen was put into contact with 5000 ml of water simulant for 2 hours at 40°C at third contact. Aluminium was searched for on the simulant coming from the contact using the ICP-MS technique. Component Result Unit of Method Limit of release measurement (mg/kg) Aluminium < 0,10 mg/kg ref. EPA 6010D 2018 The simulants and test conditions are selected on the basis of the Directives 82/711/EEC and 85/572/EEC and as amended and Decree n.338 dated 22/07/1998. (See note at the end of the document regarding art. 22 of Reg. (EU) n.10/2011 on Transitional Provisions).
- Page 44 F or slicer models with details in olive wood, the following tests were performed: Screening of inorganic compounds in materials in contact with the foodstuffs with the purpose of detecting and quantifying the molecules extractable from the sample by contact with 65% nitric acid at 120°C for 2 hours and detectable by plasma emission spectrometry (ICP/ OES). Screening of volatile organic compounds in materials in contact with the foodstuffs with the purpose of evaluating the transfer of volatile substances making up the material that can migrate into the foodstuff by conditioning at a suitable temperature, extraction of the head space (via 30 minute contact at 125°C) and gas chromatographic analysis with mass detector. Screening of semi-volatile organic and non-volatile compounds in materials in contact with the foodstuffs with the purpose of detecting and quantifying, conventionally in benzyl butyl phthalate (BBPd4), the molecules extractable from the sample by contact with 95% ethanol at 60°C for 10 days and detectable by gas chromatography equipped with mass detector (GC EI/MS). Conclusions No hazardous substances have been detected.
-
Page 45: Declaration Of Conformity
Manufacurer: Declaration of conformity CE PROFESSIONAL USE Annex Il, part 1, section A in accordance with the Machinery Directive 2006/42/CE The undersigned, legal representative of the Manufatcurer and person authorized to compile the technical file, declares that the SLICER Version:_______________________ Serial N.:_______________________ Year:__________ complies, where applicable, with the following protection directives:... - Page 46 10/2019...
- Page 47 Annex Il, part 1, section A in accordance with the Machinery Directive 2006/42/CE The undersigned Fabio Mussi, legal representative of the Manufatcurer FAC srl domiciled in via Morazzone 137 - 21044 Cavaria (VA) ltaly, and person allowed to compile the technical file, declares...
- Page 48 F 300 R - F 300 E - F 300 EL - F 300 CL - F 300 I - F 330 I - F 350 I - F 370 I ISTRUZIONI PER L’USO E LA MANUTENZIONE FAC SRL macchine affettatrici industriali e familiari Via Morazzone, 137 - 21044 CAVARIA (VA) Tel.
Need help?
Do you have a question about the F 350I and is the answer not in the manual?
Questions and answers