Fac F 195 Use And Maintenance Manual
Hide thumbs
Also See for F 195:
- Use and maintenance manual (62 pages) ,
- Use and maintenance manual (70 pages) ,
- Installation, use and maintenance manual (32 pages)
Table of Contents
Advertisement
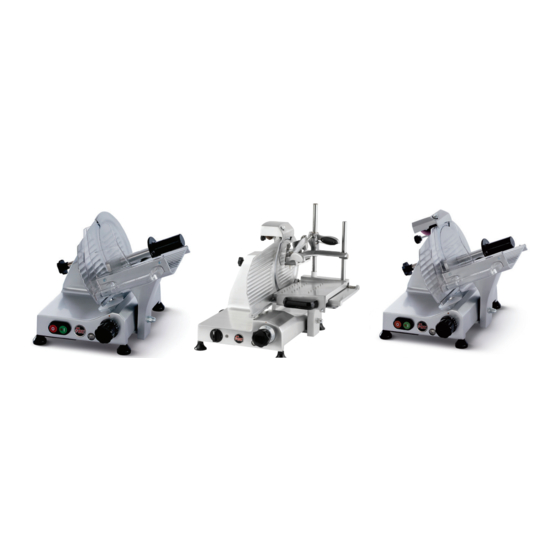
V E RT I C A L G R AVI TY SL ICER, CE H OUS E H OL D , E X T R A CE E XE C UT I ON
F 195 - S 220 - F 250 ES - F 195 AF - S 220 AF - F 250 R - F 250 E - F 250 I
F 275 E - F 275 I - F 275 IL - F 300 R - F 300 E - F 300 EL - F 300 CL - F 300 I - F 330 I
F 350 I - F 370 I - F 250 TSV - F 250 TCV - F 300 TSV R - F 300 TCV R - F 300 TSV
F 300 TCV - F 330 TSV - F 330 TCV - F 350 TSV - F 350 TCV - F 370 TSV - F 370 TCV
USE AND MAINTENANCE MANUAL
FAC SRL
macchine affettatrici industriali e familiari
Via Morazzone, 137 - 21044 CAVARIA (VA)
Tel. +39 0331 212252 - Fax. +39 0331 216443
www.slicers.it
info@slicers.it
EN
100% Made in Italy
Advertisement
Table of Contents

Related Manuals for Fac F 195


Summary of Contents for Fac F 195
- Page 1 V E RT I C A L G R AVI TY SL ICER, CE H OUS E H OL D , E X T R A CE E XE C UT I ON F 195 - S 220 - F 250 ES - F 195 AF - S 220 AF - F 250 R - F 250 E - F 250 I...
- Page 3 V E RT I C A L G R AVI TY SL ICER, CE H OUS E H OL D , E X T R A CE E XE C UT I ON F 195 - S 220 - F 250 ES - F 195 AF - S 220 AF - F 250 R - F 250 E - F 250 I...
-
Page 5: Table Of Contents
INDEX • GENERAL WARNINGS ....................Page 4 • MANUFACTURER’S WARRANTY AND LIABILITY ............Page 11 • PACKAGING .......................Page 12 • PLATES - CONFORMITY MARKINGS ...............Page 13 • SCOPE OF SUPPLY AND ACCESSORIES ..............Page 15 • TECHNICAL DESCRIPTION AND INTENDED CONDITIONS OF USE .....Page 15 •... -
Page 6: General Warnings
GENERAL WARNINGS Meaning of warning signs found in booklet DANGER: Indicates an imminently hazardous situation which, if not avoided, could result in serious injury or even death. The use of this term is limited to the most extreme situations. ATTENTION: Indicates a potentially hazardous situation ☞... - Page 7 GENERAL WARNINGS In case of a slicer sale, deliver this manual to the new owner too. ☞ The installation must be carried out according to the manufacturer’s instructions. Incorrect installation can cause harm to people, animals or properties in respect of which the manufacturer can not be held responsible.
- Page 8 GENERAL WARNINGS • Before plugging the appliance make sure that the data on the label correspond to those of the electrical distribution network. • The plate is on the bottom of the appliance. • For your safety, it is recommended to power the device through a circuit breaker (DRC) with trip current not exceeding 30 mA.
- Page 9 GENERAL WARNINGS • If you decide not to use a device of this type any more, it must be made inoperative by cutting the power cord after removing the plug from the socket. It is also recommended to make harmless those parts of the equipment which may constitute a danger, especially for children who might use an abandoned appliance for their games.
- Page 10 GENERAL WARNINGS ☞ Place the appliance on a horizontal and firm supporting plane, whose surface is not sensitive (eg. Lacquered furniture, tablecloths etc.). Make sure that the appliance is safely supported. ☞ Do not place the appliance on or near heat sources. Place the appliance away from sinks and taps.
- Page 11 GENERAL WARNINGS Do not remove the safety devices and do not modify or exclude the mechanical and electrical safety devices. ☞ Always use protective scratchproof gloves for cleaning and maintenance. ☞ Do not operate the empty appliance. ☞ In case of problems with the appliance, contact an authorized service center.
- Page 12 GENERAL WARNINGS • Do not remove, cover or alter the rating plates fitted to the machine body and ensure their prompt replacement in case of damage. • Ensure that the product holder, receiving tray, surrounding areas and floor are kept clean and dry at all times. •...
-
Page 13: Manufacturer's Warranty And Liability
MANUFACTURER’S WARRANTY AND LIABILITY • This device is guaranteed for 24 incorrect installation. months. failure to comply with the specific The purchase date must be proven with power techniques the relevant document. insufficient or incomplete periodic In the absence of valid fiscal document, maintenance. -
Page 14: Packaging
PACKAGING Check that all components spec- .1 - UNPACKAGING ified in the delivery note and this instruction booklet are present When taking delivery of the slicer, ensure and fully intact. that the packaging is fully intact; if this is • Should any faults be noted, such as: not the case, please advise the courier or dents to the frame or guards;... -
Page 15: Plates - Conformity Markings
DO NOT DISPERSE The packing components (bands, card- ☞ board, polystyrene, etc.) are products THE PACKAGING assimilable to the urban solid refusals. PRODUCTS IN THE ENVIRONMENT! Fig. 1 PLATES - CONFORMITY MARKINGS The device described in this manual The plate must never be re- is produced in accordance with the moved and must always be directives in force, as amended. - Page 16 ATTENZIONE OSSERVARE ATTENTAMENTE LE ISTRUZIONI PER L’INSTALLAZIONE, USO, PULIZIA E MANUTENZIONE FORNITE DAL COSTRUTTORE. Solo per versione “CE USO DOMESTICO” WARNING TYPE STRICTLY FOLLOW THE INSTRUCTIONS FROM THE MANUFACTURER FOR INSTALLATION, USE, CLEANING N. XXXXXXXX /2014 AND MAINTENANCE. ATTENTION CE USO DOMESTICO RESPECTEZ STRICTEMENT LES INSTRUCTIONS DU FABRICANT CONCERNANT L’INSTALLATION, MADE...
-
Page 17: Scope Of Supply And Accessories
SCOPE OF SUPPLY AND ACCESSORIES Unless otherwise defined • EC conformity declaration; moment of order, the machines are • instruction booklet for installation, supplied together with the following: use and maintenance. TECHNICAL DESCRIPTION AND INTENDED CONDITIONS OF USE .1 - General description The slicer is mainly constituted by a All components of the machine are in footing which supports a circular blade... - Page 18 2.3.b - Unexpected or improper use .2 - Environmental conditions of (NOT sliceable products) the machine use The following products CANNOT be • Temperature ..from -5 °C to + 40 °C sliced as they are liable to cause serious • Relative humidity ....
-
Page 19: Mechanical Safety Devices And Electrical Parts
ALWAYS wear gloves that can resist cuts or tears when cleaning, lubricating or sharpening the blade. Intermittent service • ONLY for “F 195” version) 5 min. pause every 15/20 min. of work. • All the other machines have a ventilated motor. -
Page 20: Technical Specifications
F 300 E - F 300 EL F 300 CL - F 300 I - F 330 I F 350 I - F 370 I F 195 * S 220 F 250 ES F 195 AF * S 220 AF F 250 R (mm) (mm) (mm) - Page 21 TECHNICAL SPECIFICATIONS F 195 - S 220 F 250 ES - F 195 AF S 220 AF - F 250 R F 250 E - F 250 I - F 275 E F 275 I - F 275 IL - F 300 R...
- Page 22 TECHNICAL SPECIFICATIONS F 195 - S 220 F 250 ES - F 195 AF S 220 AF - F 250 R F 250 E - F 250 I - F 275 E F 275 I - F 275 IL - F 300 R...
- Page 23 TECHNICAL SPECIFICATIONS F 250 TSV - F 250 TCV F 300 TSV R F 300 TCV R - F 300 TSV F 300 TCV - F 330 TSV F 330 TCV - F 350 TSV F 350TCV - F 370 TSV F 370 TCV F 370 I F 250 TSV F 250 TCV F 300 TSV R F 300 TCV R F 300 TSV (mm)
- Page 24 TECHNICAL SPECIFICATIONS F 250 TSV - F 250 TCV F 300 TSV R F 300 TCV R - F 300 TSV F 300 TCV - F 330 TSV F 330 TCV - F 350 TSV F 350TCV - F 370 TSV F 370 TCV F 300 TCV F 330 TSV F 330 TCV F 350 TSV F 350 TCV F370 TSV (mm)
- Page 25 TECHNICAL SPECIFICATIONS F 250 TSV - F 250 TCV F 300 TSV R F 300 TCV R - F 300 TSV F 300 TCV - F 330 TSV F 330 TCV - F 350 TSV F 350TCV - F 370 TSV F 370 TCV F 370 TCV (mm)
-
Page 26: Main Components
MAIN COMPONENTS 3b 5 9 12 Fig. 3... - Page 27 1. Base 12. Product grip handle 2. Adjustable feet 13. Product grip handguard 3a. Startup button “I” 14. Tray handguard protection 3b. Switch “0/I” 15. Product tray handle 4. “STOP” “0” button 16. Blade plate tie-rod 5. Machine running warning light 17.
-
Page 28: Installation And Preliminary Checks
INSTALLATION AND PRELIMINARY CHECKS .1 - Installation .3 - Control of operation and blade rotation direction Place the slicer on a well leveled, smooth, dry and stable plane ,suitable to support • Depending on the model, press the its weight. green button “I”... - Page 29 Fig. 5 • Three-phase supply slicer: • Check the product tray (8) and the if the blade (11) rotates in the opposite product grip (10) smoothness. direction, immediately stop the machine by pressing the “0” button • Check the control knob (6) and the (4) or by turning the switch (3b) gauge plate (17) functioning and anticlockwise on “0/OFF”...
-
Page 30: Using The Machine
USING THE MACHINE .1 - Loading the product on the .2 - Slicing the products tray • Check that the slice thickness control • Adjust the slice thickness with the knob knob (6) is correctly placed on “0”. (6). • Draw the tray back completely (towards •... -
Page 31: Cleaning The Slicer
CLEANING THE SLICER • When the processing is over, remove the waste residuals from the collector surface (19). The machines must be accurately cleaned after use. After a shorter or longer period of inactivity clean the slicer before use. WARNING: Cutting hazard! Use protective cut- and tear-resistant gloves and perform all operations with extreme care. - Page 32 “EXTRA CE” version “CE HOUSEHOLD USE” version • The product tray (8) can be easily • The machines are equipped with a r e m o v e d b y u n s c r e w i n g t h e irremovable cap nut, as requested by corresponding support (7) placed under the European standard.
- Page 33 .3 - Cleaning the blade Fig. 8 • Press on the blade with a wet cloth (11) slowly rubbing moving from the inside to the outside (towards the gauge plate “17”). ALWAYS perform the blade cleaning (11) when the gauge plate (17) is close to the blade in safety position.
-
Page 34: Maintenance
MAINTENANCE .1 - Generalities In addition to the cleaning operations described in the previous paragraphs, it is necessary to perform some periodic maintenance operations to guarantee the slicer efficiency over time. The maintenance interventions allowed to the user are the following: •... -
Page 35: Performing The Sharpening
MAINTENANCE .2 - Blade sharpening Accurately clean the machine as indicated in the previous paragraphs before proceeding with the operations. The sharpening can be performed until a decrease of 12 mm of the blade diameter nominal value. Beyond this value IT IS MANDATORY TO REPLACE THE BLADE, entrusting the operation EXCLUSIVELY to personnel authorized by the manufacturer. - Page 36 • Remove the sharpener from the supplied bag. • Unscrew the knurled knob (23) and insert the threaded metallic pin in the hole (y) (specifically prepared on the product tray “8”). • Make sure that the two emery-wheels (x - x1) are pointed towards the blade to be sharpened, easing the operation by pressing on the lower wheel “x1”...
- Page 37 • The lower wheel (x1) will have to remain inserted for almost half of its diameter between the blade, on which it will lean, and the regulator plane. • Insert the plug in the power socket and start the blade (with the appropriate command) while keeping the product tray (8) (and the sharpener) still through the handle (15).
- Page 38 PERFORMING THE SHARPENING .2 - Versions with built-in sharpener WARNING: Cutting hazard! Use protective cut- and tear- resistant gloves and perform all operations with extreme care. PAY ATTENTION AT ALL TIMES ! For the blade sharpening to be performed periodically as soon as a decrease in the cutting capacity is felt, it necessary to observe the following instructions: 1.
- Page 39 PERFORMING THE SHARPENING 3. Start the switch (1) and press the button (x2); 4. Let the blade rotate for about 30/40 seconds, then stop the blade by operating the switch (1) and, with a slight shift (using a pencil) to the outside of the blade, check if some burr has formed;...
-
Page 40: Lubrication
PERFORMING THE SHARPENING 6. After completing sharpening, we 7. Return the sharpener to its original advise cleaning the wheels using a position after the sharpening small brush soaked in alcohol; operation. LUBRICATION .1 - Tray sliding guides and product grip sliding rod (weekly) ☞... -
Page 41: Motor Belt Tension Adjustment
MOTOR BELT TENSION ADJUSTMENT When, after a given time, the slicer emits an unusual noise because of the belt adjustment (30), proceed as follows: • Disconnect the plug from the power socket. • Lift the slicer and place it on its side (figure “24”). ☞... -
Page 42: Taking The Slicer Out Of Service
TAKING THE SLICER OUT OF SERVICE .1 - Correct procedure A machine compromises: • Aluminium-alloy frame. • Stainless-steel inserts and components. • Electrical parts and electrical cables. • Electrical motor • Plastics, etc. When commissioning third parties to perform dismantling and demolition, only businesses authorised to dispose these materials should be employed. -
Page 43: Troubleshooting
TROUBLESHOOTING • The following information are intended to aid in identifying and correcting defects and faults that may occur during use of the machine. ☞ Some failures can be resolved by the user; others require precise technical skills or special skills, and must be carried out by qualified personnel with recognized expertise and experience in the specific area of intervention. -
Page 44: Note To User
PROBLEM CAUSES SOLUTIONS Pressing the green or Defective indicator. Do not use the machine with white button will start the light indicator off; promptly machine, but the operation c o n s u l t t h e c u s t o m e r light will not turn on. -
Page 45: Electrical Diagrams
= Brown Only for personnel authorized by the manufacturer = Blue ELECTRICAL SCHEME CE DOM for versions: F 195 - S 220- F 250 R - F 250 E - F 275 E - F 300 R Condenser Tilting switch MOD.195 MF. - Page 46 = Brown Only for personnel authorized by the manufacturer = Blue - F3 ELECTRICAL SCHEME EXTRA CE for versions: F 195 - S 220- F 250 E - F 275 E - F 300 R Tilting bipolar switch MOTOR Condenser MOD.195 MF 6,3...
-
Page 47: Spare Parts
Spare parts... - Page 48 - F300R - F300...
- Page 49 F300R F300R...
- Page 51 F250I / F275I F300E / F275IL F300EL...
- Page 59 Ed.11/2013 Ed.11/2013 F250 TS-V F250 TS-V F300 TS-VR F300 TS-VR...
- Page 61 Ed.11/2013 Ed.11/2013 F250 TC-V F250 TC-V F300 TC-VR F300 TC-VR...
- Page 62 BASE F300 TSV F350 TSV...
- Page 63 GUIDES F300 TSV F350 TSV...
- Page 64 BLADE F300 TSV F350 TSV...
- Page 65 PRODUCT GRIP F300 TSV F350 TSV...
- Page 66 BLADE PLATE F300 TSV F350 TSV...
- Page 67 ELECTRICAL PARTS F300 TSV F350 TSV...
- Page 68 SHARPENER F300 TSV F350 TSV...
- Page 69 PRODUCT TRAY For vers. 350 For vers. 300 F300 TSV F350 TSV...
-
Page 70: Moca Declaration
ORIGINAL EN LENGUA ITALIANA MOCA DECLARATION DECLARACIÓN MOCA DECLARATION OF CONFORMITY OF THE MATERIALS AND OBJECTS DESTINED TO COME INTO CONTACT WITH FOOD PRODUCTS DECLARACIÓN DE CONFORMIDAD DE LOS MATERIALES Y DE LOS OBJETOS DESTINADOS A ENTRAR EN CONTACTO CON LOS PRODUCTOS ALIMENTARIOS 1. - Page 71 ORIGINAL EN LENGUA ITALIANA To perform the analysis, a specimen was put into contact with 5000 ml of water simulant for 2 hours at 40°C at third contact. Para efectuar el análisis un ejemplar se ha puesto en contacto con 5000 ml de simulante de agua Aluminium was searched for on the simulant coming from the contact using the ICP-MS technique.
- Page 72 ORIGINAL EN LENGUA ITALIANA For slicer models with details in olive wood, the following tests were performed: Para los modelos de cortadoras con detalles realizados en madera de olivo, se han realizado las Screening of inorganic compounds in materials in contact with the foodstuffs siguientes pruebas: with the purpose of detecting and quantifying the molecules extractable from the sample by contact Cribado de compuestos inorgánicos en materiales en contacto con alimentos...
- Page 73 ORIGINAL EN LENGUA ITALIANA MOCA DECLARATION DECLARACIÓN MOCA DECLARATION OF CONFORMITY OF THE MATERIALS AND OBJECTS DESTINED TO COME INTO CONTACT WITH FOOD PRODUCTS DECLARACIÓN DE CONFORMIDAD DE LOS MATERIALES Y DE LOS OBJETOS DESTINADOS A ENTRAR EN CONTACTO CON LOS PRODUCTOS ALIMENTARIOS 1.
- Page 74 ORIGINAL EN LENGUA ITALIANA Since the value detected is lower than the QM(t) value, the slice is deemed compliant. Dado que el valor detectado es inferior al valor de QM(t), el producto cortado debe considerarse TEST CONDITIONS conforme. MIGRATION IN WATER MIGRATION IN OIL CONDICIONES DE PRUEBA Met.: BS EN 1186:2006...
- Page 75 ORIGINAL EN LENGUA ITALIANA For slicer models with details in olive wood, the following tests were performed: Para los modelos de cortadoras con detalles realizados en madera de olivo, se han realizado las Screening of inorganic compounds in materials in contact with the foodstuffs siguientes pruebas: with the purpose of detecting and quantifying the molecules extractable from the sample by contact Cribado de compuestos inorgánicos en materiales en contacto con alimentos...
-
Page 77: Declaration Of Conformity
Manufacturer: Declaration of conformity CE HOUSEHOLD USE The undersigned………………, legal representative of the Company………………… based in……………………………………………………….., and person authorized to compile the technical file, declares that the SLICER Version:_______________________ Serial N.:_______________________ Year:__________ complies, where applicable, with the following protection directives: Directive 2014/35/EU (Low Voltage Directive BT) Directive 2014/30/EU (Electromagnetic Compatibility EMC) 1935/2004/EEC Regulation on materials and articles intended to come into contact with food products... - Page 78 03/2019...
- Page 79 Nr. iscrizi. Reg. Imprese VA 00358980126 Capitale Sociale Euro 51.480,00 I.V. CE HOUSEHOLD USE The undersigned Fabio Mussi, legal representative of the Manufacturer Company FAC srl based in via Morazzone 137 - 21044 Cavaria (VA) Italy, and person authorized to compile the technical file,...
- Page 80 AF FE T TA TRI CI A G RA VITA’ C E P ROFE SSIONAL I F 195 - S 220 - F 250 ES S 220 AF - F 250 E - F 250 I - F 275 E - F 275 I - F 275 IL F 300 R - F 300 E - F 300 EL - F 300 CL - F 300 I - F 330 I - F 350 I - F 370 I ISTRUZIONI PER L’USO E LA MANUTENZIONE...
Need help?
Do you have a question about the F 195 and is the answer not in the manual?
Questions and answers