Table of Contents
Advertisement
Quick Links
Advertisement
Table of Contents

Subscribe to Our Youtube Channel
Related Manuals for ATEN IOGear GWHDMS52


Summary of Contents for ATEN IOGear GWHDMS52
- Page 1 User Manual Wireless 5x2 HD Matrix GWHDMS52 PART NO. M1229 www.iogear.com...
-
Page 3: Table Of Contents
Table of Contents Important Information Introduction Package Contents Requirements Overview Hardware Installation Step 1: Setup the Transmitter Step 2: Setup the Receiver Step 3: Setup the IR blaster extender cable and IR sensor extender cable Step 4: Mounting the Receiver to a Wall (Optional) Basic Operation Advanced Operation Naming the Input Source Devices... -
Page 4: Important Information
Important Information Please take the time to read this user manual • Power cord: Be sure the power cord is before using the Transmitter and Receiver. routed so that it will not be stepped on or It contains important information about pinched by heavy items operating your Full HD video wireless kit. - Page 5 Special Notice System Warning FEDERAL COMMUNICATIONS • Never use this product nearby an COMMISSION INTERFERENCE STATEMENT aircraft or medical facility. It can cause This equipment has been tested and found interference or undesirable effect on the to comply with the limits for a Class B digital operation result device, pursuant to Part 15 of the FCC • Use of this product in the following...
- Page 6 CAUTION: Industry Canada Statement Using the System in the US This device complies with RSS-210 of the • Any changes or modifications not Industry Canada Rules. Operation is subject expressly approved by the grantee of this to the following two conditions: (1) This device device could void the user’s authority to may not cause harmful interference, and (2) operate the equipment.
- Page 7 will be responsible for re-evaluating the utilisateurs, le type d’antenne et son gain end product (including the transmitter) doivent être choisis afin que la puissance and obtaining a separate Canada isotrope rayonnée équivalente (PIRE) ne authorization. dépasse pas ce qui est nécessaire pour une communication réussie. French translation: Ce dispositif est conforme à...
-
Page 8: Introduction
Introduction IOGEAR’s GWHDMS52 Wireless 5 x 2 HD Matrix is the first to send Full uncompressed HD 1080p, connects up to 5 source devices and allow you to switch and independently select any source between 2 HDTVs. The wireless matrix feature is the biggest breakthough in wireless AV solutions today. This means you can watch cable TV in the living room while independently select a Blu-ray movie to watch in the bedroom at the same time. -
Page 9: Overview
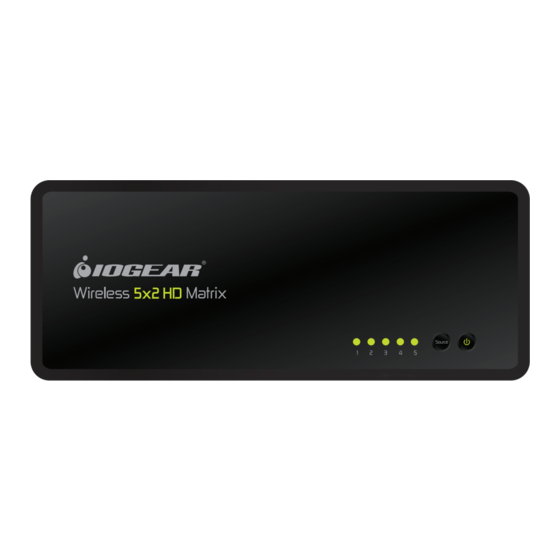
Overview Transmitter Top view 3. Power Button with LED Indicator 1. Source LEDs Press to turn the transmitter on/off. The These LED indicators are lit in solid green indicator in the power button is lit in solid to show current input green when the power is on, and turns 2. - Page 10 Receiver Top view 1. Power Button with LED indicator 3. Video status LED Press to turn the receiver On and Off. The For video input status indication. Please indicator in the power button lights up in refer to page 19, section 7 for the detailed green when the power is on, and turns information.
- Page 11 Remote Control 1. POWER ON / POWER OFF Buttons Press Power ON to turn the Transmitter & Receiver ON. Press Power OFF to turn the Transmitter & Receiver OFF. When both Transmitter & Receiver Power LEDs are red, press Power ON to the Receiver to wake-up both the Receiver and Transmitter automatically.
-
Page 12: Hardware Installation
Hardware Installation Step 1: Setup the Transmitter Connect up to 5 Audio / Video Source Devices and a HDTV to the transmitter: Home PC IR Blaster HD Projector or HD Flat Panel TV HD Gaming Box Blu-ray Player HD Cable Box 1. -
Page 13: Step 2: Setup The Receiver
Step 2: Setup the Receiver HDTV Connection with receiver: HD Projector or HD Flat Panel TV 1. Connect the supplied mini USB power 3. Connect an HDMI cable to the HDMI OUT adapter to the DC IN jack of the receiver jack of the receiver and to the HDMI-IN and a wall socket. -
Page 14: Step 3: Setup The Ir Blaster Extender Cable And Ir Sensor Extender Cable
Step 3: Setup the IR blaster extender cable and IR sensor extender cable The IR relays infrared commands from your remote control to your device. Users can control their AV devices by pointing their remote control to the receiver or IR sensor extender cable. -
Page 15: Step 4: Mounting The Receiver To A Wall (Optional)
Step 4: Mounting the Receiver to a Wall (Optional) 1. Refer the drawing at right that has relative position of the main holes that will be needed to be drilled into the wall. 2. Drill two 1/4” pilot holes. 3. Insert the supplied two Anchors into the wall. -
Page 16: Basic Operation
Basic Operation 1. After the power adapter is plugged into the electrical outlet, the device will turn ON automatically. 2. If the receiver is in Standby mode (POWER LED on the receiver is lit in red), press the POWER button ON to the receiver and then transmitter and receiver will establish link automatically. - Page 17 4. During warm-up, the transmitter’s Power LED and the receiver’s wireless status LED will blink green until the signal link between the transmitter and the receiver is established. It will take approximately 15 ~ 20 seconds for system to fully boot-up successfully. 5.
- Page 18 6. When the GWHDMS52 is first powered on, the input default is set to Source 1. Note that any time a source input is switched, it will take approximately 15 ~ 20 seconds for the image to appear. There are 3 ways to switch between connected source devices as follows: A. Press the SOURCE button on the top of the receiver or transmitter to switch the source inputs until you see the desire video program being broadcasted from your source device.
- Page 19 7. If operation is normal, the POWER/Wireless status LED and Source Status LED will glow in solid green. Please refer to the LED status table below that contains detailed LED indicator and OSD descriptions for the transmitter and receiver: Tx / Rx Status Item / Mode Power...
- Page 20 E. On Screen Display (OSD) vs. Remote Control Instruction (1) In Active mode, press the POWER (4) Press the IR button and then the “Up” button on the top of receiver or and “Down” keys on the remote control to transmitter or press the remote change the IR Blaster frequency.
- Page 21 8. USB HID Setup Instructions You can conveniently control your computer connected to the transmitter from the receiver side wirelessly via the GWHDMS52 USB connections. (1) Transmitter – Using a Mini USB to USB Type A USB cable, Plug the mini USB side into the transmitter and the USB type A into the computer you wish to control.
-
Page 22: Advanced Operation
Advanced Operation Naming the Input Source Devices 1. Press and hold the Source button on the top of transmitter for over 3 seconds. A source naming OSD will appear on the screen: CHANGE SOURCE NAME NAME= HDMI1 2. The current source input may be named by pointing the remote control Moves the cursor at the transmitter and using the remote... -
Page 23: Pairing New Transmitter With Existing Receiver (Optional)
Pairing new transmitter with existing receiver (optional) Enter the Pairing mode for transmitter: 1. Unplug Power Adapter from the transmitter. 2. Press and hold down the Power button on the transmitter. 3. Plug in Power adapter to the transmitter. 4. Keep holding down the Power button on the transmitter until the power LED is blinking orange indicating that the transmitter has entered the Pairing mode. -
Page 24: Multiple Transmitter Selection
Multiple Transmitter Selection 1. Verify that the power is removed from Transmitter 1. Press Transmitter No. key on the remote control and point it at Receiver 1. OSD Displays: Select Transmitter Number: → GWHDMS52 → GWHDMS52 SETUP Up to 4 transmitters may be detected. Press up / down and OK button on remote control for selection. - Page 25 Once Transmitter 2 and Receiver 1 are connected and video is displayed, you may apply power to Transmitter 1. Receiver 1 will now see 2 transmitters and can be selected via the Transmitter No. button on the remote control. To add Transmitter 3 and 4, repeat steps 1 ~ 4.
-
Page 26: Supported Resolution
Supported Resolution If the SOURCE LED continues to blink in green (slower than “no signal” mode); OSD display: , and there is no video displayed or the video quality suffers, it indicates that the video frame rate from your A/V source device is not supported. Ensure that the consumer timing of your HDMI device is compliant with the standard listed below: 2D Video Format Timings Resolution... -
Page 27: Audio Bit Rate Support
If the Source/Status LED continues to blink green (slower than “no signal” mode); or OSD display shows , please check that both TVs connected to the transmitter and receiver support 3D video format and try to switch the 3D video format to one of the 3D timings listed below. -
Page 28: Specifications
Specifications Supported Video HDMI Input 3D, 1080p, 1080i, 720p, 576p, 480p Resolutions Component Input 1080i, 720p, 576p, 576i, 480p, 480i Supported Audio Digital Audio Up to 6 Mbps AC3 and DTS Formats Analog Audio 48KHz and 24-bit Per Sample Transmission Distance The maximum video transmission range is100ft (The minimum range is 6.5ft). -
Page 29: Troubleshooting
Troubleshooting 1. Problem: The power indicator LED doesn’t light up. Solution: Check the power adapters of the Transmitter/Receiver to see if they are properly inserted into a functioning power outlet. 2. Problem: No video is displayed on your TV screen. Solution: • Verify that the proper cables have been selected and installed between the transmitter input and your High-Definition device output... - Page 30 Problem: No audio Solution: • Check your TV’s volume is properly set and not set in “MUTE” mode. • Check if your source player’s audio volume has been turned up.. • Ensure the bit rate of audio from the source device can be supported by GWHDMS52.
-
Page 31: Federal Communications Commission (Fcc) Statement
Federal Communications Commission (FCC) Statement The user is cautioned that this device should be used only as specified within this manual to meet RF exposure requirements. Use of this device in a manner inconsistent with this manual could lead to excessive RF exposure conditions. Limited Warranty WE’RE HERE TO HELP YOU! NEED ASSISTANCE SETTING UP THIS PRODUCT? Make sure you: 1. - Page 32 ©2013 IOGEAR ®...
Need help?
Do you have a question about the IOGear GWHDMS52 and is the answer not in the manual?
Questions and answers