Table of Contents
Advertisement
Quick Links
Advertisement
Table of Contents

Related Manuals for ATEN VP1420


Summary of Contents for ATEN VP1420
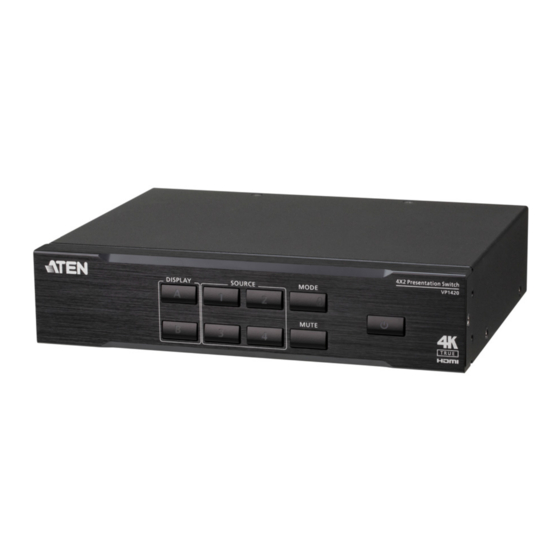
- Page 1 4 x 2 True 4K Presentation Matrix Switch VP1420 / VP1421 User Manual www.aten.com...
-
Page 2: Emc Information
VP1420 / VP1421 User Manual EMC Information FEDERAL COMMUNICATIONS COMMISSION INTERFERENCE STATEMENT: This equipment has been tested and found to comply with the limits for a Class A digital device, pursuant to Part 15 of the FCC Rules. These limits are designed to provide reasonable protection against harmful interference when the equipment is operated in a commercial environment. -
Page 3: User Information
VP1420 / VP1421 User Manual User Information Online Registration Be sure to register your product at our online support center: International http://eservice.aten.com Telephone Support For telephone support, call this number: International 886-2-8692-6959 China 86-400-810-0-810 Japan 81-3-5615-5811 Korea 82-2-467-6789 North America... -
Page 4: Package Contents
Make sure that all of the items are present and in good order. If anything is missing or was damaged in shipping, please contact your dealer for further assistance. VP1420 1 VP1420 4 x 2 True 4K Presentation Matrix Switch 1 IR Receiver 1 IR Remote Control ... -
Page 5: Table Of Contents
VP1420 ........ - Page 6 Audio Output ......... 38 Audio Input (VP1420) ........38 Audio Input (VP1421) .
- Page 7 VP1420 ........
-
Page 8: About This Manual
Remote Pad VPK104 4-Key Contact Closure Remote Pad Chapter 1, Introduction introduces you to the VP1420 / VP1421. Its purpose, features, benefits, and installation considerations are described. Chapter 2, Hardware Setup introduces the panel components of the 4 x 2 True 4K Presentation Matrix Switch and the IR Remote Control, and details the steps to quickly and safely install the VP1420 / VP1421. -
Page 9: Conventions
Indicates critical information. Product Information For information about all ATEN products and how they can help you connect without limits, visit ATEN on the Web or contact an ATEN Authorized Reseller. Visit ATEN on the Web for a list of locations and telephone numbers: International http://www.aten.com... - Page 10 VP1420 / VP1421 User Manual This Page Intentionally Left Blank...
-
Page 11: Introduction
(VP1420), HDBaseT Extender (VP1421), and audio DSP (VP1421) into one compact device. With the four analog/digital inputs to 2 HDMI True 4K outputs (VP1420) / 1 HDMI & 1 HDBaseT outputs (VP1421), the VP1420/ VP1421 is designed to boost the efficiency and impact of professional presentations. -
Page 12: Features
RS-232, and web-based GUI through Ethernet Supports standby mode for power saving and fast waking up Consumer Electronics Control (CEC) support Built-in contact in and LED out ports for keypad control using the ATEN VPK104 Contact Closure Remote Pad... - Page 13 VP1420 / VP1421 User Manual ATEN Control Box Media Player HDMI Audio VPK104 Contact Closure Remote Pad IR Recevier Active Speaker RS-232 Network Internet/ TV Box Laptop Blue-ray Player...
-
Page 14: Vp1421
Chapter 1. Introduction VP1421 Analog/Digital AV Matrix Supports 4 multi-format inputs – 2 HDMI, 1 HDBaseT, and 1 VGA inputs 1 HDMI and 1 HDBaseT outputs Audio embedding – stereo audio can be embedded into the display output or separated to stereo or optical audio outputs ... - Page 15 Long-distance transmission – transmit digital AV signal, bi-directional RS-232, and IR control signals up to 140 m via Cat 6/6a or ATEN 2L-2910 Cat 6 cables Note: This is achieved using the HDBaseT In and HDBaseT Out ports on the VP1421, each extending the transmission up to 70 m.
-
Page 16: Planning The Installation
Chapter 1. Introduction Planning the Installation Required Equipment Prepare the following equipment before installing the VP1420 / VP1421. VP1420 Up to 3 input devices equipped with HDMI and 1 input device equipped with a VGA port Up to 2 display devices each equipped with an HDMI port VP1421 ... -
Page 17: Optional Equipment
1 Ethernet cable to connect the VP1421 to a network switch for remote management via the web console 1 RS-232 serial controller or ATEN Control Box for RS-232 serial control 1 ATEN VPK104 Contact Closure Remote Pad for convenient operation ... - Page 18 Chapter 1. Introduction This Page Intentionally Left Blank...
-
Page 19: Hardware Setup
Chapter 2 Hardware Setup 1. Please review the safety information regarding the placement of this device in Safety Instructions, page 53. 2. Do not power on the VP1420 / VP1421 until all the necessary hardware is connected. Hardware Overview VP1420... -
Page 20: Rear View
Chapter 2. Hardware Setup Rear View Component Description Grounding Grounds the VP1420 to prevent damages from Terminal power surge or static electricity. Ethernet Port Connects to a network switch via an Ethernet cable to allow remote operation via the web console. -
Page 21: Vp1421
Press a pushbutton to select a source for the Pushbuttons focused display. The pushbutton for the selected source lights green. Power Pushbutton Used to power on/off the VP1420, or enable/ disable the standby mode. For details, see Power LED Indication, page 29. Mode Pushbutton ... -
Page 22: Rear View
Chapter 2. Hardware Setup Rear View 1 2 3 15 16 Component Description Ethernet Port Connects to a network switch via an Ethernet cable to allow remote operation via the web console. IR Receiver Port Connects to an IR receiver to receive IR signals from the IR remote control. - Page 23 VP1420 / VP1421 User Manual Component Description 15 Output/Display B Connects to an Rx device which in turn connected to a display device at a distance. 16 Grounding Grounds the VP1421 to prevent damages from Terminal power surge or static electricity.
-
Page 24: Ir Remote Control
Chapter 2. Hardware Setup IR Remote Control To operate the VP1420 / VP1421, insert the supplied IR Receiver to the IR Receiver Port on back panel of the device. No. Buttons Description On/Off Used to power on the VP1420 / VP1421 and enable/disable the standby mode. -
Page 25: Vpk104
VP1420 / VP1421 User Manual VPK104 Front View Component Description Source Selection Press a source selection button to put the source Buttons onto the set display*. The number on each button represents the source number at the rear of the VP1420 / VP1421. -
Page 26: Rear View
48.5mm Component Description LED In Port Connects to the LED Out port on the VP1420 / VP1421 to transmit and receive LED signals. Contact Out Port Connects to the Contact In port on the VP1420 / VP1421 to transmit and receive operation signals. -
Page 27: Mounting
VP1420 / VP1421 User Manual Mounting Rack Mount The VP1420 / VP1421 can be mounted on a 19” (1U) system rack. To conveniently access the front panel for local configuration and operation, mount the unit in a rack with the front panel facing outward. -
Page 28: Under Desk Mount
Chapter 2. Hardware Setup Under Desk Mount The VP1420 / VP1421 can be installed under a desk. To conveniently access the front panel for local configuration and operation, install the unit with the front panel facing forward. Note: The mounting kit required for this installation is not included in the package. -
Page 29: Installation
VP1420 / VP1421 User Manual Installation VP1420 Follow the steps below to safely install sources, displays, and other equipment to the VP1420. Media Player Medi i a Player Playe Internet/ 1. Use a grounding wire to ground the unit by connecting one end to the grounding terminal, and the other end to a suitable grounded object. - Page 30 8. (Optional) To allow access to the web interface, use an Ethernet cable to connect the unit’s Ethernet port to a network switch. 9. (Optional) To control the VP1420 using an IR remote control, connect the supplied IR receiver to the IR Receiver port.
-
Page 31: Vp1421
VP1420 / VP1421 User Manual VP1421 Follow the steps below to safely install sources, displays, and other equipment to the VP1421. Front View Media Player Medi i a Player Playe Play Rear View Internet/ VE802R VE802T 1. Use a grounding wire to ground the unit by connecting one end to the grounding terminal, and the other end to a suitable grounded object. - Page 32 Terminal Blocks. 7. (Optional) To configure the unit’s settings via RS-232 commands, connect a hardware controller, e.g. ATEN Control Box, to the RS-232 Serial Port using the provided 3-pole Terminal Block. 8. (Optional) To allow access to the web interface, use an Ethernet cable to connect the Ethernet port of the unit to a network switch.
-
Page 33: Vpk104
VP1420 / VP1421 User Manual VPK104 Follow the steps below to safely install the Remote Pad to the VP1420 / VP1421. Before you start, prepare 2 screws, 1 wall box, and some core wires. 1. (Optional) Prepare your installation site and install a Wall Box. - Page 34 Chapter 2. Hardware Setup 7. Cover the unit with the faceplate. Wall Box (not included) Faceplate...
-
Page 35: Local Operation
To ensure smooth operation using the IR remote control, use the IR remote control within the effective range (6 m) and keep a clear line-of-sight between the remote control and the IR receiver connected to the VP1420 / VP1421. Switching Sources To switch the video source on a display: 1. -
Page 36: Display Mode
Chapter 3. Local Operation Display Mode Understanding Display Mode The VP1420 / VP1421 supports the following display modes: Matrix mode ( ): When enabled, the AV sources can be configured separately, capable of showing different outputs. Mirror mode ( ): When enabled, display B uses the AV source assigned for display A and shows identical content. -
Page 37: Audio Settings
VP1421, use the MIC knob on the front panel. To mute all audio outputs (displays and speaker): For VP1420, press the Mute pushbutton/button. For VP1421, press the Volume knob on the front panel or press the Mute button on the IR remote control. -
Page 38: Panel Lock
Chapter 3. Local Operation Panel Lock To prevent accidental tampering of system settings via the front panel, you can lock the panel using the Mode pushbutton or set up an idle time for an auto lock via the web console (General > Panel Auto Lock). Refer to the table below for how to enable/disable the panel lock and the corresponding LED indication. -
Page 39: Power Led Indication
User Manual Power LED Indication The power pushbutton is equipped with an LED that indicates the power status of the VP1420 / VP1421. Refer to the table below for the status and supported tasks for each LED indication. LED Indication... - Page 40 Chapter 3. Local Operation This page is intentionally left blank.
-
Page 41: Remote Operation
192.168.0.1 HTTP Port Note: If the VP1420 / VP1421 is connected to a router that supports DHCP, a dynamic IP address will be assigned to the VP1420 / VP1421 as soon as it connects to the network. Look up the IP address by sending a read command via an RS-232 serial controller. -
Page 42: Supported Web Browsers
Chapter 4. Remote Operation Supported Web Browsers The VP1420 / VP1421 supports access to its web UI through the following web browsers and operating systems: Operating System Web Browser Supported Version Windows 10 x 64 Edge 40.15063.674.0 Windows 10 x 64 Firefox 64.0... -
Page 43: Logging In The Web Console
VP1420 / VP1421 User Manual Logging In the Web Console 1. In a web browser, type the IP address of the VP1420 / VP1421. This screen appears. 2. Type the username administrator and the password. 3. Click Log In. The main screen appears. -
Page 44: The Main Screen
Chapter 4. Remote Operation The Main Screen The VP1420 / VP1421 defaults to the main screen after logging in. Refer to the illustration and table below for an overview of the web console. Element Description Click the ATEN logo to visit ATEN’s official website. -
Page 45: General Settings
VP1420 / VP1421 User Manual General Settings The General page includes settings such as device name, panel lock, EDID, and login password. To access the general settings, log in the web console and the screen defaults to the page. - Page 46 Basic Name: Type a name for the VP1420 / VP1421. A valid name should be within 30 characters in length and contains no special characters. This name appears on the web console immediately after the model name: ...
-
Page 47: Audio & Video Settings
VP1420 / VP1421 User Manual Audio & Video Settings Audio Control To access the audio control page, log in the web console, and then go to Video & Audio > Audio. -
Page 48: Audio Output
VP1421: Sets the volume of display B. Audio Out VP1420: Mute or unmute the independent speaker connected to the Audio Out port. VP1421: Sets the volume of the independent speaker connected to the Audio Out port. -
Page 49: Apply Vs. Auto Apply
VP1420 / VP1421 User Manual Source: Sets the audio source for the HDBaseT source. To use the audio source that comes along with the video, select Digital Audio. To use the audio source from the independent audio source (connected to the Audio In port), select Embedded Audio In. -
Page 50: Video Control
Chapter 4. Remote Operation Video Control Use the video control page to assign video sources and configure video settings. To access the video control page, log in the web console, and then go to Video & Audio > Video. Display A / Display B: Shows a preview of the currently selected source and indicates the source number at the center of the preview. -
Page 51: Apply Vs. Auto Apply
VP1420 / VP1421 User Manual To switch the source for the display, click on one of the listed sources. The assigned source is highlighted green. To rename the source, click CEC: Consumer Electronics Control (CEC) allows for control of devices connected through HDMI ports to communicate with each other and makes the control of these devices using one remote control device possible. -
Page 52: System Settings
In the Support and Download tab, download a firmware file. 2. Log in the VP1420 / VP1421’s web console, and then go to System > Maintenance. 3. In the Firmware Upgrade section, click Browse File to select the firmware file that you downloaded, and then click Upgrade. -
Page 53: Backing Up System Settings
You can back up and export the VP1420 / VP1421’s configurations. This backup will not include the username and password settings. 1. Log in the VP1420 / VP1421’s web console, and then go to System > Maintenance. 2. Click Back Up. -
Page 54: Network Settings
IP address, subnet mask, gateway, and DNS to the VP1420 / VP1421. Manual: Select this option for the VP1420 / VP1421 to use a fixed IP address. Specify the IP address, subnet mask, and default gateway. Browser ... -
Page 55: Cli Commands
Setup 1. Connect a PC to the RS-232 Serial port on the VP1420 / VP1421 unit. 2. Download and install controller software that supports RS-232 serial control and the operation system of your controller PC. -
Page 56: Command Syntax
Chapter 5. CLI Commands Command Syntax The general form of a command is: command parameter<argument> {one|two|three} Notation Description The name of the command is shown in bold. command Indicates the name of the parameter. parameter Indicates the name of the value or the information that the user <argument>... -
Page 57: Command List
VP1420 / VP1421 User Manual Command List Port Numbers Interface Source Source No. Port Numbers VP1420 VP1421 HDMI HDBaseT Video Input HDMI HDMI HDMI HDMI HDMI HDMI Video Output HDMI HDMI Audio Input Stereo (VGA) Stereo (VGA) Stereo Audio Output... -
Page 58: Displaymode
Function Updates an RS-232 controller connected to the VP1420 / VP1421 when operations are made to the VP1420 / VP1421 via its front panel, web console, or telnet. Execute this function to keep the RS-232 controller in sync with the VP1420 / VP1421. -
Page 59: Mute
VP1420 / VP1421 User Manual remix: Set the VP1420 / VP1421’s EDID mode to remix with which the system sends the optimum EDID of the connected displays to the sources. default: Set the VP1420 / VP1421’s EDID mode to ATEN Default which sends ATEN-predefined EDID to the connected sources. -
Page 60: Read
Displays the system settings, including EDID mode, system firmware version, and network settings. Syntax read reset Function Resets the VP1420 / VP1421 to its default settings. Syntax reset Function Switches the specified source on the specified display. ... -
Page 61: Volume
VP1420 / VP1421 User Manual volume Function Configures the volume of a specified input/output port. This command is only supported by the VP1421. Syntax volume {i<input_port>|i sys|i*} v<volume_number> volume {o<output_port>|o sys|o*} v<volume_number> Parameters i<input_port>: Specifies an input port in two digits. - Page 62 Chapter 5. CLI Commands This Page Intentionally Left Blank...
-
Page 63: Appendix
Appendix Safety Instructions General This product is for indoor use only. Read all of these instructions. Save them for future reference. Follow all warnings and instructions marked on the device. Do not place the device on any unstable surface (cart, stand, table, etc.). If the device falls, serious damage will result. - Page 64 Appendix Do not allow anything to rest on the power cord or cables. Route the power cord and cables so that they cannot be stepped on or tripped over. If an extension cord is used with this device make sure that the total of the ampere ratings of all products used on this cord does not exceed the extension cord ampere rating.
-
Page 65: Rack Mounting
VP1420 / VP1421 User Manual Rack Mounting Before working on the rack, make sure that the stabilizers are secured to the rack, extended to the floor, and that the full weight of the rack rests on the floor. Install front and side stabilizers on a single rack or front stabilizers for joined multiple racks before working on the rack. -
Page 66: Technical Support
For telephone support, call this number: International 886-2-8692-6959 China 86-400-810-0-810 Japan 81-3-5615-5811 Korea 82-2-467-6789 North America 1-888-999-ATEN ext 4988 1-949-428-1111 North America Email Support support@aten-usa.com Online Technical Troubleshooting http://www.aten-usa.com/support Support Documentation Software Updates Telephone Support 1-888-999-ATEN ext 4988 When you contact us, please have the following information ready beforehand: ... -
Page 67: Specifications
VP1420 / VP1421 User Manual Specifications VP1420 Video Input Interfaces 3 x HDMI Type-A female (Black) 1 x VGA (HDB-15) female (Blue) Max. Distance HDMI: 4K@60Hz (4:4:4) up to 3m 4K@30Hz up to 10m 1080p@60Hz up to 15m VGA: ... - Page 68 Video Output Port 2 x Pushbuttons (LED: Orange) Selection Selection Mute: 1 x Pushbutton Mode/Unlock: 1 x Pushbutton EDID Mode ATEN Default, Display A, Remix Connectors Power 1 x DC jack (Black) Power Consumption DC 5V, 7.21W Environmental Operating Temperature 0 - 40°C...
-
Page 69: Vp1421 Specifications
HDBaseT: 4K@30Hz (4:4:4) up to 35m (Cat 5e/6) 4K@30Hz (4:4:4) up to 40m (Cat 6a or ATEN 2L-2910 Cat 6) 1080p @60Hz up to 60m (Cat 5e/6) 1080p @60Hz up to 70m (Cat 6a or ATEN 2L-2910 Cat 6) - Page 70 Video Output Port 2 x pushbuttons (LED: Orange) Selection Selection Mic: 1 x knob Volume: 1 x knob Mode/Unlock: 1 x pushbutton EDID Modes ATEN Default, Display A, Remix Connectors Power 1 x DC jack (Black) Power DC 12V: 14.93W Consumption Environmental...
- Page 71 VP1420 / VP1421 User Manual Operating 0 - 40°C Temperature Storage -20 - 60°C Temperature Humidity 0 x 80% RH, Non-Condensing Physical Properties Housing Metal Weight 1.16 kg (2.56 lb) Dimensions 20.00 x 17.01 x 4.40 cm (7.87 x 6.70 x 1.73 in)
-
Page 72: Limited Warranty
ATEN will provide a repair service, without charge, during the Warranty Period. If a product is detective, ATEN will, at its discretion, have the option to (1) repair said product with new or repaired components, or (2) replace the entire product with an identical product or with a similar product which fulfills the same function as the defective product.
Need help?
Do you have a question about the VP1420 and is the answer not in the manual?
Questions and answers
Vp1420 incorrect username and or password, can reset?
To reset the username and password for the ATEN VP1420, you need to reset the device to default settings:
1. Log in to the VP1420’s web console.
2. Go to System > Maintenance.
3. Click "Reset to Default."
This will reset all settings, including network settings, and restore the default login credentials:
- Username: administrator
- Password: password
Note: Passwords must be 5 to 6 characters long, not case-sensitive, with no spaces or special characters.
This answer is automatically generated