Table of Contents
Advertisement
Quick Links
Advertisement
Table of Contents

Related Manuals for BIONIME Rightest GM210


Summary of Contents for BIONIME Rightest GM210
- Page 1 Blood Glucose Monitoring System GM210 BIONIME CORPORATION 694, Renhua Road, Dali City, Taichung County, Taiwan 412 Tel: +886 4 24951268 Fax: +886 4 24952568 http: //www.bionime.com E-mail: info@bionime.com BIONIME GmbH USER’S MANUAL Tramstrasse 16, 9442 Berneck Switzerland GM210 0197...
- Page 2 Blood Glucose Monitoring System. Please read this manual your Bionime authorized representative or call us by phone number, 886 4 24951268 ( GMT+08:00, thoroughly before you start testing. It provides all the information you need to use the product. You 08:30~17:30 ).
- Page 3 Precaution Precaution - Before using the System to test your blood gluco se, please read all the instructions and Blood Glucose Meter hasn't been used for arterial blood testing yet, so it is still not practice the tests including quality control test. ( Refer to page 46.) suitable to be used for arterial blood testing so far.
-
Page 4: Table Of Contents
Table of Contents Table of Contents Review Your Test Memory About System Blood Glucose Monitoring System Recalling Your Test Result Meter Recalling Your Average Test Result Test Strip Quality Control Dummy Code Key About Quality Control Test Smart Code Key Performing a Quality Control Test Being Ready for Test Understanding Control Test Results... -
Page 5: The Blood Glucose Monitoring System
Blood Glucose Monitoring System Blood Glucose Monitoring System Package of Meter Kit 13. Two AAA Batteries ( not shown )* Your Blood Glucose Monitoring System consists of several items. Please identify each 14. Instruction for the lancing device ( not shown )* item of your system and learn what they're called and how they're used. -
Page 6: The Meter
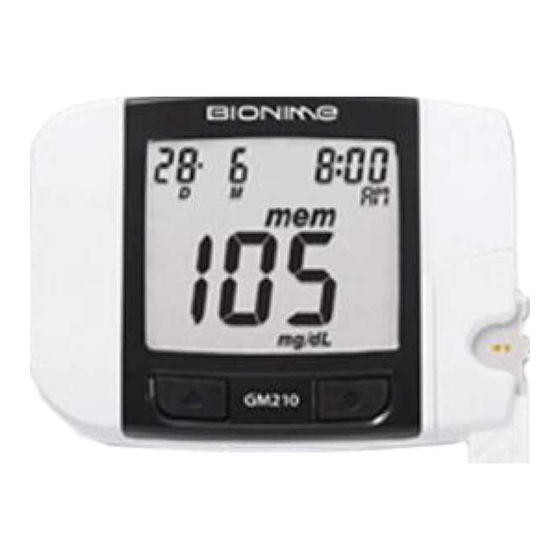
Meter Meter Display Window Show your test result, messages and relative information. Smart Code Key For calibrating your meter. New one comes with every boxof test strips. ( Refer to page 17 ) Contain the test strip port for inserting strip. Assemble Smart Code Key into code key base. - Page 7 Meter Meter Please follow the step ① and step ②. Model Number Meter Serial Number Smart Code Key Release Button Battery Cover Smart Code Key Base Press down to release and switch the Slide cover to change batteries. Assemble Smart Code Key here Smart Code Key.
-
Page 8: The Test Strip
Test Strip Test Strip Sample Entry Apply a drop of blood or control solution here. The test request is only 1.4µl of blood. Hand Bar Where you can easily hand the strip to do the test. The blood sample will be drawn into sample entry by capillarity automatically. -
Page 9: Dummy Code Key
Dummy Code Key Smart Code Key For package without test strip, not for package with test strip What is Smart Code Key ? A Dummy Code Key will be installed on the new meter in the Smart Code Key is designed for calibrating your meter to match the strips package without test strip. -
Page 10: Smart Code Key Installation
Smart Code Key Installation Smart Code Key Installation How to switch Smart Code Key ? 3. Push down the Smart Code Key until it snaps into the Smart Code Key base. Every new box of test strips should come with a Smart Code Key inside. Before you install the Smart Code Key, please check that the code number on the strip vial and the code number on the bottom of Smart Code Key should be the same. -
Page 11: Batteries Installation
Batteries Installation Batteries Installation Your meter kit comes with two AAA, 1.5volt, batteries uninstalled. New set of batteries will provide 4. Meter will do electronic running-test and the whole screen power to perform about 1000 tests under normal use. The low battery symbol " "... -
Page 12: Setting Up Your Meter
Setting Up Your Meter Setting Up Your Meter Entering Setting Mode Setting the Time, Date and Unit 1. Year setting You can enter Setting Mode by below two ways. With the year format blinking, press the " " button (left button) to adjust 1. - Page 13 Setting Up Your Meter Setting Up Your Meter 3. Day setting 6. Minute setting With the day blinking, press the " " button (left button) until the current With the minute blinking, press the " " button (left button) until the current day appears.
-
Page 14: Turning On/Off The Meter
Turning On/Off the Meter Function Screens and Button Operations 1. Auto Power Off Switching the Function Screens The Meter will power off automatically if you don't operate it for over 2 minutes. 1. Press the " " button (right button) to switch function screens including Memory, Average and Time in sequence. -
Page 15: Easily Handling The Test Strip
Easily Handling the Test Strip Easily Handling the Test Strip How to easily handle the test strip ? Removing the test strip: 1. Hold the test strip same as insert it. Inserting the test strip: 1. Hold the test strip between thumb and middle finger with indication symbol "... -
Page 16: Getting Ready For Testing
Getting Ready for Testing Performing a Test in Order Before performing a blood Each time of using a new box of test strip, you have to assemble the Smart Code glucose test, you have to Key from the new strip package. prepare the items below : Meter ( with Smart Code Key installed ) - Page 17 Performing a Test in Order Performing a Test in Order 4) Twist off and set aside the protective cover of the disposable lancet. Preparing your meter and strip 5) Replace the depth adjustable cap. 6) Choose a depth of penetration by rotating the top portion of the depth adjustable cap until the setting depth matches the window.
- Page 18 Performing a Test in Order Performing a Test in Order 5. While the " " symbol flashing, you are ready to apply the blood sample. The Obtaining blood sample code number will appear on the right up corner of the screen. 1.
- Page 19 Performing a Test in Order Performing a Test in Order 4. The minimum blood sample size of Glucose Monitoring System is 1.4µl :( ) Applying blood sample to test strip µl µl µl µl 4 µl Sample Size Example We suggest you to take 1.4~2.5µl to do the test on glucose monitoring system. Blood sample size above 4.0µl is too much which will contaminate the Smart Code Key.
- Page 20 Performing a Test in Order Performing a Test in Order View Window Appearance - To ensure accurate test results, make sure the code number on your meter matches the Make sure your blood sample covers code number highlighted on the vial of test strips you are using. the whole area of the View Window - Only place the blood drop to the sample entry of the strip.
-
Page 21: Comprehending Test Results And Messages
Performing a Test in Order Comprehending Test Results and Messages 3. The testing result with time and date is automatically stored in your If your blood glucose result is unusually high or low, or if you question your testing results, repeat meter's memory. -
Page 22: Recalling Your Test Result
Comprehending Test Results and Messages Recalling Your Test Result Meter displays results between 0.6 and 33.3 mmol/L or 10 meter is able to store 300 test results with time and date automatically. If your test and 600 mg/dL. If your test result is below 0.6 mmol/L ( 10 mg/dL ), " "... -
Page 23: Recalling Your Average Test Result
Recalling Your Test Result Recalling Your Average Test Result You can keep pressing " " button (left button) for 2 seconds to do fast meter provides you several average test results. You can view the 1-day, 7-day, 14- searching. If you want to switch the searching direction, keep pressing "... -
Page 24: About Quality Control Test
About Quality Control Test About Quality Control Test What is quality control test ? When should perform a quality control test ? - Before doing a blood glucose test with your meter for the first time. To make sure the monitoring system will work properly. It is necessary to do two kinds of quality - When you open and start using a new vial of test strips. -
Page 25: Performing A Quality Control Test
If error screen appears again, your meter is not working - Replace the vial cap of control solution and close tightly right away after using of control correctly. Please contact Bionime authorized distributor or Customer Service solution sample. - Page 26 Performing a Quality Control Test Performing a Quality Control Test Performing test with control solution PRECAUTION - Before you do control solution test, you have to do check key test first. 1. Please run check key test first. After see " "...
- Page 27 Performing a Quality Control Test Performing a Quality Control Test 8. When you hear a sound of " beep " , leave the meter on the table while waiting PRECAUTION the test result. The screen will show the countdown mode. - Your quality control test result by control solution test will not be calculated for average reading but still can be recalled.
-
Page 28: Understanding Control Test Results
Cleaning Smart Code Key exist, do not use the System to test your blood glucose. And contact Bionime authorized If your Smart Code Key is stained with blood, control solution or any liquid, please use a dry tissue or distributor or Bionime Customer Service. -
Page 29: Error Messages And Trouble Shooting
Please move the meter to environment with temperature between 10~40℃ The Smart Code Key is faulty or not assembled well to the meter. Reinsert the Smart ( 50~104℉ ) and redo the test after 30 minutes. Code Key. If the error screen appears again, contact Bionime Customer Service. -
Page 30: Limitations
- The glucose test may be interfered under abnormal concentration of If error screen still appears, contact Bionime Customer Service. Uric acid > 9.0 mg/dL ( > 0.54 mmol/L ) L - Dopa > 1.5 mg/dL ( > 0.076 mmol/L ) About Signal Error - Er3 Methyldopa >... -
Page 31: Specification
Specification Specification Hematocrit Measurement Technology 30 - 55% Oxidase Electrochemical Sensor Sample Capillary whole blood Power Supply Two 1.5V ( AAA ) batteries 1.4 microliter Minimum Sample Volume Battery Life About 1000 tests 10-600 mg/dL ( 0.6-33.3 mmol/L ) Measuring Range Meter Dimension 82.0 mm x 60.0 mm x 20.0 mm 8 seconds... -
Page 32: Warranty
You are always welcome to contact us by call: 886 4 24951268 ( GMT+08:00, 08:30~17:30 ), or by e-mail at info@bionime.com This warranty does not apply to the performance of a Meter that has been altered, If you have any question or advice. -
Page 33: Parts Of Critical Component
Blood Glucose Meter, Test Strip, Control Solution and Lancing Device Manufacturer: Bionime Corp. Product complied with In Vitro Diagnostic Medical Device Directive 98/79/EC. ( CE0197 ) EU Rep: BIONIME GmbH Tramstrasse 16, 9442 Berneck / Switzerland Disposable Sterile Lancets Manufacturer : SteriLance Medical (SuZhou) Inc. -
Page 34: Log Book
Log Book Log Book DATE DATE Blood Blood Glucose Glucose Breakfast Breakfast Insulin/ Insulin/ Medication Medication Blood Blood Glucose Glucose Lunch Lunch Insulin/ Insulin/ Medication Medication Blood Blood Glucose Glucose Dinner Dinner Insulin/ Insulin/ Medication Medication Blood Blood Glucose Glucose Bedtime Bedtime Insulin/... - Page 35 Log Book Log Book DATE DATE Blood Blood Glucose Glucose Breakfast Breakfast Insulin/ Insulin/ Medication Medication Blood Blood Glucose Glucose Lunch Lunch Insulin/ Insulin/ Medication Medication Blood Blood Glucose Glucose Dinner Dinner Insulin/ Insulin/ Medication Medication Blood Blood Glucose Glucose Bedtime Bedtime Insulin/...
- Page 36 Log Book Log Book DATE DATE Blood Blood Glucose Glucose Breakfast Breakfast Insulin/ Insulin/ Medication Medication Blood Blood Glucose Glucose Lunch Lunch Insulin/ Insulin/ Medication Medication Blood Blood Glucose Glucose Dinner Dinner Insulin/ Insulin/ Medication Medication Blood Blood Glucose Glucose Bedtime Bedtime Insulin/...
- Page 37 Log Book Log Book DATE DATE Blood Blood Glucose Glucose Breakfast Breakfast Insulin/ Insulin/ Medication Medication Blood Blood Glucose Glucose Lunch Lunch Insulin/ Insulin/ Medication Medication Blood Blood Glucose Glucose Dinner Dinner Insulin/ Insulin/ Medication Medication Blood Blood Glucose Glucose Bedtime Bedtime Insulin/...
- Page 38 Log Book Log Book DATE DATE Blood Blood Glucose Glucose Breakfast Breakfast Insulin/ Insulin/ Medication Medication Blood Blood Glucose Glucose Lunch Lunch Insulin/ Insulin/ Medication Medication Blood Blood Glucose Glucose Dinner Dinner Insulin/ Insulin/ Medication Medication Blood Blood Glucose Glucose Bedtime Bedtime Insulin/...
-
Page 39: Warranty Card
3. The sole obligation of Bionime under this warranty shall be to replace any defective Monitor. No other warranties, express or implied, are made. Bionime shall not be responsible for any incidental or consequential damages. 4. Activation of this warranty shall be conditioned upon completion and return of the warranty registration card to your local authorized Bionime distributor. -
Page 40: Emergency Card
Warranty Card Emergency Card Thank you for purchasing our product. Please complete and mail this warranty card within 30 days of purchase of your Blood Glucose Monitoring System. Name Male/Female Date of Birth Address City Country Postal Code Phone Number Healthcare Professional Who Recommended City Country...
Need help?
Do you have a question about the Rightest GM210 and is the answer not in the manual?
Questions and answers