Advertisement
Quick Links
Advertisement

Subscribe to Our Youtube Channel
Related Manuals for Elo TouchSystems Touch Solutions 1717L


Summary of Contents for Elo TouchSystems Touch Solutions 1717L
- Page 1 USER MANUAL Elo Touch Solutions 1517L and 1717L Touchmonitors SW601708 Rev E...
- Page 2 Elo to notify any person of such revisions or changes. Trademark Acknowledgments AccuTouch, CarrollTouch, Elo, Elo (logo), Elo Touch, Elo Touch Solutions, Elo TouchSystems, IntelliTouch, iTouch, SecureTouch, TouchTools and VuPoint are trademarks of Elo and its Affiliates. Windows is a trademark of Microsoft Corporation.
-
Page 3: Table Of Contents
Table of Contents Chapter 1: Introduction ................4 Chapter 2: Installation ................5 Chapter 3: Mounting ................. 7 Chapter 4: Operation ................12 Chapter 5: Technical Support ..............16 Chapter 6: Safety & Maintenance ............18 Chapter 7: Regulatory Information ............20 Chapter 8: Warranty Information ............ -
Page 4: Chapter 1: Introduction
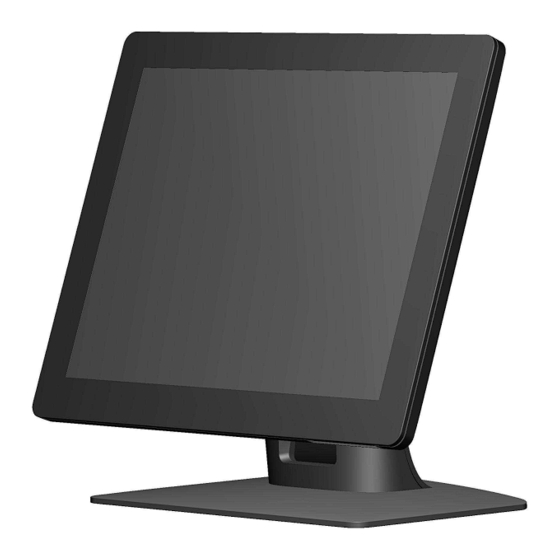
Chapter 1: Introduction Product Description Your new touchmonitor combines the reliable performance of Elo Touch Solutions touch products with the latest developments in touch technology and display design. This combination of features creates a natural flow of information between the user and the touchmonitor. This touchmonitor incorporates a 16.2M color, active matrix thin-film-transistor LCD panel to provide high quality display performance. -
Page 5: Chapter 2: Installation
Chapter 2: Installation Unpacking the Touchmonitor Open the carton and verify that the following items are present: • Touchmonitor with protective sheet over touchscreen • User Manuals CD • Japanese language regulatory information pamphlet • Quick Install Guide • VGA cable •... - Page 6 Connector Panel & Interfaces Touchmonitor Connections 1. Connect the VGA video cables between the monitor’s VGA input connectors and your VGA video source, respectively. Tighten the video cable’s screws for best performance. 2. Connect the USB/serial touch cable between the monitor’s USB/serial connector and your PC’s USB/serial port.
- Page 7 Installing the Touch Technology Software Drivers Some software installation is required for your touchmonitor to work with your computer. No additional drivers are required for your projected-capacitive touchmonitor, it uses Windows HID drivers. To download latest touch drivers 1. Visit www.elotouch.com/Support/Downloads/Driver/DriverDownload/Default.aspx 2.
-
Page 8: Chapter 3: Mounting
Chapter 3: Mounting Rear VESA Mount For the 15 inch touchmonitor, a four-hole 75x75mm mounting pattern for M4 screws is provided on the rear of the monitor. Remove the stand using a Phillips screwdriver to access this mounting interface. The VESA FDMI-compliant counting is coded: VESA MIS-B, 75, C. An optional filler plate is available for purchase separately to use with the VESA mount: E000404 (Black) E000420 (White) - Page 9 For the 17 inch touchmonitor, a four-hole 75x75mm mounting pattern for M4 screws is provided on the rear of the monitor. Remove the stand using a Phillips screwdriver to access this mounting interface. The VESA FDMI-compliant counting is coded: VESA MIS-B, 75, C. An optional filler plate is available for purchase separately to use with the VESA mount: E000405 (Black) E000421 (White)
- Page 10 Base Mount For the 15 inch touchmonitor, a threaded three-hole mounting pattern for M4 screws is provided on the bottom of stand base for mounting or securing. An additional two-hole pattern is available under small caps on the top of the base. See page 15 for instructions on how to access holes. For the 17 inch touchmonitor, a threaded three-hole mounting pattern for M4 screws is provided on the bottom of stand base for mounting or securing.
- Page 11 Both the 15” and 17” touchmonitors have covered mounting holes for securing the stand to a flat surface using M4 flathead screws. To utilize these mounting holes, unsnap the access covers from the outside, install the screws into the holes and then snap the cover back into place.
-
Page 12: Chapter 4: Operation
Chapter 4: Operation Power To turn the touchmonitor on or off, press the touchmonitor power button once. The Power Status LED on the bottom of the touchmonitor functions according to the following table: Touchmonitor status LED status SLEEP PULSING The system consumes low power when in SLEEP and OFF modes. For detailed power consumption specifications, refer to the technical specifications available on the Elo website www.elotouch.com. - Page 13 Video A display’s native resolution is its width and height measured in number of pixels. Generally, for best performance, an image displayed on this monitor will look best when your computer’s output resolution matches this monitor’s native resolution, which is 1024 x 768 for the 15 inch, or 1280 x 1024 for the 17 inch.
- Page 14 The OSD buttons control an on-screen graphical user interface, which displays on top of your input video. This allows for intuitive adjustment of the following display parameters: Parameter Available Adjustment Increase/decrease monitor brightness Brightness Default: Maximum Increase/decrease monitor contrast Contrast Default: Best gray-shade performance Allows fine adjustments of the panel’s pixel dot clock Clock...
- Page 15 Adjusts how long a period of OSD button inactivity the touchmonitor will wait before closing the OSD. The adjustable range is between 5 and 60 OSD Timeout seconds. Default: 15 seconds Selects which language the OSD information is displayed in. The available languages are: English, French, Italian, German, Spanish, Simplified OSD Language Chinese, Traditional Chinese, and Japanese...
-
Page 16: Chapter 5: Technical Support
Chapter 5: Technical Support If you are experiencing trouble with your touchmonitor, refer to the following suggestions. If the problem persists, please contact your local dealer or contact Elo Touch Solutions Customer Service. Solutions to Common Problems Problem Suggested Troubleshooting Check that the DC power adaptor is properly The touchmonitor does not respond when connected... - Page 17 Technical Assistance Visit www.elotouch.com/products for technical specifications for this device Visit www.elotouch.com/go/websupport for online self-help. Visit www.elotouch.com/go/contactsupport for technical support. See this user manual’s last page for worldwide technical support phone numbers. User Manual: 1517L, 1717L SW601708 Rev E, Page 17 of 25...
-
Page 18: Chapter 6: Safety & Maintenance
Chapter 6: Safety & Maintenance Safety To avoid risk of electric shock, follow all safety notices and do not disassemble the touchmonitor. They are not user-serviceable. Ensure that your installation is equipped to maintain the specified environmental conditions listed in the Technical Specifications chapter. Care and Handling The following tips will help keep your touchmonitor functioning at an optimal level: •... - Page 19 Waste Electrical & Electronic Equipment Directive (WEEE) This product should not be disposed of with household waste. It should be deposited at a facility that enables recovery and recycling. Ensure that product is disposed at the end of its useful life according to local laws and regulation. Elo has put in place recycling arrangements in certain parts of the world.
-
Page 20: Chapter 7: Regulatory Information
Chapter 7: Regulatory Information I. Electrical Safety Information: Compliance is required with respect to the voltage, frequency, and current requirements indicated on the manufacturer’s label. Connection to a different power source than those specified herein will likely result in improper operation, damage to the equipment or pose a fire hazard if the limitations are not followed. - Page 21 as required by EMC Directive 2004/108/EC as indicated in European Standard EN 55022 Class B and the Low Voltage Directive 2006/95/EC as indicated in European Standard EN 60950. General Information to all Users: This equipment generates, uses and can radiate radio frequency energy.
- Page 22 III. Agency Certifications The following certifications and marks have been issued or declared for this monitor: Australia C-Tick Japan VCCI United States FCC, Canada CUL, IC Korea KC China CCC Mexico CoC Europe CE Taiwan BSMI IV. China RoHS In accordance to Chinese law (Administration on the Control of Pollution Caused by Electronic Information Products), the section below lists out the name and amount of the toxic and/or hazardous materials that this product may contain.
- Page 23 Operating Temperature:0-40 / Humidity:20%-80% (non-condensing). Storage Temperature:-20~60 / Humidity:10%~90% (non-condensing). (2). It is encouraged and recommended that this product be recycled and reused according to local laws. The product should not be thrown away casually. V. Power Adapter Specifications Electrical Ratings: Input: 100-240VAC, 50/60Hz Output: 12VDC, minimum 4.16A, LPS VI.
-
Page 24: Chapter 8: Warranty Information
Chapter 8: Warranty Information for more information http://www.elotouch.com/Support/warranty.asp User Manual: 1517L, 1717L SW601708 Rev E, Page 24 of 25... - Page 25 Check out Our Website! www.elotouch.com Get the latest... • Product Information • Specifications • Upcoming events • Press releases • Software drivers Getting in Touch with us To find out more about the extensive range of Elo touch solutions, visit our website at www.elotouch.com, or simply call the office nearest you: North America Tel 800-ELO-TOUCH...
Need help?
Do you have a question about the Touch Solutions 1717L and is the answer not in the manual?
Questions and answers