Table of Contents
Advertisement
Quick Links
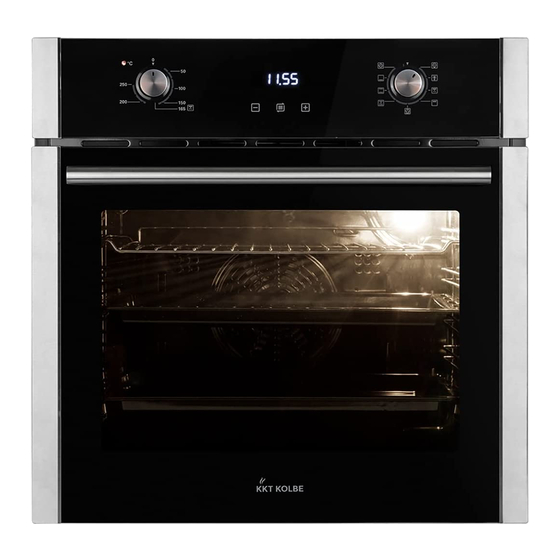
Service Manual For Built-in Oven
( EU Series electric oven)
Model list:
65C:65CME19xxx, 65CME10xxx,
65CNE19xxx, 65CNE10xxx
65D:65DME30xxx, 65DME31xxx, 65DME40xxx, 65DME41xxx,
EB8005ED, EB8010ED, EB8013ED,
65DNE30xxx, 65DNE31xxx,
EB8015ED, EB8015W, EB8016ED
65DEE30xxx, 65DEE31xxx, 65DEE40xxx, 65DEE41xxx,
65DTE40xxx, 65DTE41xxx, 65DTE42xxx,
65DAE30xxx, 65DAE40xxx, 65DAE41xxx, 65DAE42xxx
65E:65EAE40xxx, 65EAE41xxx, 65EAE42xxx
Warnings:
This service manual is not available to the general users, but only
applies to professional technicians with relevant qualifications. Any
incorrect maintenance may result in other dangers!
The power (and gas) supply must be cut off before maintenance!
A new power cord which meets the relevant technical requirements
must be used once possible hidden malfunctions are found with the
current power cord (refer to this Manual)!
Please read carefully all safety warnings in this Manual before
maintenance!
The product is prohibited from using until test is conducted as per
relevant regulations after maintenance!
This service manual applies to many models, so the specific
operations please prevail in kind!
- -
Model list:
V2.0
Dec, 2014
1
Advertisement
Table of Contents

Related Manuals for KKT KOLBE EU Series


Summary of Contents for KKT KOLBE EU Series
- Page 1 Service Manual For Built-in Oven ( EU Series electric oven) Model list: 65C:65CME19xxx, 65CME10xxx, 65CNE19xxx, 65CNE10xxx Model list: 65D:65DME30xxx, 65DME31xxx, 65DME40xxx, 65DME41xxx, EB8005ED, EB8010ED, EB8013ED, 65DNE30xxx, 65DNE31xxx, EB8015ED, EB8015W, EB8016ED 65DEE30xxx, 65DEE31xxx, 65DEE40xxx, 65DEE41xxx, 65DTE40xxx, 65DTE41xxx, 65DTE42xxx, 65DAE30xxx, 65DAE40xxx, 65DAE41xxx, 65DAE42xxx 65E:65EAE40xxx, 65EAE41xxx, 65EAE42xxx...
-
Page 2: Table Of Contents
Contents Precaution ...............................1 Safety Precaution ........................1 Precaution Warning ............................1 Safety Precaution Dimension..............................1 Warning Function ..............................2 Dimension Function adjustment ........................2 Function Temperature adjustment ......................2 Function adjustment Timer function ..........................3 Temperature adjustment Display introduction ........................3 Timer function Circuit diagram ............................4 Display introduction 65CME19xxx .......................... -
Page 3: Precaution
1. Precaution 1.1 Safety Precaution 1. To prevent injury to the user or other people and property damage, the following instructions must be followed. 2. Incorrect operation due to ignoring instructions will cause harm or damage. 3. Before maintenance, please read carefully the following instructions at first. Warning . -
Page 4: Function
3. Function 3.1 Function adjustment Rotate the knob to the related function position. (Model: 65CME\65CNE\65DME\65DNE\65DEE) (Model: EB8005ED, EB8010ED) Rotate the knob and watch the display, rotate it to the related function icon. (Model: EB8013ED) (Model: 65DAE\65EAE) Select the related function by touching control buttons. (Model: EB8015ED, EB8015W, EB8016ED) (Model: 65DTE) 3.2 Temperature adjustment... -
Page 5: Display Introduction
Rotate the knob to the expected timer position. (Model: 65CME\65DME) 3.3 Timer function Rotate the knob to the expected timer position. (Model: 65CME\65DME) Set the timer by the buttons. (Model: EB8005ED, EB8010ED) (Model: 65DEE) Set the timer by the buttons. (Model: 65DEE) Set the timer by the buttons。... -
Page 6: Eb8005Ed, Eb8010Ed
4. Cirquit diagramm 4.1 EB8005ED, EB8010ED 4.14 65DNE31xxx 4.7 65DEE40xxx 4.8 65DEE41xxx 4.19 65DAE40xxx 4.2 EB8015ED, EB8015W, EB8016ED 4.15 65DTE40xxx 4.9 65DME30xxx 4.3 EB8013ED 4.20 65DAE41xxx 4.21 65DAE42xxx... - Page 7 5. Installation 5.1 Preparation before installation 1 Assembly shall be refered to the measurements in the following specification after the package is removed. (The packing material shall be handled properly.) 2 Please use the handle boxes on the sides if the oven is required to be lifted or moved. It is prohibited from using door handle directly to lift the oven.
- Page 8 6. Disassembly 6.1 Tools Most of the tools that you might need are shown below. Some are optional. ELECTRICAL PLIERS or STRIPPERS : For cutting and stripping small electrical wire. VOM (VOLT-OHM METER): For testing electrical circuits. If you do not have one, please get one. An inexpensive one will suffice, as long as it has both "AC Voltage"...
- Page 9 6.2 Remove the oven from the cabinet WARNING: 1 Use a trolley to move the oven when installing it or removing it from the cabinet for service. Use a trolley will minimize the risk of personal injury as a result of the oven tipping.
- Page 10 6.3 Disassembly of oven door 6.3.1 Remove the door from oven Step 1: Open the door to the maximum angle and then pull backward the movable buckle of door hinge (as indicated in Fig ) to the other side (position as indicated in Fig ). Step 2: Hold the oven door and lift up (open the door 30°...
- Page 11 6.3.2 Disassembly of enamel door (Type: 2 layers of glass or 4 layers of glass) Step 1: Remove the door from oven (please refer to Point 6.3.1), and put it horizontally on the table. Step 2: Use a screwdriver to remove two screws on the bottom of the oven door. Step 3: Hold the bottom of the door by one hand on each side, lift it up until the door frame bottom edge releases from the door frame brackets.
- Page 12 Step 4: Use a screwdriver to remove the screws fixed the door handle, and disassemble the door handle. Step 5: Use a screwdriver to remove the screws fixed the hinges, and disassemble the hinges. Warning: Don’t try to use hard stuff forcibly to pull the hinges out, and shall be prevented glass smashing during the disassembly process.
- Page 13 6.3.3 Disassembly of flat door (Type: 2 layers of glass, 3 layers of glass or 4 layers of glass) Step 1: Remove the door from oven (please refer to Point 6.3.1), and put it horizontally on the table. Step 2: Hold the door by hand on the bottom side of the inner glass, push the inner glass down and pull the inner glass upward (See No.1, No.2 indicated in Fig), take the inner glass out (See No.3 indicated in Fig).
- Page 14 Step 4: Use a screwdriver to remove the screws fixed the door handle, and disassemble the door handle. Step 5: Use a screwdriver to remove the screws fixed the hinges, and disassemble the hinges. Note: When assemble the middle glass, please make sure the glass is put in the right place (See the following figure).
- Page 15 6.4 Disassembly of control panel 6.4.1 Remove the control panel from oven WARNING: 1 Turn off the electrical power supply to the appliance prior to servicing it. Failure to disconnect the power supply during service may result in an electrical shock or fire hazard.
- Page 16 6.4.2 Disassembly parts of Control panel Step 1: Remove the control panel from oven (please refer to Point 6.4.1), and put it horizontally on the table. Step 2: Pull the knobs out of the control panel assembly by hands. (Model: 65CME\65CNE\65DME\65DNE) Step 3: Use a screwdriver to remove the screws on control panel holder (on the back of knob decoration ring), remove the knob assembly by screwing it off the control panel holder.
- Page 17 Step 5: Use a screwdriver to remove the screws on the back of the control panel assembly. (Type: glass control pane appearance.) Step 6: Press the clips on both sides of the indicator, meanwhile rotate the indicator to the aligned position with the hole on the control panel holder, and pull the indicator out of the it (Model: EB8005ED, EB8010ED) (Model: 65CME\65CNE\65DME\65DNE\65DEE) Step 7: Use a screwdriver to remove the screws which fixed the electric components on...
- Page 18 6.5 Disassembly of back cover WARNING: Turn off the electrical power supply to the appliance prior to servicing it. Failure to disconnect the power supply during service may result in an electrical shock or fire hazard. Step 1: Disassemble the control panel cover and control panel back cover (please refer to Point 6.4.1 step 1).
- Page 19 6.6 Disassembly of convection motor, turbo heating element WARNING: Turn off the electrical power supply to the appliance prior to servicing it. Failure to disconnect the power supply during service may result in an electrical shock or fire hazard. Step 1: Remove the door from oven (please refer to Point 6.3.1), and put it horizontally on the table.
-
Page 20: Disassembly Of Top, Bottom Heating Element
Step 7: Disconnect the wires from the turbo heating element. For the sake of reassembly convenience, please mark the connection positions before moving the wires. Remove the screws on the turbo heating element, and then take it out of from clipping hole. Screw Clipping 6.7 Disassembly of top, bottom heating element... -
Page 21: Disassembly Of Cooling Fan Motor
6.8 Disassembly of cooling fan motor WARNING: 1 Turn off the electrical power supply to the appliance prior to servicing it. Failure to disconnect the power supply during service may result in an electrical shock or fire hazard. 2 Access the cooling fan motor requires that oven's control panel cover and control panel back cover were removed. -
Page 22: Disassembly Of Rotary Motor
6.10 Disassembly of rotary motor Step1: Disassemble the control panel cover and control panel back cover (please refer to Point 6.4.1 step 1). Step 2: Disassemble the back cover (please refer to Point 6.5). Step3: Disconnect wires on the rotary motor. For the sake of reassembly convenience, please mark the connection positions before moving the wires. -
Page 23: Disassembly Of Rail Bracket, Slider, Automatic Clean Fender
6.13 Disassembly of rail bracket, slider, automatic clean fender 6.12 Disassembly of rail bracket, slider, atomatic clean fender Step1: Remove the door from oven (please refer to Point 6.3.1), and put it horizontally on the table. Step2: Remove the screws connected the rail bracket and the cavity, and take it out from the clipping hole. -
Page 24: Troubleshooting
Troubleshooting Troubleshooting OPERATIONAL DIFFICULTIES AND POSSIBLE CAUSES OPERATIONAL DIFFICULTIES AND POSSIBLE CAUSES Symptom Cause / Source Troubleshooting Checks Solution User Actions / Solutions Symptom Cause / Source Troubleshooting Checks Solution User Actions / Solutions Oven is set for delay timed Oven will turn on automatically at Oven will turn on automatically at Oven will turn on automatically at... -
Page 25: Error Codes
8. Error codes Displayed Error code Description / Failure Criteria Software Logic Description Solution (1) Turn off the power, 1 minute later, Er-1 Temperature sensor open circuit All load stopped working turn on the power, checked whether display error code or not. (2) Turn off the power, open the oven Er-2 Temperature sensor short circuit...
Need help?
Do you have a question about the EU Series and is the answer not in the manual?
Questions and answers