Advertisement
1
Check your order to make sure that all parts are included:
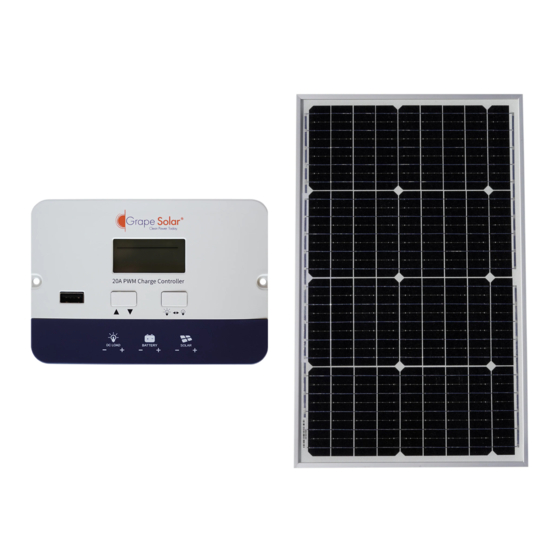
GS-PWM-20A Charge Controller
3x GS-STAR-50W Solar Panel
2x Branch Connector Set
5-Foot Ring-lug Red/ Black Cable Pair
Black 15-foot MC4 Cable
Additional tools and equipment you will need:
◦Screwdriver– Philips Head
◦12-Volt Deep-Cycle Battery Bank
2
Mount The Three 50-Watt Solar Panels so that they are facing due South at approximately the same angle as
your latitude. The ideal area has full sun and no shading. If the following connections are made during daylight,
cover the panel with cardboard, cloth, or a similar opaque material so that the panel does not put out power.
3
Connect the wire end of the red battery cable to the
"+BATTERY" terminal on the back of the GS-PWM-20A
charge controller . Connect the wire end of the 5-foot
black cable to the "-BATTERY" terminal. A Phillips head
screwdriver can be used to loosen and tighten the screw
clamps onto the wires.
Attach the ring lug end of the red cable to the positive
terminal of a 12V deep cycle battery. Attach the ring lug end
of the black cable to the negative terminal.
www.GrapeSolar.com
Tel. 1-877-264-1014 (toll free), 1-541-349-9000
150 Watt Off-Grid Charging Kit
(GS-150-KIT)
Quick Connect Guide
IMPORTANT: Please read GS-PWM-20A charge controller
owner's manual and GS-STAR-50W connection guide (both
included with products) before assembling kit.
For additional information about Grape Solar products:
email Support@GrapeSolar.com, or
call 1-877-264-1014 for live telephone support.
◦Wire Stripper/Cutter
◦Voltmeter (for Troubleshooting)
GS-150-KIT PHOTOVOLTAIC
POWER GENERATION SYSTEM
QUICK CONNECT GUIDE Rev. 210519
[
diagrams not to scale]
*
12V deep cycle battery
not included with kit
Document Version 210519
©Copyright 2021, Grape Solar, Inc.
Advertisement
Table of Contents

Subscribe to Our Youtube Channel
Summary of Contents for Grape Solar GS-150-KIT
- Page 1 IMPORTANT: Please read GS-PWM-20A charge controller owner’s manual and GS-STAR-50W connection guide (both included with products) before assembling kit. For additional information about Grape Solar products: email Support@GrapeSolar.com, or call 1-877-264-1014 for live telephone support. Check your order to make sure that all parts are included: ...
- Page 2 Proper fuses or breakers should be used to comply with all local and national codes. Contact Grape Solar for specific recommendations. All batteries used for this system should be identical. Do not mix battery types or sizes. Do not mix old batteries with new batteries.


Need help?
Do you have a question about the GS-150-KIT and is the answer not in the manual?
Questions and answers