Advertisement
Quick Links
Advertisement

Related Manuals for Gefen HDMI1.3-441


Summary of Contents for Gefen HDMI1.3-441
- Page 1 HDMI 1.3 4x1 Switcher U S E R M A N U A L www.gefen.com...
- Page 2 Chatsworth, CA 91311 www.gefen.com support@gefen.com Gefen Inc. reserves the right to make changes in the hard ware, packaging and any accompanying doc u men ta tion without prior written notice. HDMI 1.3 4x1 Switcher is a trademark of Gefen Inc.
-
Page 3: Table Of Contents
Introduction Features Panel Descriptions Connecting and Operating the HDMI 1.3 4x1 Switcher / Device Buttons RMT4-IR Installation IR Code Confl icts RS-232 Interface Specifi cations Warranty TABLE OF CONTENTS... -
Page 4: Introduction
HDMI cable to regenerate the HDMI signal. Our Commitment Gefen will always offer the fi nest quality product at the best possible price. Included in that price is a lifetime support from a team of outstanding engineers. -
Page 5: Features
FEATURES Features • Switches easily between any four HDMI 1.3 sources • Maintains 480i/p, 576i/p, 720p, 1080i, and 1080p resolutions • Maintains highest HDMI single link video resolution • Supports HDCP compliant devices • HDMI or DVI to HDMI cables are used to connect the inputs and switcher output •... -
Page 6: Panel Descriptions
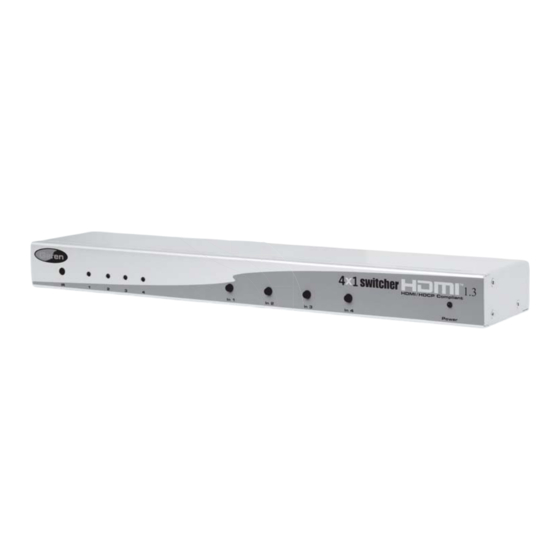
PANEL DESCRIPTIONS FRONT IR Eye Input Indicator Input 1 Input 3 Power Indicator LED’s Selector Selector Input 2 Input 4 Selector Selector BACK Input 1 Input 2 Input 3 Input 4 HDMI RS-232 Output Control Port 5VDC Power Supply Input IR Eye Extension Port... -
Page 7: Connecting And Operating The Hdmi 1.3 4X1 Switcher / Device Buttons
CONNECTING AND OPERATING THE HDMI 1.3 4x1 SWITCHER How to Connect the HDMI 1.3 4x1 Switcher to your devices 1. Connect the supplied cables from the HDTV HDMI sources into the HDMI 1.3 4x1 Switcher inputs. 2. Connect the cable from your display (monitor or projector) into the HDMI out of the HDMI 1.3 4x1. -
Page 8: Rmt4-Ir Installation
1. Remove battery cover from the back of the RMT4-IR remote. 2. Verify that dip switches 1 & 2 are in the down (OFF) position. 3. Insert the battery, hold the battery so that you can see the positive side facing up. The side that is not marked must be facing down. -
Page 9: Ir Code Confl Icts
Switch 1 on the remote is linked to switch 8 on the unit, and switch 2 on the remote is linked to switch 7 on the unit. There are 4 possible sets of IR codes and at least one of these sets should be able to resolve any IR confl icts with other home theater devices. -
Page 10: Rs-232 Interface
Binary Table ASCII Input Terminal Settings Bits per second ... 19200 Data bits ... 8 Parity ... None Stop bits ...1 Flow Control ... None RS-232 INTERFACE Binary 0011 0001 0011 0010 0011 0011 0011 0100... -
Page 11: Specifi Cations
SPECIFICATIONS Video Amplifi er Bandwidth ...340 MHz Input Video Signal ...1.2 volts p-p Input DDC Signal ...5 volts p-p (TTL) Single Link Range ...1080p/60 16 bit color depth, 1920x1200 HDMI Connector ...type A 19 pin female Remote Control Port ...RS232 female, mini-stereo Power Supply ...5V DC Power Consumption ...10 watts (max) Dimensions ...13.25”W x 1”H x 2.75”D...
Need help?
Do you have a question about the HDMI1.3-441 and is the answer not in the manual?
Questions and answers