Table of Contents

Related Manuals for Lumens VC-B30UAB


Summary of Contents for Lumens VC-B30UAB
- Page 1 VC-B30U PTZ Video Camera Installation Guide - English [Important] To download the latest version of Quick Start Guide, multilingual user manual, software, or driver, etc., please visit Lumens https://www.MyLumens.com/support...
-
Page 2: Table Of Contents
Table of Contents Copyright Information ..................3 Chapter 1 Safety Instructions ................4 Chapter 2 Package Contents ................6 Chapter 3 Product Overview ................7 Overview ..................... 7 Description of LED indicator ............... 8 System Requirements ................ 8 Chapter 4 Instruction for installation .............. 9 Preparation before installation ............ - Page 3 6.11 I would like to freeze images ............27 6.12 I would like to rotate the image ............27 6.13 I would like to change the camera direction ........27 6.14 I would like to display the current status .......... 27 6.15 I would like to reset to the original setting ........
-
Page 4: Copyright Information
Inc. Copying, reproducing or transmitting this file is not allowed if a license is not provided by Lumens Digital Optics Inc. unless copying this file is for the purpose of backup after purchasing this product. In order to keep improving the product, Lumens Digital Optics Inc. hereby reserves the right to make changes to product specifications without prior notice. -
Page 5: Chapter 1 Safety Instructions
Chapter 1 Safety Instructions Always follow these safety instructions when setting up and using the product: 1 Operation 1.1 Please use the product in the recommended operating environment. 1.2 Do not place the product in tilted position. 1.3 Do not place the product on an unstable trolley, stand or table. 1.4 Do not use this product near water or source of heat. - Page 6 4 Cleaning 4.1 Unplug all the cables before cleaning. Use a damp cloth for cleaning. Do not use liquid or aerosol cleaners. 5 Remote control (if the accessories are equipped with remote control) 5.1 Using an incorrect battery type in the remote control may result in breakdown.
-
Page 7: Chapter 2 Package Contents
Chapter 2 Package Contents Instruction for VC-B30U Remote Control installation Power Cord Power Adapter USB cable (USB 3.0) Appearance may vary depending on country/region HDMI cable English... -
Page 8: Chapter 3 Product Overview
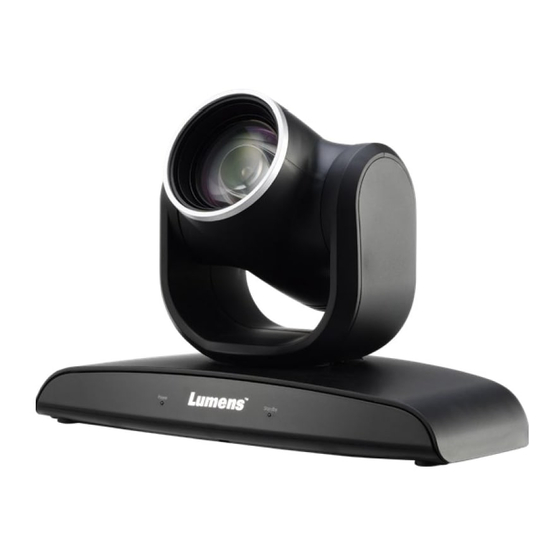
Chapter 3 Product Overview 3.1 Overview Front View Back View 1. Camera Lens 2. Power LED Indicator 3. Standby LED Indicator 4. Power Input 5. RS232 IN 6. USB 3.0 Port 7. -
Page 9: Description Of Led Indicator
3.2 Description of LED indicator 3.2.1 Power: No Light: Power off 3.2.1.1 Green light: In use 3.2.1.2 3.2.2 Standby: No Light: Power on 3.2.2.1 Orange: Startup in progress or in standby mode 3.2.2.2 Flickering orange: Power off in progress 3.2.2.3 3.3 System Requirements 1. -
Page 10: Chapter 4 Instruction For Installation
Chapter 4 Instruction for installation 4.1 Preparation before installation Installation and connection of HD camera requires special skills. To install by yourself, please follow necessary steps, ensure steady and tight installation of the device, and pay attention to your safety to avoid any accident. - Page 11 Installation steps 4.2.1.2 1. Install the camera on the wall with VC-AC03 <Remark> For the installation of VC-AC03, please refer to VC-AC03 Quick Installation Guide 4.2.1.3 Camera Size Length x Width x Height: 267.69 x 123 x 155.60 mm Weight : 1.3 Kg English...
- Page 12 English...
- Page 13 4.2.1.4 Precautions for installation 1. Before installation, please confirm the orientation of the machine relative to the object to be captured 2. It is recommended that the machine should be set at a distance of more than 1 meter away from the object to be captured. Please adjust for a best distance according to the magnification of the lens English...
-
Page 14: Connecting The Device
4.3 Connecting the device 4.3.1 Video Conference - Connecting to PC <Remark> Camera System Switch should be set to USB Mode Monitor HDMI Cable Camera USB 3.0 Cable Computer USB 2.0 Cable Speakerphone 4.3.2 Video Conference - connecting to dual monitor <Remark>... - Page 15 4.3.3 Video Conference - Connecting to the conference host <Remark> Camera System Switch should be set to HDMI Mode Monitor Microphone HDMI Cable AUDIO Cable HDMI Cable VISCA Cable Decoder Camera 4.3.4 Connect Multiple VC-B30U Sets Through VISCA <Remark> Camera System Switch should be set to HDMI Mode Monitor AUDIO Cable Camera...
- Page 16 4.3.5 IR Out IR Out includes IR Right and IR Left, use VISCA command to switch: 1. IR right and IR left ON 2. IR left OFF, IR right ON 3. IR left ON, IR right OFF 4. NA (no signal from IR receiver.) IR Left IR Right English...
-
Page 17: Chapter 5 Setting Menu Description
Chapter 5 Setting Menu Description 5.1 Functions of remote control <Remark> The below functions are listed alphabetically. Item Description ,,, Move the lens Back Light Turn on/off back light compensation Camera Choose camera 1 ~ 3 select Focus- Turn on manual focus to adjust the Manual / focal length Far/Near... -
Page 18: Setting Menu
5.2 Setting Menu <Remark> Press [Menu] on the remote control to enter the setting menu; the bold underlined values in the following table are defaults. 1st Level 2nd Level 3rd Level Function Descriptions Major Minor Items Adjustment Items Values 1. Full Auto 2. - Page 19 1/350 1/300 1/250 1/215 1/180 1/150 1/120 1/120 1/100 1/100 1/90 1/75 1/60 1/50 1/30 1/25 1/15 1/12 1. F1.8 2. F2.5 3. F3.6 4. F5.1 Iris Pri Iris setting 5. F7.2 6. F10 7. F14 8. F20 English...
- Page 20 1. 0dB 2. 2 dB 3. 4 dB 4. 6 dB 5. 8 dB 6. 10 dB 7. 12 dB 8. 14 dB Manual Gain Manually set the gain 9. 16 dB 10. 18 dB 11. 20 dB 12. 22 dB 13.
- Page 21 1/60 1/50 1/30 1/25 1/15 1/12 1. F1.8 2. F2.5 3. F3.6 4. F5.1 Manual Iris Manually set the iris 5. F7.2 6. F10 7. F14 8. F20 1. 8 dB 2. 10 dB 3. 12 dB 4. 14 dB 5.
- Page 22 Select the color 1. Auto temperature mode 2. Indoor 1. 4000k ~ 7000k 3. Outdoor 2. 3200k 4. One Push WB 3. 5800k 5. ATW 4. 1700k ~ 10000k 6. Manual 5. 1700k ~ 10000k 7. Sodium Lamp Mode 6. Custom 8.
- Page 23 1. Off 2. Low 3D dynamic noise 3D NR 3. Typ reduction settings 4. Max 5. Auto Saturation 0~ A ~25 0~ A ~14 Gamma 0~ A ~3 Skin Tone 1~ A ~5 Brightness 0~ A ~14 Contrast Contrast adjustment 0~ A ~14 1.
- Page 24 Select the AF triggering 1. Low speed. The higher the 2. Middle speed is, the faster AF is Sensitivity 3. High triggered AF frame setting, when Auto central area was set as AF frame, focusing will be on Focus Full Area/Center the center of the screen.
-
Page 25: Chapter 6 Descriptions Of Major Functions
The VC-B30U can be controlled using the “USB PTZ Camera Controller” software or the VS-K20 Compact Camera Controller. The USB PTZ Camera Controller software can be downloaded from the Lumens website. Refer to the USB PTZ Camera Controller Manual more details. -
Page 26: I Would Like To Adjust The Shooting Angle Of The Lens
function 1. Press [Back Light] on the remote control to turn on or turn off the back light compensation 6.6 I would like to adjust the shooting angle of the lens 1. Press [Tilt ] or [Tilt ] on the remote control to adjust the angle upward or downward. -
Page 27: I Would Like To Adjust The Af Speed
6.9 I would like to adjust the AF speed 6.9.1 Adjust the AF Sensitivity Triggering speed of focus. The higher the speed is, the faster focus is triggered To shoot fast-moving objects, AF Sensitivity can be set to [High] or [Medium], which is applicable to quick focus. -
Page 28: I Would Like To Set The Image Mode
6.10 I would like to set the image mode 1. Press [Picture] on the remote control to switch [Off / Neg / B&W]. 6.11 I would like to freeze images 1. Press [Freeze] on the remote control to freeze the current image on the display. -
Page 29: Chapter 7 Dip Switch Setting
Chapter 7 DIP switch setting <Note> Please turn off the machine before changing DIP switch setting. 7.1 SYSTEM SWITCH Setting Function Descriptions HDMI / USB Mode OFF: USB Mode (USB and HDMI can output DIP 1 screens simultaneously) ON: HDMI Mode (Only HDMI has output screens) Output Resolution DIP 2 OFF:1080P / ON:720P... -
Page 30: Chapter 8 Troubleshooting
Chapter 8 Troubleshooting This chapter describes problems you may encounter while using VC-B30U. If you have questions, please refer to related chapters and follow all the suggested solutions. If the problem still occurred, please contact your distributor or the service center. Problems Solutions 1. -
Page 31: Information
Supplier's Declaration of Conformity 47 CFR § 2.1077 Compliance Information Manufacturer:Lumens Digital Optics Inc. Product Name:VC-B30U Model Number:PTZ Video Camera Responsible Party – U.S. Contact Information Supplier:Lumens Integration, Inc. 4116 Clipper Court, Fremont, CA 94538, United States e-mail :support@mylumens.com FCC Compliance Statement This device complies with Part 15 of the FCC Rules.
Need help?
Do you have a question about the VC-B30UAB and is the answer not in the manual?
Questions and answers