Table of Contents
Advertisement
Quick Links
Advertisement
Table of Contents

Related Manuals for Electrolux OEE5C61Z


Summary of Contents for Electrolux OEE5C61Z
- Page 1 OEE5C61Z Oven User Manual...
-
Page 2: Table Of Contents
14. ENERGY EFFICIENCY.................. 30 WE’RE THINKING OF YOU Thank you for purchasing an Electrolux appliance. You’ve chosen a product that brings with it decades of professional experience and innovation. Ingenious and stylish, it has been designed with you in mind. So whenever you use it, you can be safe in the knowledge that you’ll get great results every time. -
Page 3: Safety Information
ENGLISH SAFETY INFORMATION Before the installation and use of the appliance, carefully read the supplied instructions. The manufacturer is not responsible for any injuries or damages that are the result of incorrect installation or usage. Always keep the instructions in a safe and accessible location for future reference. -
Page 4: Safety Instructions
WARNING: The appliance and its accessible parts • become hot during use. Care should be taken to avoid touching heating elements. Always use oven gloves to remove or put in • accessories or ovenware. Before carrying out any maintenance, disconnect the •... - Page 5 ENGLISH 2.3 Use operated with the electric power supply. WARNING! 2.2 Electrical connection Risk of injury, burns and electric shock or explosion. WARNING! • This appliance is for household use Risk of fire and electric only. shock. • Do not change the specification of this •...
- Page 6 • Discoloration of the enamel or • Clean the appliance with a moist soft stainless steel has no effect on the cloth. Only use neutral detergents. Do performance of the appliance. not use any abrasive products, • Use a deep pan for moist cakes. Fruit...
-
Page 7: Product Description
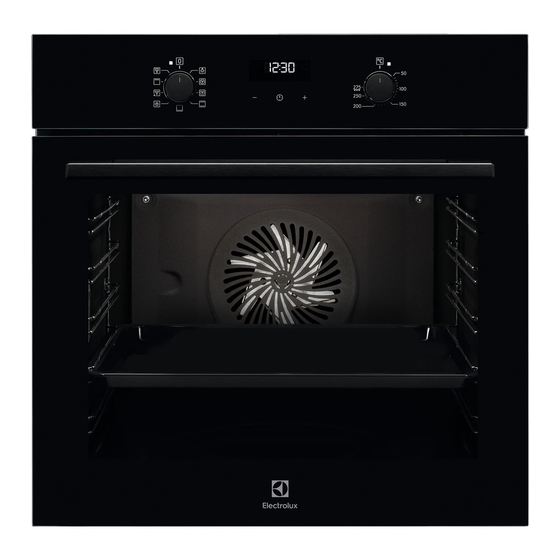
ENGLISH 3. PRODUCT DESCRIPTION 3.1 General overview Control panel Knob for the heating functions Power lamp / symbol Display Control knob (for the temperature) Temperature indicator / symbol Socket for the core temperature sensor Heating element Lamp Shelf support, removable Shelf positions 3.2 Accessories Grill- / Roasting pan... -
Page 8: Control Panel
4. CONTROL PANEL 4.1 Buttons Sensor field / Button Function Description MINUS To set the time. CLOCK To set a clock function. PLUS To set the time. 4.2 Display A. Clock functions B. Timer C. Clock function D. Core temperature sensor indicator 5. -
Page 9: Clock Functions
ENGLISH 6.3 Heating functions Oven func‐ Application tion Oven func‐ Application tion This function is de‐ signed to save energy The oven is off. during cooking. For the Moist Baking cooking instructions re‐ Off position fer to "Hints and tips" chapter, Moist Baking. - Page 10 Clock function Application To set when the appliance deactivates. TIME DELAY To combine DURATION and END function. MINUTE MIND‐ To set countdown time. This function has no effect on the operation of the appliance. You can set the MINUTE MINDER at any time, also when the appliance is off.
-
Page 11: Using The Accessories
ENGLISH 7.7 Cancelling the clock 2. Press to set the necessary functions time. The Minute Minder starts automatically after 5 seconds. 1. Press the again and again until 3. When the set time ends, an acoustic the necessary function indicator signal sounds. - Page 12 2 minutes. Press any button to stop front frame of the appliance. the signal. 5. Deactivate the appliance. 6. Remove the plug of the core temperature sensor from the socket. Remove the dish from the appliance. If the dish is not cooked to your satisfaction, do the above steps again and set a higher core temperature.
-
Page 13: Additional Functions
ENGLISH Wire shelf and baking tray / deep pan together: Push the baking tray / deep pan between the guide bars of the shelf support and the wire shelf on the guide bars above. Baking tray/ Deep pan: Push the baking tray / deep pan between the guide bars of the shelf support. - Page 14 10.3 Tips on baking Baking results Possible cause Remedy The bottom of the cake The shelf position is incor‐ Put the cake on a lower shelf. is not baked sufficient‐ rect. The cake sinks and The oven temperature is...
- Page 15 ENGLISH Use the third shelf position. Food Tempera‐ Time Use the function: True Fan Cooking. ture (°C) (min) Use the baking tray. Fruit flans made 160 - 170 40 - 80 of short pastry Food Tempera‐ Time ture (°C) (min) Cake with crum‐...
- Page 16 Food Tempera‐ Time Food Tempera‐ Time ture (°C) (min) ture (°C) (min) Short pastry 150 - 160 10 - 20 Pastries made 80 - 100 120 - 150 biscuits of egg white / Meringues Rolls, preheat 10 - 25...
- Page 17 ENGLISH (°C) (min) Sweet rolls, 16 baking tray or dripping 45 - 55 pieces Pizza, frozen, wire shelf 45 - 50 0.35 kg Swiss roll baking tray or dripping 45 - 55 Brownie baking tray or dripping 55 - 60 Sponge flan flan base tin on wire 40 - 50...
- Page 18 10.7 Multilevel Baking Use the baking trays. Use the function: True Fan Cooking. Cakes, pastries Food Temperature Time (min) Shelf position (°C) 2 positions 3 positions Cream puffs / 160 - 180 25 - 45 1 / 4 Eclairs...
- Page 19 ENGLISH Food Tempera‐ Time (min) Food Tempera‐ Time (min) ture (°C) ture (°C) Vegetable 160 - 180 50 - 60 Pierogi 180 - 200 15 - 25 10.9 Tips on Roasting Preheat the empty oven before cooking. Use heat-resistant ovenware. Use the second shelf position.
- Page 20 Food Quantity (kg) Temperature (°C) Time (min) Shoulder / Neck /Ham 1 - 1.5 160 - 180 90 - 120 joint Chops / Spare rib 1 - 1.5 170 - 180 60 - 90 Meatloaf 0.75 - 1 160 - 170 50 - 60 Pork knuckle, pre‐...
- Page 21 ENGLISH Food Quantity (kg) Temperature (°C) Time (min) Turkey 2.5 - 3.5 160 - 180 120 - 150 Turkey 4 - 6 140 - 160 150 - 240 Fish Use the function: Conventional Cooking / Top / Bottom Heat. Food Quantity (kg) Temperature (°C) Time (min)
- Page 22 Food Temperature (°C) Time (min) Shelf posi‐ tion Hash browns 210 - 230 20 - 30 Lasagne / Cannelloni, 170 - 190 35 - 45 fresh Lasagne / Cannelloni, 160 - 180 40 - 60 frozen Baked cheese 170 - 190...
- Page 23 ENGLISH Soft fruit Food Temperature (°C) Cooking time until Continue to cook simmering (min) at 100 °C (min) Strawberries / Blue‐ 160 - 170 35 - 45 berries / Raspber‐ ries / Ripe goose‐ berries Stone fruit Food Temperature (°C) Cooking time until Continue to cook simmering (min)
- Page 24 10.16 Food Sensor Beef Food core temperature (°C) Rare Medium Well done Roast beef Sirloin Beef Food core temperature (°C) Less Medium More Meatloaf Pork Food core temperature (°C) Less Medium More Ham / Roast Saddle chop / Pork loin, smoked /...
- Page 25 ENGLISH Poultry Food core temperature (°C) Less Medium More Duck, whole / half / Turkey, whole / breast Duck, breast Fish (salmon, trout, zander) Food core temperature (°C) Less Medium More Fish, whole / large / steamed / Fish, whole / large / roasted Casseroles - Precooked vege‐...
- Page 26 Food Function Temperature Time Shelf posi‐ (°C) (min) tion Fatless sponge cake Conventional 35 - 50 Cooking / Top / Bottom Heat Apple pie, 2 tins Ø20 True Fan Cook‐ 60 - 90 Apple pie, 2 tins Ø20 Conventional...
-
Page 27: Care And Cleaning
ENGLISH Food Function Time (min) Shelf position Beef steak, turn halfway Grilling 24 - 30 through 11. CARE AND CLEANING WARNING! Refer to Safety chapters. 11.1 Notes on cleaning Clean the front of the oven with a soft cloth with warm water and a mild cleaning agent. - Page 28 Install the removed accessories in the 3. Close the oven door to the first opposite sequence. opening position (approximately 70° angle). 11.3 Catalytic cleaning 4. Hold the door with one hand on each side and pull it away from the oven at The cavity with a catalytic coating is self- an upwards angle.
-
Page 29: Troubleshooting
ENGLISH Wait until the oven is cooled down. One of the hinge-arms 2. Disconnect the oven from the mains. (normally the right one) is 3. Put a cloth on the bottom of the free to move. Make sure, cavity. that both hinge-arms are in the same position The top lamp (approximately 70°... -
Page 30: Technical Data
Problem Possible cause Remedy Steam and condensation You left the dish in the Do not leave the dishes in settle on the food and in oven for too long. the oven for longer than 15 the cavity of the oven. - Page 31 ENGLISH 15. ENVIRONMENTAL CONCERNS appliances marked with the symbol Recycle materials with the symbol with the household waste. Return the Put the packaging in relevant containers product to your local recycling facility or to recycle it. Help protect the contact your municipal office. environment and human health by recycling waste of electrical and electronic appliances.
- Page 32 www.electrolux.com/shop...
Need help?
Do you have a question about the OEE5C61Z and is the answer not in the manual?
Questions and answers