
Related Manuals for Electrolux OED3H50K


Summary of Contents for Electrolux OED3H50K
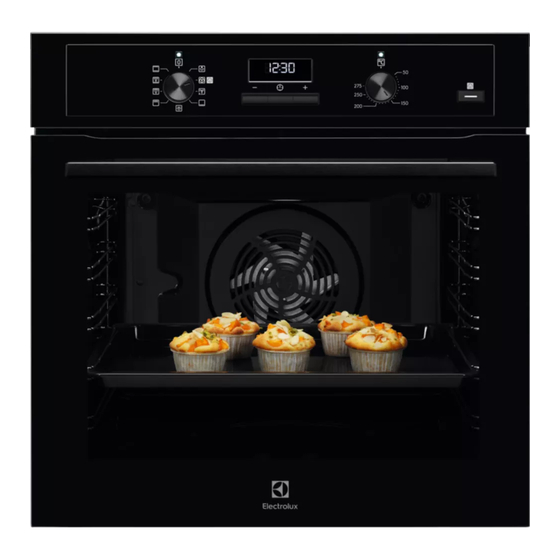
- Page 1 User Manual Oven OED3H50K OED3H50V OED3H50X OEM3H50K OEM3H50X electrolux.com/register...
-
Page 2: Table Of Contents
WE’RE THINKING OF YOU Thank you for purchasing an Electrolux appliance. You’ve chosen a product that brings with it decades of professional experience and innovation. Ingenious and stylish, it has been designed with you in mind. So whenever you use it, you can be safe in the knowledge that you’ll get great results every time. -
Page 3: Safety Information
SAFETY INFORMATION Before the installation and use of the appliance, carefully read the supplied instructions. The manufacturer is not responsible for any injuries or damage that are the result of incorrect installation or usage. Always keep the instructions in a safe and accessible location for future reference. -
Page 4: Safety Instructions
Only a qualified person must install this appliance and • replace the cable. Do not use the appliance before installing it in the built-in • structure. Disconnect the appliance from the power supply before • carrying out any maintenance. If the mains power supply cable is damaged, it must be •... - Page 5 • Connect the mains plug to the mains socket only at the end of the installation. Cabinet depth 550 (550) mm Make sure that there is access to the Height of the front of the 594 mm mains plug after the installation. appliance •...
- Page 6 2.4 Care and cleaning • Deactivate the appliance after each use. • Be careful when you open the appliance door while the appliance is in operation. WARNING! Hot air can release. Risk of injury, fire, or damage to • Do not operate the appliance with wet the appliance.
-
Page 7: Installation
3. INSTALLATION 3.1 Building in WARNING! Refer to Safety chapters. www.youtube.com/electrolux www.youtube.com/aeg How to install your AEG/Electrolux Oven - Column installation (*mm) min. 550 min. 560 ENGLISH... - Page 8 (*mm) min. 550 min. 560 3.2 Securing the oven to the cabinet ENGLISH...
-
Page 9: Product Description
4. PRODUCT DESCRIPTION 4.1 General overview Control panel Knob for the heating functions Power lamp / symbol Display Control knob (for the temperature) Temperature indicator / symbol Plus Steam Heating element Lamp Cavity embossment - Aqua cleaning container Shelf support, removable Shelf positions 4.2 Accessories To bake and roast or as pan to collect fat. -
Page 10: Before First Use
5.3 Display A. Clock functions B. Timer 6. BEFORE FIRST USE WARNING! Refer to Safety chapters. 6.1 Before first use The oven can emit an odour and smoke during preheating. Make sure that the room is ventilated. Step 1 Step 2 Step 3 Set the clock Clean the oven... - Page 11 7.2 Setting the function: True Fan Cooking PLUS WARNING! Risk of burns and damage to the appliance. Step 1 Make sure that the oven is cold. Step 2 Fill the cavity embossment with tap wa‐ ter. The maximum capacity of the cavity embossment is 250 ml.
-
Page 12: Clock Functions
Heating func‐ Application Heating func‐ Application tion tion This function is designed to To bake pizza. To make inten‐ save energy during cooking. sive browning and a crispy bot‐ When you use this function, the tom. Moist Fan Baking Pizza Function temperature in the cavity may differ from the set temperature. - Page 13 8.2 How to set: Clock functions How to set: Time of Day - flashes when you connect the oven to the electrical supply, when there was a power cut or when the timer is not set. - press to set the time. After approximately 5 sec., the flashing stops and the display shows the time.
-
Page 14: Using The Accessories
9. USING THE ACCESSORIES devices. The high rim around the shelf WARNING! prevents cookware from slipping of the shelf. Refer to Safety chapters. 9.1 Inserting accessories A small indentation at the top increases safety. The indentations are also anti-tip Wire shelf: Push the shelf between the guide bars of the shelf support and make sure that the feet point down. -
Page 15: Additional Functions
Step 1 Pull out the right and left hand telescopic Step 2 Put the wire shelf on the telescopic runners. runners and carefully push them into the oven. 10. ADDITIONAL FUNCTIONS 10.1 Cooling fan 10.2 Safety thermostat When the oven operates, the cooling fan Incorrect operation of the oven or defective turns on automatically to keep the surfaces of components can cause dangerous... - Page 16 11.2 True Fan Cooking PLUS Use the second shelf position. Use a baking tray. CAKES / PASTRIES / BREADS (ml) (°C) (min) Cookies / Scones / Croissants 150 - 180 10 - 20 Focaccia 200 - 210 10 - 20 Pizza 10 - 20 Bread rolls...
- Page 17 ROASTING (°C) (min) Roast beef 50 - 60 Chicken 60 - 80 Roast pork 65 - 80 11.3 Baking and roasting Conventional Cook‐ True Fan Cooking CAKES (min) (°C) (°C) Whisked recipes 3 (2 and 4) 45 - 60 Cake mould Shortbread dough 3 (2 and 4) 20 - 30...
- Page 18 Conventional Cook‐ True Fan Cooking CAKES (min) (°C) (°C) Buns, preheat the 12 - 20 Baking tray empty oven Eclairs 25 - 35 Baking tray Eclairs, two levels 2 and 4 35 - 45 Baking tray Plate tarts 45 - 70 Cake mould, Ø...
- Page 19 Conventional Cooking True Fan Cooking FLANS (min) (°C) (°C) Lasagne 180 - 190 180 - 190 25 - 40 Cannelloni 180 - 190 180 - 190 25 - 40 Use the second shelf position. Use the wire shelf. Conventional Cook‐ True Fan Cook‐...
- Page 20 Conventional Cooking True Fan Cooking FISH (min) (°C) (°C) Trout / Sea bream, 3 - 4 fish 40 - 55 Tuna / Salmon, 4 - 6 fillets 35 - 60 11.4 Grill Preheat the empty oven. Use the fourth shelf position. Grill with the maximum temperature setting.
- Page 21 PORK POULTRY (°C) (min) (°C) (min) Shoulder / Neck / Ham 160 - 180 90 - 120 Poultry, portions, 0.2 - 200 - 220 30 - 50 joint, 1 - 1.5 kg 0.25 kg each Chops / Spare rib, 1 - 170 - 180 60 - 90 Chicken, half, 0.4 - 0.5...
- Page 22 (kg) Defrosting time Further defrosting (min) time (min) Strawberries 30 - 40 10 - 20 Butter 0.25 30 - 40 10 - 15 Gateau 11.7 Dehydrating - True Fan Cooking VEGETA‐ Cover trays with grease proof paper or BLES (°C) baking parchment.
- Page 23 11.9 Moist Fan Baking For the best results follow suggestions listed in the table below. (°C) (min) Sweet rolls, 12 pieces baking tray or dripping pan 40 - 50 Rolls, 9 pieces baking tray or dripping pan 35 - 45 Pizza, frozen, 0.35 kg wire shelf 45 - 55 Swiss roll...
- Page 24 (°C) (min) Small Conventional Baking tray 20 - 30 cakes, 20 Cooking per tray Small True Fan Baking tray 150 - 160 20 - 35 cakes, 20 Cooking per tray Small True Fan Baking tray 2 and 4 150 - 160 20 - 35 cakes, 20 Cooking...
-
Page 25: Care And Cleaning
12. CARE AND CLEANING WARNING! Refer to Safety chapters. 12.1 Notes on cleaning Clean the front of the oven with a soft cloth with warm water and a mild detergent. Clean and check the door gasket around the frame of the cavity. Use a cleaning solution to clean metal surfaces. - Page 26 Step 1 Turn off the oven and wait until it is cold. Step 2 Pull the front of the shelf support away from the side wall. Step 3 Pull the rear end of the shelf support away from the side wall and remove Step 4 Install the shelf supports in the oppo‐...
- Page 27 Step 2 Lift and pull the latches until they click. Step 3 Close the oven door halfway to the first opening position. Then lift and pull to remove the door from its seat. Step 4 Put the door on a soft cloth on a stable sur‐ face.
-
Page 28: Troubleshooting
12.6 How to replace: Lamp Always hold the halogen lamp with a cloth to prevent grease residue from burning on the lamp. WARNING! Risk of electric shock. The lamp can be hot. Before you replace the lamp: Step 1 Step 2 Step 3 Turn off the oven. -
Page 29: Technical Data
Voltage 220 - 240 V Frequency 50 - 60 Hz 15. ENERGY EFFICIENCY 15.1 Product Information and Product Information Sheet* Supplier's name Electrolux OED3H50K 949499333 OED3H50V 949499334 Model identification OED3H50X 949499332 OEM3H50K 949499335 OEM3H50X 949499336 Energy Efficiency Index 95.3 Energy efficiency class Energy consumption with a standard load, conventional mode 0.93 kWh/cycle... -
Page 30: Environmental Concerns
Energy efficiency class is not applicable for Russia. EN 60350-1 - Household electric cooking appliances - Part 1: Ranges, ovens, steam ovens and grills - Methods for measuring performance. 15.2 Energy saving Residual heat When the cooking duration is longer than 30 min, reduce the oven temperature to The oven has features which minimum 3 - 10 min before the end of... - Page 32 electrolux.com...
Need help?
Do you have a question about the OED3H50K and is the answer not in the manual?
Questions and answers