CNET CWR-854 User Manual
54mbps wireless-g router
Hide thumbs
Also See for CWR-854:
- User manual (70 pages) ,
- Setup manual (17 pages) ,
- Quick installation manual (11 pages)
Table of Contents
Advertisement
Advertisement
Table of Contents

Related Manuals for CNET CWR-854


Summary of Contents for CNET CWR-854
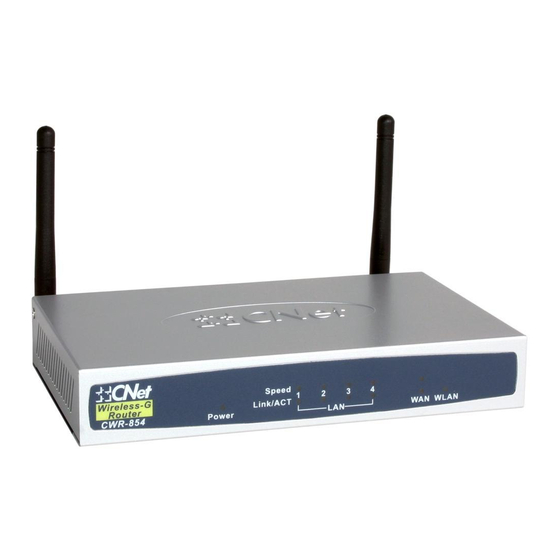
- Page 1 CWR-854 54Mbps Wireless-G Router User’s Guide...
-
Page 2: Table Of Contents
1 INTRODUCTION ... 3 ... 3 NSTALLING OUTER ... 3 YSTEM EQUIREMENTS ... 3 NSTALLATION NSTRUCTIONS 2 PREPARING YOUR NETWORK ... 5 ... 5 REPARING ETWORK ISP I OLLECTING NFORMATION IP N ONFIGURING INDOWS FOR 3 CONFIGURING THIS WIRELESS-G ROUTER...11 3.1 S ...11 ETUP... -
Page 3: Introduction
1 Introduction Installing Your Router In this chapter, you’ll learn how to connect your router. System Requirements ․One or more PCs (desktop or notebook) with Ethernet interface ․Broadband Internet access ․Ethernet cables ․Wireless interface (if planning to use wireless functions) Installation Instructions Connecting the Router: 1. - Page 4 5. Turn on your PC(s).
-
Page 5: Preparing Your Network
2 Preparing Your Network Preparing Your Network In this chapter, you’ll learn what to do before configuring your router. Before you can configure your router, you need to set up all the computers on your network for TCP/IP networking. Collecting ISP Information The following information needs to be gathered from the ISP before you can configure your router: ․Has your ISP assigned you a static IP address, or will it be assigned dynamically? If they have... - Page 6 3. Click the IP Address tab. Select Obtain an IP address automatically 4. Now click the Gateway tab, and verify that the Installed Gateway field is Blank. Click the OK button. 5. Click the OK button again. Windows may ask you for the original Windows installation disk or additional files.
- Page 7 2. Select the Local Area Connection icon for the applicable Ethernet adapter (usually it is the first Local Area Connection listed). Double-click the Local Area Connection. Click the Properties button 3. Make sure the box next to Internet Protocol (TCP/IP) is checked. Highlight Internet Protocol (TCP/IP), and click the Properties button.
- Page 8 5. Restart your computer. The following instructions assume you are running Windows XP with the default interface. If you are using the Classic interface (where the icons and menus look like previous Windows versions), please follow the instructions for Windows 2000. 1.
- Page 9 3. Make sure the box next to Internet Protocol (TCP/IP) is checked. Highlight Internet Protocol (TCP/IP), and click the Properties button.
- Page 10 4. Select Obtain an IP address automatically. Once the new window appears, click the OK button. Click the OK button again to complete the PC configuration.
-
Page 11: Configuring This Wireless-G Router
3 Configuring this Wireless-G Router In this chapter, it describes how to use the web management tool, a web browser-based utility that allows you to remotely configure and manage this Wireless-G Router. Open your Web browser and type the IP address “http://192.168.1.254” and press <ENTER>. Enter the User name and Password when prompted, the default User name is “root”, and the default Password is “1234”. -
Page 12: Time Zone Settings
3.1.1 Time Zone Settings The first step in Setup Wizard is Time Zone Settings. Users can synchronize the local clock to an available NTP server. You can enable NTP client update and select the correct Time Zone. Enable NTP client update: enable this time zone update function Time Zone Select: Select the time zone of the country where this router is located. -
Page 13: Wan Interface Setup
IP Address: Enter IP address for this Wireless-G Router. Subnet Mask: Enter the subnet mask for this Wireless-G Router. Cancel: To skip the current settings and jump to the Setup Wizard page. Back: To skip the current settings and go back to the last page. Next: Go to the next page. -
Page 14: Lan Settings
Operating Band: 802.11B/G, 802.11G or 802.11B Operating Mode: AP, Client, WDS, and AP+WDS. Network type: when operating mode is “Client” mode, users can select the network type as “infrastructure” or “Adhoc”. SSID: The SSID differentiates one WLAN from another, therefore, all wireless access points/routers and all wireless devices attempting to connect to a specific WLAN must use the same SSID. -
Page 15: Wan Settings
IP Address: Enter IP address for this Wireless-G Router. Subnet Mask: Enter the subnet mask for this Wireless-G Router. Default Gateway: Enter Default Gatewayfor this Wireless-G Router. 802.1d Spanning Tree: On LAN side, it supports Spanning Tree Protocol to avoid physical loop problem. -
Page 16: Dhcp Client
WAN Access Type: select the Static IP connection IP Address: this is the IP address that your ISP has given you. Subnet Mask: enter the subnet mask provided by your ISP Default Gateway: enter the default gateway provided by your ISP DNS1: enter this Primary DNS provided by your ISP DNS2: enter this Secondary DNS if necessary. -
Page 17: Pppoe
WAN Access Type: select the DHCP Client connection Attain DNS Automatically: enable to attain DNS from your ISP automatically. Set DNS Manually: allow user to set the DNS manually. DNS1: enter a specific DNS to this Primary field. DNS2: enter this Secondary DNS if necessary. DNS3: enter this Tertiary DNS if necessary. - Page 18 WAN Access Type: select the PPPoE connection User Name: enter the User Name provided by your ISP Password: enter the Password provided by your ISP Connection Type: there are three connection type – continuous, connect on demand and manual. Continuous: the connection to the ISP is already connected. Connect On Demand: the connection to the ISP is build only your application is active to connect the Internet.
-
Page 19: Pptp
in the WAN port. Enable UPnP: It allows to enable or disable uPNP feature here. After you enable the uPNP feature, all client systems that support uPNP, like Windows XP, can discover this router automatically and access the Internet throuth this router without any configuration. -
Page 20: Wireless
MTU Size: MTU is the Maximum Transmission Unit. It specifies the largest packet size permitted for Internet transmission. Keep the default setting, 1452, to have the router select the best MTU for your Internet connection. Attain DNS Automatically: enable to attain DNS from your ISP automatically. Set DNS Manually: allow user to set the DNS manually. - Page 21 Mode: This Wireless-G Router supports four operating modes: AP, client, WDS, and AP+WDS. Network Type: when operating mode is Client mode, users can select the network type as “Infrastructure” or “Adhoc” mode. SSID: The SSID differentiates one WLAN from another, therefore, all wireless access points/routers and all wireless devices attempting to connect to a specific WLAN must use the same SSID.
-
Page 22: Advanced Settings
Refresh: Click on “Refresh” button to show the latest information. Close: Click on “Close” button to close this window. 3.4.2 Advanced Settings In Advanced Settings page, more 802.11 related parameters are tunable. Authentication Type: There are three Authentication Type- Open System, Shared Key, and Auto Fragment Threshold: Fragmentation mechanism is used for improving the efficiency when high traffic flows along in the wireless network. -
Page 23: Security
Before a station enters power save mode, the station needs the beacon interval to know when to wake up to receive the beacon (and learn whether there are buffered frames at the wireless router). Data Rate: By default, it selects the highest rate for transmission. - Page 24 Encryption: “None” means no encryption being selected. Users can enable the 802.1x Authentication and set the RADIUS server authentication parameters – port, IP address and Password. Use 802.1x Authentication: It is a port access protocol for protecting networks via authentication. If a wireless user is authenticated via 802.1x for network access, a virtual port is opened on the access point allowing for communication.
- Page 25 Encryption: Select “WEP” (Wired Equivalent Privacy) encryption type. Set WEP Key: Only valid if not select “Use 802.1x Authentication” is not selected. Use 802.1x Authentication: When this feature is enable, please enter the parameters of “RADIUS Server” and select the encryption length to be “WEP 64bits”...
- Page 26 Key Length: You can choose either 64-bit or 128-bit as the encryption key. Key Format: You can select hexadecimal or ASCII mode as the format of input value. Default Tx Key: You can select the default encryption Key (Key1 to Key4) being transmitted.
-
Page 28: Access Control
Encryption: “WPA” stands for Wi-Fi Protected Access. There are three encryption modes – TKIP, AES and Mixed. TKIP: Temporal Key Integrity Protocol AES: Advanced Encryption Standard Mixed: WPA2 Mixed mode operation permits the coexistence of WPA and WPA2 clients on a common SSID. WPA2 Mixed Mode is a Wi-Fi Certified feature. -
Page 29: Wds
“Delete Selected” button. Wireless Access Control Mode: There are three types of access control options: Disable: disable this control feature. Allow Listed: If you choose “Allow Listed”, only those clients whose wireless MAC addresses are in the access control list will be able to connect to your Wireless-G Router. -
Page 30: Site Survey
set these Wireless-G Routers in the same channel and set MAC address of all other Wireless-G Routers which you want to communicate with in the table and then enable the WDS. Enable WDS: enable the WDS function. Add WDS AP: you need to fill out the other AP’s MAC address which you want to communicate. -
Page 31: Firewall
Show Client button: A table shows the assigned IP address, MAC address and time expired for each DHCP leased client. 3.5 Firewall 3.5.1 IP Filtering You can set up the filter against the IP addresses to block specific users from accessing the Internet. -
Page 32: Port Filtering
Delete All: Allow user to delete all Local IP Address in the Current Filter Table. Reset: Click on “Reset” to undo your changes. Help: To request help information. 3.5.2 Port Filtering The Port filtering can restrict certain type of data packets from your LAN to Internet through the router. -
Page 33: Vpn Settings
Enable MAC Filtering: Enable the MAC Filtering function. MAC Address: Enter the MAC Address that you want to block accessing the Internet. Comment: Allow user to add any description to this MAC Address. Apply Changes: Click on “Apply Changes” to save the setting. Current Filter Table: A table shows the current MAC Address filtering. - Page 34 Enable IPSec VPN: to enable IPSec VPN function. Enable NAT Traversal: enable this function to detect NAT gateways between IIPSec hosts and to negotiate the use of UDP encapsulation of IPSec packets. Generate RSA Key: here you can generate a new public key. Show RSA Public Key: to show the new public key.
- Page 35 When you click on the Edit button, the VPN Setup window will display as below: Enable Tunnel 1: Enable the IPSec VPN tunnel. Connection Name: Specify a name for the VPN connection. Auth Type: Allow user to choice the method of authenticating gateways for Diffie-Hellman key negotiation.
- Page 36 Remote Secure Gateway: Enter remote site gateway. Remote IP Address/Network: Enter remote site IP Address (for Single Address) or IP network (for Subnet Address). Remote Subnet Mask: Enter remote site subnet mask. Local ID Type: Specify the local ID type, which is supported IP, DNS and Email. Local ID: Specify a local ID to be used for setup VPN connection.
- Page 37 Phase 1 Negotiation Mode: This negotiation is a main process to build a VPN connection in phase 1. Encryption Algorithm: There are two encryption algorithm – 3DES and AES128. Authentication Algorithm: There are two authentication algorithm – MD5 and SHA1. Key Group: There are three Key groups to be defined –...
-
Page 38: Advanced
Help: To request help information. 3.7 Advanced 3.7.1 Port Forwarding The Port Forwarding allows you to re-direct a particular range of service port numbers (from the WAN port) to a particular LAN IP address. It helps you to host some servers behind the router’s NAT firewall. -
Page 39: Dmz
3.7.2 DMZ DMZ feature allows one local user to be exposed to the Internet for use of a special-purpose service such as Internet gaming or videoconferencing. It will forward all the ports at the same time to one PC. The port forwarding feature is more secure because it only opens the ports you want to have opened, while DMZ opens all the ports of one computer, exposing the computer so the Internet can see it. -
Page 40: Management
Enable DDNS: Enable this DDNS function. Service Provider: Select the DDNS Service Provider. Domain Name: Enter the Service Provider Domain Name if needed. Username/Email: Enter the user name or Email address required to log into the DDNS account Password/Key: Enter the password or Key number required to log into the DDNS account. - Page 41 System Uptime: The date/time shows how long the router power on. Firmware Version: Show the current firmware version. Wireless Configuration Mode: Shows the current operating modes. Band: Shows the current operating band. SSID: Shows the current SSID. Channel Number: Shows the current operating channel. Encryption: Shows the current encryption mode.
-
Page 42: Dhcp Settings
Help: To request help information. 3.8.3 Time Zone Settings This wireless router provides a NTP (Network Time Protocol) client that can synchronize time with configured NTP server. Press the Refresh Time button refreshes system timestamp and the Save/Time Sync buttons force NTP client sync time with NTP server. -
Page 43: Password
Current Time: Show the current time of this router. Time Zone Select: Select the time zone of the country where this router is located. Enable NTP client update: enable this time zone update function NTP server: you can select the existing NTP server by clicking the down arrow or manually assign time server address. -
Page 44: Upgrade Firmware
Help: To request help information. 3.8.5 Upgrade Firmware This wireless router allows you to easily upgrade the firmware. Firmware Upgrade: Click on the Browse button to select the firmware and then click on the Upload button. After the firmware upgrade is completed, the router will restart automatically. -
Page 45: Save/Reload Settings
Reset: Click on “Reset” to undo your changes. Help: To request help information. 3.8.7 Save/Reload Settings You can create a backup file that contains your current router settings. After you create a backup file, you can use it to restore your settings in the event you need to reset the router’s defaults. Save Settings to File: Click on “Save”... -
Page 46: Event Log
Apply Changes: Click on “Apply Changes” to confirm to reset this router. Help: To request help information. 3.9 Event Log This wireless router supports System Log information. This data is useful for monitoring and troubleshooting the network. Enable Log: Enable the Log function. - Page 47 running a syslog daemon. Apply Changes: Click on “Apply Changes” to save the setting. Refresh: Get the log data again. Clear: Click on “Clear” to clear all log data in the message box. Help: To request help information.
-
Page 48: Appendix A: Troubleshooting
Appendix A: Troubleshooting Symptom Possible Causes Inability to connect physically • Incorrect or incompatible wireless network configuration. For example, shared key authentication is configured on the wireless AP/Router and the wireless client is attempting open system authentication • Inadvertent media access control (MAC) address filtering •... - Page 49 • Cable failure • AP/Router is not power on Intermittent connectivity • IEEE 802.1X authentication is enabled on the wireless client and is not enabled on the wireless AP/Router • Improperly functioning or outdated wireless network adapter driver • Improperly functioning wireless AP/Router Incorrect, missing, or stale •...
- Page 50 outdated wireless network adapter driver • On a laptop computer, the wireless radio button might be in the off position Client can't connect to the • Wrong IP address AP/Router's configuration utility. • With the Services snap-in, ensure that the Wireless Zero Configuration or Wireless Configuration services are configured to start...
-
Page 51: Appendix B: Frequently Asked Questions
Appendix B: Frequently Asked Questions Q1: What is wireless networking? Ans: The term wireless networking refers to technology that enables two or more computers to communicate using standard network protocols, but without network cabling. Strictly speaking, any technology that does this could be called wireless networking. The current buzzword however generally refers to wireless LANs. - Page 52 Figure A2: Hardware Access Point. Wireless connected computers using a Hardware Access Point. Figure A3: Software Access Point. Wireless connected computers using a Software Access Point. Q3: Can I mix wireless equipment from different vendors? Ans: Because most wireless networking hardware vendors support the 802.11 standard they can inter operate.
- Page 53 also allow considerable flexibility in providing access to different network types, such as different types of Ethernet, Wireless and Token Ring networks. Such connections are only limited by the number of slots or interfaces in the computer used for this task. Further to this the software access point may include significant additional features such as shared Internet access, web caching or content filtering, providing significant benefits to users and administrators.
- Page 54 is analogous to Ethernet cabling, the answer to this question becomes clear. To share an Internet connection across a LAN you need two things: (1) an Internet sharing hardware device or software program (2) connection to a LAN If your LAN is wireless, the same criteria apply.
- Page 55 produces secure scrambled text. Decryption is the opposite of encryption; it is the mathematical operation that transforms cipher text to standard text. Q11: Why do I need a router? Ans: The increased reliance on computers to store valuable information and the development of applications that share information over the internet through networked personal computers, in combination with the advent of computer hacking, has made information and network security an important issue.
- Page 56 Q21: What is the maximum number of users the Access Point facilitates? Ans: It depends on the volume of data and may be less if many users create a large amount of network traffic. Q22: What is the maximum number of IP addresses that the Router will support? Ans: The Router will support up to 253 IP addresses.
Need help?
Do you have a question about the CWR-854 and is the answer not in the manual?
Questions and answers