Table of Contents
Advertisement
Quick Links
Advertisement
Table of Contents

Related Manuals for CNET CWR-635M


Summary of Contents for CNET CWR-635M
- Page 1 CWR-635M Quick Setup Guide User’s Manual V1.0...
-
Page 2: Table Of Contents
Table of Contents CHAPTER 1 HARDWARE CONNECTION............... 4 Router Mode Hardware connection and application ...... 4 AP Mode Hardware connection and application ......4 Client Mode Hardware connection and application ......4 CHAPTER 2 ROUTER MODE QUICK SETUP ............5 2.1 R ............ - Page 3 3.1.9 Printer Server Setup..............26 3.1.10 Samba Server Setup ..............27 3.1.11 Audio Server Setup ..............27 3.1.12 Quick Setup Finish............... 27 CHAPTER 4 CLIENT MODE QUICK SETUP ............28 ..........28 LIENT UICK ETUP NSTRUCTION 4.1.1 Site Survey Setup ................ 30 4.1.2 Wireless Setup ................
-
Page 4: Chapter 1 Hardware Connection
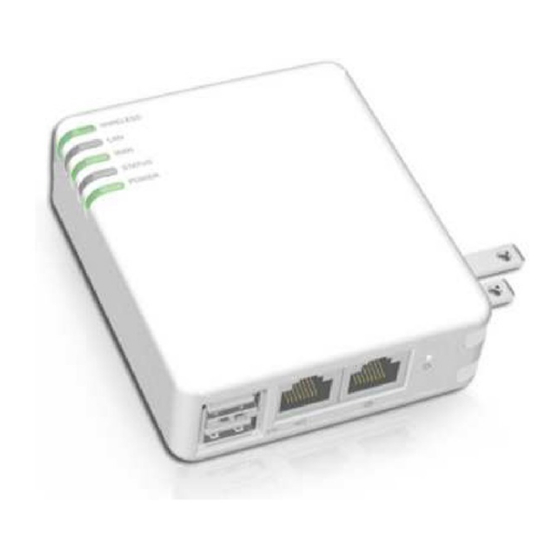
Chapter 1 Hardware Connection Router Mode Hardware connection and application When Mini Router switches to Router Mode, there will be each WAN and LAN port exist. AP Mode Hardware connection and application When Mini Router switches to AP Mode, it supports 2 LAN ports as Bridge. Client Mode Hardware connection and application When Mini Router switches to Client Mode, Mini Router will be a Wireless Adapter, and users can plug cable to each 2 LAN ports and then connect Internet via... -
Page 5: Chapter 2 Router Mode Quick Setup
Chapter 2 Router Mode Quick Setup 2.1 Router Mode Quick Setup Instruction Please open a Microsoft Internet Explorer, and enter http://192.168.1.1 (Default Gateway) into browser’s blank, then you will see the configuration page below. Please click on Administrator button to login. User’s Manual V1.0... - Page 6 Please input in the blanks, the factory default values for User Name and Password are “admin” and “admin” (all in lowercase letters); after inputting, please click on “Login” to enter the homepage as below. Typical Configuration Manager Page consists of two separate frames. The left frame contains all the means available for device configuration and the right site map is shown as the icons form.
-
Page 7: Wan Setup
Click on “Basic” including WAN Setup 、 LAN Setup 、 Wireless Setup 、 Time Server Setup and Password Setup. Default setting and has to be set. Default setting and has to be set. Default setting and has to be set. Default setting and has to be set. -
Page 8: Wan Type - Dynamic Ip
by ISP Input the data provided Please click on “Next” button to connect to next step. 2.1.1.2 WAN Type – Dynamic IP Choose Dynamic IP to obtain IP address information automatically form your ISP. Select this option if your ISP does not give you any IP numbers to use. Input it if requested by your ISP MAC Address Please click on “Next”... -
Page 9: Wan Type - Pptp
Input it by your ISP provided. Please click on “Next” button to connect to next step. 2.1.1.4 WAN Type – PPTP Some DSL service providers supply a special DSL modem in Europe or Big Pond Cable in Australia. This kind of modem only supports the PPTP tunnel to access the Internet;... -
Page 10: Lan Setup
2.1.2 LAN Setup If you are using the Mini Router with multiple PCs on your LAN, please set up this function for multiple users to connect it. The default LAN IP for Mini Router is 192.168.1.1. Requested to be as complied as LAN IP. Please click on “Next”... -
Page 11: Time Server Setup
Select the suitable item for you to use. It’s suggested to use. Please click on “Next” button to connect to next step. 2.1.4 Time Server Setup The section provides to change the Time. However, change the router’s date and time does not affect the date and time on your PCs. Please select your time zone. -
Page 12: Password Setup
Please click on “Next” button to connect to next step. 2.1.5 Password Setup Here suggest changing the password for logging into the configuration manager under security reason. The password may consist of A-Z, a-z, 0-9, underscores, and a single dot (.) Please click on “Next”... -
Page 13: Usb Disk Management Setup
2.1.6 USB Disk Management Setup This Setup part will enable you to easily check all the USB storage devices connected to your Mini Router. Please click on any device under your demand, and then click on “OK”, the setup will be finished. Please click on “Next”... -
Page 14: Firewall Setup
Input the User’s name and password, and then click on “Add”. Please click on “Next” button to connect to next step. 2.1.8 Firewall Setup The Firewall rules of Mini Router is one of the advance features which used to deny or allow traffic from passing through the router. -
Page 15: Qos Configuration Setup
Please click on “Next” button to connect to next step. 2.1.9 QoS Configuration Setup QoS management helps to set and evaluate QoS goals. By doing this setup, it will make your massive information transmissions much easier to be controlled. User’s Manual V1.0... -
Page 16: Ftp Server Setup
Input the figures under your demand to decide the priority order. Please click on “Next” button to connect to next step. 2.1.10 FTP Server Setup Mini Router can be the FTP Server provides users to transmit files, also for the guest can download the files from the FTP anonymous folder. -
Page 17: Web Camera Server Setup
Please click on “Next” button to connect to next step. 2.1.11 Web Camera Server Setup If you plan to use the Mini Router as a Web Camera site, connect a supported USB Web Camera to the USB port of the Mini Router. To enable the webcam server and access from WAN as demand, and the Image format can be selected. -
Page 18: Samba Server Setup
If the printer isn’t connected, you can’t choose “Enable”. Please click on “Next” button to connect to next step. 2.1.13 Samba Server Setup It supports NetBIOS protocol, and provides users to share files or printers. Please click on “Next” button to connect to next step. 2.1.14 Audio Server Setup Using herewith adapter to connect speaker, and then you can play music via LAN. -
Page 19: Quick Setup Finish
Please click on “Next” button to connect to next step. 2.1.15 Quick Setup Finish The Quick Setup has been completed successfully when see this screen. To apply your new settings, please click on “Finish” button to reboot system automatically and goes to the Product’s Diagram Homepage. Chapter 3 AP Mode Quick Setup AP Mode Quick Setup Instruction Please open a Microsoft Internet Explorer, and enter... - Page 20 Please input in the blanks, the factory default values for User Name and Password are “admin” and “admin” (all in lowercase letters); after inputting, please click on “Login” to enter the homepage as below. Typical Configuration Manager Page consists of two separate frames. The left frame contains all the means available for device configuration and the right site map is shown as the icons form.
-
Page 21: Lan Setup
Click on “Basic” including LAN Setup、Wireless Setup、Time Server Setup and Password Setup. Default setting and has to be set. Default setting and has to be set. Default setting and has to be set. Default setting and has to be set. Please click on “Next”... -
Page 22: Wireless Setup
Please click on “Next” button to connect to next step. 3.1.2 Wireless Setup The first step of setting up the “Wireless Setup” is to give a name for SSID, herewith the default name of SSID is NAVIR122g, it’s suggested to use. Select the suitable item for you to use. -
Page 23: Password Setup
3.1.4 Password Setup Here suggest changing the password for logging into the configuration manager under security reason. The password may consist of A-Z, a-z, 0-9, underscores, and a single dot (.) Please click on “Next” button to connect to next step. Click on “Application”... -
Page 24: Usb Disk Management Setup
3.1.5 USB Disk Management Setup This Setup part will enable you to easily check all the USB storage devices connected to your Mini Router. Please click on any device under your demand, and then click on “OK”, the setup will be finished. Please click on “Next”... -
Page 25: Ftp Server Setup
Input the User’s name and password, and then click on “Add”. Please click on “Next” button to connect to next step. 3.1.7 FTP Server Setup Mini Router can be the FTP Server provides users to transmit files, also for the guest can download the files from the FTP anonymous folder. -
Page 26: Web Camera Server Setup
3.1.8 Web Camera Server Setup If you plan to use the Mini Router as a Web Camera site, connect a supported USB Web Camera to the USB port of the Mini Router. To enable the webcam server and access from WAN as demand, and the Image format can be selected. Please click on “Next”... -
Page 27: Samba Server Setup
3.1.10 Samba Server Setup It supports NetBIOS protocol, and provides users to share files or printers. Please click on “Next” button to connect to next step. 3.1.11 Audio Server Setup Using herewith adapter to connect speaker, and then you can play music via LAN. Please click on “Next”... -
Page 28: Chapter 4 Client Mode Quick Setup
Chapter 4 Client Mode Quick Setup Client Mode Quick Setup Instruction Please open a Microsoft Internet Explorer, and enter http://10.64.64.64 (Default Gateway) into browser’s blank, then you will see the configuration page below. Please click on Administrator button to login. Please input in the blanks, the factory default values for User Name and Password are “admin”... - Page 29 Typical Configuration Manager Page consists of two separate frames. The left frame contains all the means available for device configuration and the right site map is shown as the icons form. Click on Quick Setup in the left screen of the main menu. It includes both “Basic” and “Application”.
-
Page 30: Site Survey Setup
Default setting and has to be set. Default setting and has to be set. Default setting and has to be set. 4.1.1 Site Survey Setup This function provides you with scanning the wireless network; which means if any Access Point is found, you could choose to connect it manually when the client mode is enabled, and after you choose the desired Access Point;... -
Page 31: Wireless Setup
4.1.2 Wireless Setup Show “120_Cliff” information of wireless AP. ETOP User’s Manual V1.0... -
Page 32: Time Server Setup
Please click on “Next” button to connect to next step. 4.1.3 Time Server Setup The section provides to change the Time. However, change the router’s date and time does not affect the date and time on your PCs. Please click on “Next” button to connect to next step. 4.1.4 Password Setup Here suggest changing the password for logging into the configuration manager... -
Page 33: Usb Disk Management Setup
Default setting and has to be set. Default setting and has to be set. 4.1.5 USB Disk Management Setup This Setup part will enable you to easily check all the USB storage devices connected to your Mini Router. Please click on any device under your demand, and then click on “OK”, the setup will be finished. -
Page 34: User Account Management Setup
4.1.6 User Account Management Setup Personal users can use each individual application such as My Status, My Webcam and My Document. Input each user’s right by your demand. Input the User’s name and password, and then click on “Add”. Please click on “Next” button to connect to next step. 4.1.7 FTP Server Setup Mini Router can be the FTP Server provides users to transmit files, also for the... -
Page 35: Web Camera Server Setup
Please click on “Next” button to connect to next step. 4.1.8 Web Camera Server Setup If you plan to use the Mini Router as a Web Camera site, connect a supported USB Web Camera to the USB port of the Mini Router. To enable the webcam server and access from WAN as demand, and the Image format can be selected. -
Page 36: Samba Server Setup
如果沒有連接印表機 如果沒有連接印表機, , , , 如果沒有連接印表機 如果沒有連接印表機 無法選擇 無法選擇 無法選擇 無法選擇“Enable” Please click on “Next” button to connect to next step. 4.1.10 Samba Server Setup It supports NetBIOS protocol, and provides users to share files or printers. Please click on “Next” button to connect to next step. ETOP User’s Manual V1.0... -
Page 37: Audio Server Setup
4.1.11 Audio Server Setup Using herewith adapter to connect speaker, and then you can play music via LAN. Please click on “Next” button to connect to next step. 4.1.12 Quick Setup Finish The Quick Setup has been completed successfully when see this screen. To apply your new settings, please click on “Finish”... -
Page 38: Fcc Radiation Exposure Statement
Consult the dealer or an experienced radio/TV technician for help. FCC Caution To assure continued compliance, any changes or modifications not expressly approved by the party responsible for compliance could void the user's authority to operate this equipment. (Example - use only shielded interface cables when connecting to computer or peripheral devices).
Need help?
Do you have a question about the CWR-635M and is the answer not in the manual?
Questions and answers