Advertisement
Quick Links
Introduction
Thank you for purchasing the Auber WS series temperature controller. We sincerely
appreciate your decision and trust that our machine will meet your expectations in both
the quality of the result and the value of our product. While we are delighted that you may
be anxious to operate the controller for your project, a few minutes of your time reading
through this manual will only serve to enhance your experience in the months and years
ahead. In particular, we urge you to read through the safety warnings below. Although
this plug-and-play controller is very easy to operate, the process involves high
temperature and high wattage appliances, and your safety is paramount.
This controller is designed only to be used with devices that have limited power
and their own thermal cut off protection, such as a thermostat or thermal fuse in
case of controller failure.
Do not place any objects on the top of controller surface which is used to vent
excess heat during its operation.
The maximum electric current this controller can handle is 15 ampere. For 120
volt AC in US and Canada, this limits the heater power to1800 watts. Due to its
compact size and the splash proof design for kitchen applications, the controller
has a limited ability to dissipate the heat generated by the internal solid state relay
during the initial heat up. The initial full power heat up process cannot be more
than 90 minutes. If you system need take longer time to warm up, please read
Appendix 1 "Managing the heat generated by the controller"
Always place the sensor in the controlled subject when the controller is on.
Before turning on the controller, please make sure the sensor is placed inside the
container to be controlled. Leaving the sensor outside will form an open loop
Operation Instruction Manual
WS-1500ES
Precision PID Temperature Controller
Version 1.4
Auber Instruments
5755 North Point Parkway, Suite 99
Alpharetta, GA 30022
770-569-8420
www.auberins.com
Dec, 2016
SAFETY WARNINGS
1
Advertisement

Related Manuals for Auber Instruments WS-1500ES


Summary of Contents for Auber Instruments WS-1500ES
- Page 1 Operation Instruction Manual WS-1500ES Precision PID Temperature Controller Version 1.4 Auber Instruments 5755 North Point Parkway, Suite 99 Alpharetta, GA 30022 770-569-8420 www.auberins.com Dec, 2016 Introduction Thank you for purchasing the Auber WS series temperature controller. We sincerely appreciate your decision and trust that our machine will meet your expectations in both the quality of the result and the value of our product.
-
Page 2: Specifications
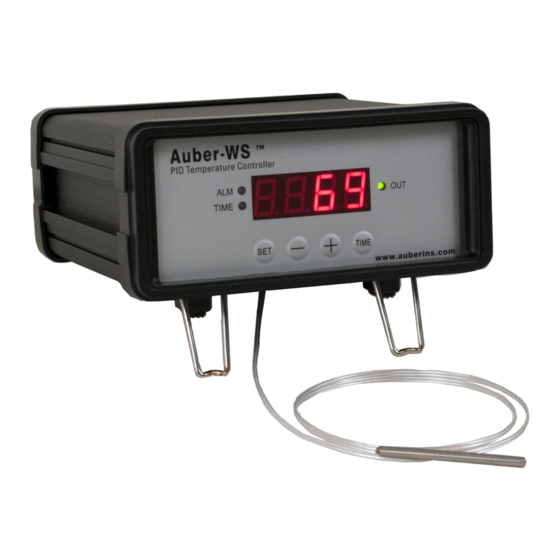
This controller is designed to control the devices recommended by Auber Instruments only. Using it to control a non-recommended device can be dangerous and cause fire. Auber Instruments is not liable for damages caused by misuse of the controller. If you are not sure whether the controller can be used, please contact Auber Instruments before use. - Page 3 Operating Instructions 1) Description of the controller. Figure 1. Front Panel (1) Parameter Window (LED) - for displaying temperature values and controller's system parameters. (2) Output status indicator - In normal mode, this LED indicates the heater status. When it is on (lit), the heater is powered. When it is off, the heater power is off. When it is flashing, it means the heater is on and off intermittently to reduce the power output.
- Page 4 When it is flashing and “(8)” stays on, “(1)” is the time that has elapsed since it’s powered on. When it is flashing “(8)” is off, the controller is in the parameter setting mode. “(1)” is the value can be changed by using (4) and (5) key. Figure 2.
- Page 5 The connection of the controller should be done in the following steps. Plug the temperature sensor to the back of the controller. Plug the power cord to the power outlet on the wall. Turn on the controller to make sure the controller powers up properly and the temperature display is in the range expected.
- Page 6 Fig 3b. How to remove the sensor. 3) Operating the controller 3.1 Setting the temperature. Press SET key twice. Both 1) and 2) will start to flash. The LED shows the current temperature setting. Use “+” and “-“ keys to change the setting. When finished, press the SET again to confirm the change.
- Page 7 power to the cooker 1200 minutes after it is powered up. It will display “End” on the window and send an audio beeping sound. Turning off the power and on again will reset the timer. b) Use it as a clock. Instead of using the timer function, many users just use it as a clock to find how long the food has been cooked.
- Page 8 4) Controller System Configuration Parameter. This section discusses how to configure the controller for a specific application. For most sous vide cooking users, there is no need to read this section. The controller’s default setting is for most common configurations of sous vide cooking. The controller parameters are divided into two groups.
- Page 9 integrated with time. Integral action is used to eliminate temperature offset. A larger number means slower action. e. g. assuming the difference between the measured and set temperature is 2 degrees and remains unchanged, the output will increase continuously with time until it reaches 100%. When temperature fluctuate regularly (system oscillating), increase the integral time.
- Page 10 controller. If the cooker has its own thermostat or power control, turn both as high as they’ll go. Set the controller to the appropriate power level (see next Section). Turn the controller and cooker on, and then enter the desired set point temperature close to your normal cooking temperature.
- Page 11 4 sec Figure 4. Code 166 Parameter setup flow chart Press and hold SET key for 4 seconds until LED displays “LCK.” Then, release the SET key. The display will show “0”. To get into parameters setting mode, you need to key in the pass code.
- Page 12 set value. Table 1. List of control parameters and the initial settings under code 155 Symbol Display Description Range Initial Off set (degree) -20~+20 -58-752° F Alarm Setting -50-400° C Alarm buzzer 0=off 1=on Open loop alarm 0=off 1=on Hysteresis band 0-100 COOL COOL...
- Page 13 on again when T<SV-Hy. e. g. If SV=100 ° C. Hy=3 ° C, the heater will heat until temperature reaches 100C. It will be turned on again when temperature drops below 97 ° C. For the cooling mode, the compressor will be turned off when T=SV. It will be on again when T>SV+Hy.
- Page 14 3 sec Cool Figure 5. Code 155 Parameter setup flow chart Press and hold SET key for 4 seconds until the Parameter Window displays “LCK”. Release the SET. The display will show “0”. Use “+” and “-” keys to adjust the display to 155 (another pass code) and press SET.
-
Page 15: Warranty
Alpharetta, GA 30022 If the appliance is found by Auber Instruments to be defective in material or workmanship, Auber Instruments will repair or replace it free of charge. A dated proof of purchase may be required. The liability of Auber Instruments is limited solely to the cost of the repair or replacement of the unit at our discretion. - Page 16 Copyright 2007-2016, Auber Instruments All Rights Reserved. No part of this manual shall be copied, reproduced, or transmitted in any way without the prior, written consent of Auber Instruments. Auber Instruments retains the exclusive rights to all information included in this document.
- Page 17 Appendix 1 Managing the heat generated by the controller The heat dissipation of the controller is directly related to the electric current drawing power of the heater. If your cooker consumes less than 10 ampere of current or your pot is less than 5 gal (19 liters), you do not need to worry about the heat generated by the controller.
- Page 18 minutes will provide enough energy to heat 10 gallons (38 liters) of water up by 108° F (60 ° C). If your have a pot that is bigger than 10 gallons and the heater is drawing 15 A, and you need to raise the temperature by 108 ° F, you better use one of the methods mentioned below to reduce the heat in the controller.
Need help?
Do you have a question about the WS-1500ES and is the answer not in the manual?
Questions and answers