Table of Contents
Advertisement
Quick Links
Advertisement
Table of Contents

Subscribe to Our Youtube Channel
Related Manuals for Qsan XCUBESAN XS5226S XCUBESAN XS3224D


Summary of Contents for Qsan XCUBESAN XS5226S XCUBESAN XS3224D
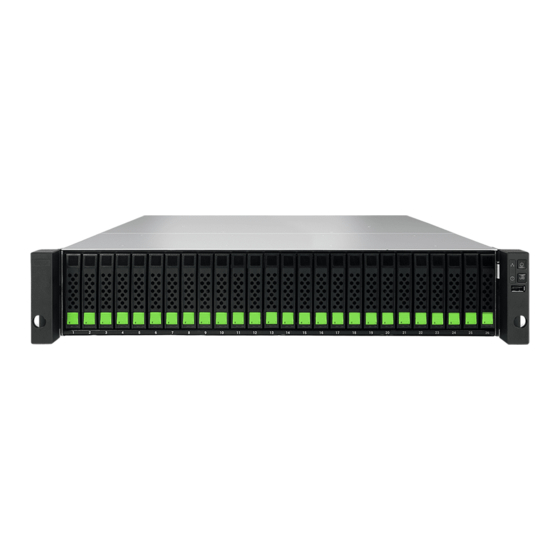
- Page 1 XCubeSAN Series Hardware Manual Applicable Models: XS5224D, XS5216D, XS5212D, XS5212S, XS5226D, XS5226S XS3224D, XS3224S, XS3216D, XS3216S, XS3212D, XS3212S XS3226D, XS3226S, XS1224D, XS1224S, XS1216D, XS1216S XS1212D, XS1212S, XS1226D, XS1226S QSAN Technology, Inc. www.QSAN.com...
- Page 2 Copyright © Copyright 2018 QSAN Technology, Inc. All rights reserved. No part of this document may be reproduced or transmitted without written permission from QSAN Technology, Inc. July 2019 This edition applies to QSAN XCubeSAN XS5200 / XS3200 / XS1200 series SAN storage systems.
-
Page 3: Notices
Notices This XCubeSAN hardware owner’s manual is applicable to the following XCubeSAN models: XCubeSAN Storage System 4U 19” Rack Mount Models Model Name Controller Type Form Factor, Bay Count, and Rack Unit XS5224D Dual Controller LFF 24-disk 4U Chassis XS3224D Dual Controller LFF 24-disk 4U Chassis XS3224S... -
Page 4: Regulatory Statements
Information contained in this manual has been reviewed for accuracy. But it could include typographical errors or technical inaccuracies. Changes are made to the document periodically. These changes will be incorporated in new editions of the publication. QSAN may make improvements or changes in the products. All features, functionality, and product specifications are subject to change without prior notice or obligation. - Page 5 VCC1-A CE Statement This device has been shown to be in compliance with and was tested in accordance with the measurement procedures specified in the Standards and Specifications listed below. Technical Standard: EMC DIRECTIVE 2014/30/EU (EN55022 / EN55024) UL Statement Rack Mount Instructions - The following or similar rack-mount instructions are included with the installation instructions: 1.
- Page 6 Las baterias pueden explotar si no se manipulan de forma apropiada. No desmonte ni tire las baterias al fuego. Siga las normativas locales al desechar las baterias agotadas. : (Simplified Chinese) © Copyright 2018 QSAN Technology, Inc. All Right Reserved.
- Page 7 Battery Backup Module or super capacitor module (applies for cache- to-flash module): 1 year limited warranty from date of original purchase. For more detail warranty policy, please refer to QSAN official web site: https://www.qsan.com/warranty Notices...
-
Page 8: Table Of Contents
Installing the Optional Memory Modules ................ 44 3.5. Installing the Optional Cache-to-Flash Modules ............. 48 3.6. Installing the Optional Slide Rails ..................52 3.7. Installing the Trays into the System ................55 © Copyright 2019 QSAN Technology, Inc. All Right Reserved. - Page 9 3.8. Connecting the System to a Host ..................56 3.8.1. Connecting to the Management Ports ............. 57 3.8.2. Dual Path (MPIO) Deployment ................57 3.8.3. Expansion Deployment ..................58 3.9. Connecting Power Cords and Powering ON the System ..........59 3.10.
- Page 10 Appendix ........................118 End-User License Agreement (EULA) ..................118 viii © Copyright 2019 QSAN Technology, Inc. All Right Reserved.
- Page 11 Figures Figure 1-1 Form Factors of All XCubeSAN Series Models .............. 2 Figure 2-1 System Controls and Indicators ..................14 Figure 2-2 LFF & SFF System Front Panel Components ............... 15 Figure 2-3 Disk Drive Indicators of LFF & SFF Disk Drive Tray ............15 Figure 2-4 System Disk Drive Numbering for the XCubeSAN Series ..........
- Page 12 4-port 10GbE iSCSI Host Card (SFP+) LEDs ..............88 Figure 5-8 2-port 10GBASE-T iSCSI Host Card (RJ45) LEDs ............89 Figure 5-9 4-port 1GBASE-T iSCSI Host Card (RJ45) LEDs ............90 © Copyright 2019 QSAN Technology, Inc. All Right Reserved.
- Page 13 Figure 5-10 Flash Module LEDs and Button ..................90 Figure 6-1 Warning Message of Failed Controller Module in the SANOS UI ........ 93 Figure 6-2 Warning Message of Controller Module by the Status LED ........94 Figure 6-3 Mechanical Components of the Controller Module ............. 94 Figure 6-4 Procedures of Removing the Controller Module ............
- Page 14 Available UPS Cable for XCubeSAN Series ..............64 Table 3-16 Available USB LCM for XCubeSAN Series ..............65 Table 4-1 Deployment Types ......................66 Table 4-2 The List of Available Cable for XCubeSAN Series ............67 © Copyright 2019 QSAN Technology, Inc. All Right Reserved.
- Page 15 Table 4-3 SAN System and Expansion Enclosure Configuration Rules ........68 Table 5-1 Descriptions of the System Controls and Indicators LEDs ......... 83 Table 5-2 Descriptions of Disk Drive LEDs ..................84 Table 5-3 Descriptions of XCubeSAN Series Controller LEDs ............. 85 Table 5-4 Descriptions of the Power Supply Unit LED ..............
-
Page 16: Preface
White Papers Application Notes Technical Support Do you have any questions or need help trouble-shooting a problem? Please contact QSAN Support, we will reply to you as soon as possible. © Copyright 2019 QSAN Technology, Inc. All Right Reserved. -
Page 17: Information, Tip, And Caution
Via Telephone: +886-2-7720-2118 extension 136 (Service hours: 09:30 - 18:00, Monday - Friday, UTC+8) Via Skype Chat, Skype ID: qsan.support (Service hours: 09:30 - 02:00, Monday - Friday, UTC+8, Summer time: 09:30 - 01:00) Via Email: support@qsan.com... - Page 18 Indicates that you have a choice between two or more options or arguments. / Slash Indicates all options or arguments. underline Indicates the default value. Example: [ a | b ] © Copyright 2019 QSAN Technology, Inc. All Right Reserved.
-
Page 19: Overview
Overview Thank you for purchasing QSAN Technology, Inc. products. The QSAN XCubeSAN series is a high-performance SAN storage solutions combining outstanding performance with high availability, reliability, flexibility, and simple management. 1.1. XCubeSAN Series Product Overview QSAN XCubeSAN series is a SAN storage system, the system is composed of system hardware and the SANOS operating system, the system hardware is a modular design and FRU (Field Replacement Unit) optimized. -
Page 20: Figure 1-1 Form Factors Of All Xcubesan Series Models
LFF 16-bay 3U Chassis XS3216D Dual Controller LFF 16-bay 3U Chassis XS3216S Single Controller LFF 16-bay 3U Chassis XS1216D Dual Controller LFF 16-bay 3U Chassis XS1216S Single Controller LFF 16-bay 3U Chassis © Copyright 2019 QSAN Technology, Inc. All Right Reserved. -
Page 21: Xcubesan Series Hardware Features
Table 1-3 XCubeSAN Series Storage System 2U 19” Rack Mount Models Model Name Controller Type Form Factor, Bay Count, and Rack Unit XS5212D Dual Controller LFF 12-bay 2U Chassis XS5212S Single Controller LFF 12-bay 2U Chassis XS3212D Dual Controller LFF 12-bay 2U Chassis XS3212S Single Controller LFF 12-bay 2U Chassis... -
Page 22: Xcubesan Series Hardware Specifications
for your dual controller XCubeSAN system; you have to purchase 6G MUX board from QSAN channel partners. Because there are different LFF and SFF disk drive trays, 6G MUX board is needed to adapt to the type of bracket: 。... - Page 23 4 x 10GbE iSCSI ports (SFP+) 2 x 10GbE iSCSI ports (RJ45) 4 x 1GbE iSCSI ports (RJ45) Optional Host Cards at Slot 2 (PCIe Gen2 x 4) 4 x 16Gb FC ports (SFP+) 2 x 16Gb FC ports (SFP+) 4 x 10GbE iSCSI...
-
Page 24: Table 1-5 Xs3200 Series Hardware Specifications
(connect with the SAS cable by using mini-SAS HD SFF-8644 connector) (per Controller) Drive Type Mix & match 3.5" & 2.5" SAS, NL-SAS, SED HDD 2.5" SAS, NL-SAS, 2.5” SAS, SATA SED HDD 2.5” SAS, SATA © Copyright 2019 QSAN Technology, Inc. All Right Reserved. -
Page 25: Table 1-6 Xs1200 Series Hardware Specifications
Expansion Up to 10 expansion units using XD5300 series 12Gb SAS expansion Capabilities enclosure XD5324 (4U 24-bay, LFF) XD5316 (3U 16-bay, LFF) XD5312 (2U 12-bay, LFF) XD5326 (2U 26-bay, SFF) Max. Drives Supported Dimension 19” Rack mount 19”... - Page 26 Protection Battery backup module + Flash module (to protect all memory capacity) Super capacitor module + Flash module (to protect up to 16GB memory per controller) USB LCM (LCD Module) (optional) © Copyright 2019 QSAN Technology, Inc. All Right Reserved.
-
Page 27: Xcubesan Series Package Contents
XCubeSAN Series Optional Accessories Following list are optional components for all XCubeSAN series models. If you want to purchase these optional components, please contact your nearest local reseller or visit QSAN official web site: https://qsan.com/location Table 1-7 XCubeSAN Series Accessories... - Page 28 4-port 10GbE iSCSI Host Card (SFP+) HQ-10G2T 2-port 10GBASE-T iSCSI Host Card (RJ45) HQ-01G4T 4-port 1GBASE-T iSCSI Host Card (RJ45) GBC-SFP+16Gb-J 16G Fibre Channel SFP+ Optical Transceiver GBC-SFP+10Gb-F 10GBASE-SR SFP+ Optical Transceiver © Copyright 2019 QSAN Technology, Inc. All Right Reserved.
- Page 29 GBC-SFP+8Gb-F 8G Fibre Channel SFP+ Optical Transceiver CBL-OPL500 Optical FC Cable, LC-LC, 5 Meters CBL-OPL200 Optical FC Cable, LC-LC, 2 Meters CBL-CNL Console Cable, Phone-jack, 1 Meter CBL-UPS UPS Cable, Phone-jack, 1 Meter CBL-12SW150 SAS 12G Expansion Cable with Wake-on-SAS, SFF-8644 to SFF-8644, 1.5 Meters (This cable is not suitable for connecting HBA or RAID card)
- Page 30 HDT-251 2.5” Disk Drive Tray XS5226 XS3226 XS1226 HDM-251 SATA 6Gb MUX Board and Bracket for HDT-251 © Copyright 2019 QSAN Technology, Inc. All Right Reserved.
-
Page 31: System Components Overview
System Components Overview This chapter outlines the key hardware components or modules of the XCubeSAN system. After reading this chapter, you will have a basic understanding of each part of the XCubeSAN hardware and give you the ability to be able to successfully configure and operate your system. -
Page 32: Figure 2-1 System Controls And Indicators
System Power Button/LED UID (Unique Identifier) Button/LED System Access LED System Status LED USB Port (for USB LCM module) Figures and the table below illustrate LFF & SFF system front panel components. © Copyright 2019 QSAN Technology, Inc. All Right Reserved. -
Page 33: Figure 2-2 Lff & Sff System Front Panel Components
Figure 2-2 LFF & SFF System Front Panel Components Table 2-2 LFF & SFF System Front Panel Components Number Description System Left Ear Disk Drive Tray System Right Ear The System Controls and Indicators Disk Drive Tray Indicators: figures and the table below illustrate LFF and SFF disk drive tray indicators. -
Page 34: System Disk Drive Numbering
LFF, you can find a disk drive numbering sticker on the right side of the system chassis top cover; for SFF system, the disk drive numbering is printed on the lower part of the system front. © Copyright 2019 QSAN Technology, Inc. All Right Reserved. -
Page 35: Supported Disk Drives And Ssds
This can be a reference for you to purchase suitable disk drives or SSDs for your system. QSAN has qualified the popular SAS HDDs and SAS/SATA SSDs available in the market; to ensure that you have the highest level of flexibility in choosing the most advanced HDDs or SSDs available from the manufacturers or purchase the best cost/performance SAS HDDs or SAS/SATA SSDs from the market, to suit your budget/performance. -
Page 36: Rear Panel
When installing SATA SSDs in dual controller models, it needs to install optional SATA 6Gb MUX board and bracket for 2.5” disk drive tray (model name: HDM-251). Please contact a QSAN authorized reseller for details purchasing information. 2.4. Rear Panel The following content outlines the detail of the XCubeSAN series rear panel and components. -
Page 37: Figure 2-5 Lff & Sff Rear Panel Layout
Figure 2-5 LFF & SFF Rear Panel Layout Table 2-5 LFF & SFF Rear Panel Layout Number Description Power Supply Unit 1 Fan Module 1 Slot for Cache-to-Flash Module: Flash Module Controller Module 1 Controller Module 2 Fan Module 2 Power Supply Unit 2 Slot for Cache-to-Flash Module: Power Module INFORMATION:... -
Page 38: Controller Module
Description of the Controller Module Components Number Description Host Card Slot 1 (host card is an optional part) Buzzer Mute Button Host Card Slot 2 (host card is an optional part) © Copyright 2019 QSAN Technology, Inc. All Right Reserved. - Page 39 Reset Button Console Port (3.5mm jack to RS232) Service Port (UPS) Management Port USB Port 1 USB Port 2 10GbE iSCSI Port 1 (RJ45) 10GbE iSCSI Port 2 (RJ45) 12Gb/s SAS Wide Port 1 (SFF8644) 12Gb/s SAS Wide Port 2 (SFF8644) INFORMATION: Press the button for 3 seconds to progress reset the management port...
-
Page 40: Power Supply Unit
The images and the table below illustrate the location of PSU in the LFF or SFF system. Figure 2-8 Location of the Power Supply Unit in the LFF or SFF System © Copyright 2019 QSAN Technology, Inc. All Right Reserved. -
Page 41: Fan Module
Table 2-7 Location of the Power Supply Unit in the LFF or SFF System Number Description PSU 1 PSU 2 Figure 2-9 Components of the Power Supply Unit Table 2-8 Components of the Power Supply Unit Number Description PSU Release Tab PSU Power Cord Connect PSU Handle PSU LED Indicator... -
Page 42: Figure 2-10 Location Of Each Fan Module Installed In The Lff Or Sff System
Location of Each Fan Module Installed in the LFF or SFF System Table 2-9 Location of Each Fan Module Installed in the LFF or SFF System Number Description Fan 1 and Fan 2 Fan 3 and Fan 4 © Copyright 2019 QSAN Technology, Inc. All Right Reserved. -
Page 43: Cache-To-Flash Memory Protection
Figure 2-11 Mechanical Components of the Fan Module Table 2-10 Mechanical Components of the Fan Module Number Description Fan Module Release Tab Fan Module Handle 2.7. Cache-to-Flash Memory Protection In the event of power loss, the I/O cache data stored in the volatile memory will be lost; this can cause data inconsistency especially in database applications. -
Page 44: Figure 2-12 Location Of The Cache-To-Flash Module
Figure 2-12 Location of the Cache-to-Flash Module Table 2-11 Location of the Cache-to-Flash Module Number Description Slot for Flash Module Slot for Power Module © Copyright 2019 QSAN Technology, Inc. All Right Reserved. -
Page 45: Mechanism Of Cache Data Protection
Figure 2-14 The Cache-to-flash Module – SCM (Super Capacitor Module) Pack 2.7.1. Mechanism of Cache Data Protection The following image is the working sequence of QSAN Cache-to-Flash workflow. Figure 2-15 Cache-to-Flash Workflow Cache-to-Flash technology will first flush CPU cache to memory RAM, then flush memory RAM to M.2 flash module to maintain the upmost data consistency. -
Page 46: Features Of The Cache-To-Flash Module
Protection Memory Capacity by Different Cache-to-Flash Module Device Protection Memory Capacity Battery Backup Module + Flash Module Protect all memory capacity Super Capacitor Module + Flash Module Protect up to 16GB memory per controller © Copyright 2019 QSAN Technology, Inc. All Right Reserved. -
Page 47: Installing The System Hardware
Installing the System Hardware This chapter will show you the detailed procedure of the XCubeSAN series hardware installation and initial configuration. 3.1. Installation Checklist To ensure a successful system installation and initial configuration, you can follow the procedures in the checklist below by order. Table 3-1 Installation Checklist Step... -
Page 48: Figure 3-1 Front Side Components Of Lff & Sff Disk Drive Trays
Procedure of opening the SFF disk drive tray carrier handle: shift the carrier handle release button from up to down; then carrier handle will automatically pop out. © Copyright 2019 QSAN Technology, Inc. All Right Reserved. -
Page 49: Figure 3-2 Unlock And Open The Carrier Handle Of A Disk Drive Tray (Lff)
Figure 3-2 Unlock and Open the Carrier Handle of a Disk Drive Tray (LFF) Figure 3-3 Unlock and Open the Carrier Handle of a Disk Drive Tray (SFF) The following content is the procedure for removing disk drive trays from the system: 。... -
Page 50: Figure 3-4 Hold The Carrier Handle And Pull Out The Disk Drive Tray (Lff)
Figure 3-4 Hold the Carrier Handle and Pull out the Disk Drive Tray (LFF) Figure 3-5 Hold the Carrier Handle and Pull out the Disk Drive Tray (SFF) © Copyright 2019 QSAN Technology, Inc. All Right Reserved. -
Page 51: Figure 3-6 Align A Disk Drive & Install Into A Tray (Lff-To-Lff)
Installing a Disk Drive into a Tray Following contents and figures are detail steps of installing a disk drive into the tray. For installing an LFF disk drive into an LFF tray 。 Place a disk drive tray onto a stable surface. 。... -
Page 52: Figure 3-7 Align A Disk Drive & Install Into A Tray (Sff-To-Lff)
。 Align four disk drive tray screw holes on both sides of the disk tray. 。 Install and tighten all four screws to secure disk drive within the tray. © Copyright 2019 QSAN Technology, Inc. All Right Reserved. -
Page 53: Figure 3-8 Align A Disk Drive & Install Into A Tray (Sff-To-Sff)
Figure 3-8 Align a Disk Drive & Install into a Tray (SFF-to-SFF) TIP: Please plug-in any of the first four hard drives, then event logs can be saved and displayed in next system boot up. Otherwise, the event logs cannot be saved. The table below shows the available disk drive trays, MUX board with bracket, and their descriptions. -
Page 54: Installing The Optional Host Cards
There are several types of host cards that are available for selection. You can configure a Fibre Channel SAN by using QSAN 16Gb Fibre Channel host cards; you can choose a iSCSI SAN by using 10GbE via SFP+, 10GBASE-T, or 1GBASE-T iSCSI host cards. The table below shows the available host card types, model names, and their descriptions. -
Page 55: Figure 3-9 Host Card Installation Slots
Figure 3-9 Host Card Installation Slots Table 3-5 Host Card Installation Slots of a Controller Item Number Description Host Card Slot 1 Host Card Slot 2 Please refer to following tables for supported installing location and combination of host cards to keep the optimized system performance and prevent any unexpected incidents. Table 3-6 Supported Installing Location and Combination of the Host Cards Controller... - Page 56 HQ-10G2T CTRL 1 HQ-10G4S2 HQ-01G4T Single Controller iSCSI SAN 10GbE (SFP+) CTRL 1 HQ-10G4S2 HQ-01G4T 1GBASE-T Dual Controller (RJ45) CTRL 2 HQ-10G4S2 HQ-01G4T iSCSI SAN Single Controller CTRL 1 HQ-10G2T HQ-01G4T © Copyright 2019 QSAN Technology, Inc. All Right Reserved.
- Page 57 10GBASE-T (RJ45) + 1GBASE-T CTRL 1 HQ-10G2T HQ-01G4T (RJ45) Dual Controller CTRL 2 HQ-10G2T HQ-01G4T CTRL 1 HQ-16F4S2 HQ-10G4S2 Single Controller Mix SAN 16Gb FC (SFP+) CTRL 1 HQ-16F4S2 HQ-10G4S2 10GbE Dual Controller (SFP+) CTRL 2 HQ-16F4S2 HQ-10G4S2 CTRL 1 HQ-10G4S2 HQ-16F2S2 Single Controller...
- Page 58 The following content and images are detailed steps for installing a host card into the system. Remove the controller from the system chassis. The following image and table are the introduction of the mechanical components of a controller module. © Copyright 2019 QSAN Technology, Inc. All Right Reserved.
-
Page 59: Figure 3-10 Mechanical Components Of The Controller Module
Figure 3-10 Mechanical Components of the Controller Module Table 3-7 Mechanical Components of a Controller Module Number Description Release Lever Screw The following content and images are detailed steps for removing the controller module from the system chassis. Use a Phillips screwdriver to loosen the thumb screws on each release levers. -
Page 60: Figure 3-11 Steps Of Removing The Controller Module
Remove the dummy host card cage by loosening two screws of the dummy host card cage and then take dummy host card cage from controller module. Figure 3-12 Procedures of Removing the Host Card Dummy Cage © Copyright 2019 QSAN Technology, Inc. All Right Reserved. -
Page 61: Figure 3-13 Procedures Of Installing The Host Card
Align the host card to the slot to be installed and then push all the way into the controller cage until hear a “click” sound and make sure the host card is well connected with the connector in the controller module. Figure 3-13 Procedures of Installing the Host Card ... -
Page 62: Installing The Optional Memory Modules
It is requested that the installation slot and capacity of the memory module MUST be exactly the same for both controller. The table below shows the available memory modules and their descriptions. © Copyright 2019 QSAN Technology, Inc. All Right Reserved. -
Page 63: Table 3-8 Memory Modules For Xcubesan Series
Table 3-8 Memory Modules for XCubeSAN Series Model Name Picture Description Applied Models DIM-D44GB DDR4 ECC 4GB Memory XS5200 Series Module XS3200 Series XS1200 Series DIM-D48GB DDR4 ECC 8GB Memory Module DIM-D416GB DDR4 ECC 16GB Memory Module DIM-D432GB DDR4 ECC 32GB Memory XS5200 Series Module XS3200 Series... -
Page 64: Figure 3-15 The Installation Sequence Of The Memory Module In Xs3200 And Xs5200
16GB 16GB 48GB 16GB 16GB 16GB 16GB 32GB 16GB 16GB 16GB 48GB 16GB 16GB 16GB 16GB 64GB 32GB 32GB 32GB 32GB 64GB 32GB 32GB 32GB 96GB 32GB 32GB 32GB 32GB 128GB © Copyright 2019 QSAN Technology, Inc. All Right Reserved. -
Page 65: Figure 3-16 The Installation Sequence Of The Memory Module In Xs1200
CAUTION: To ensure the system stability, you MUST install genuine QSAN memory modules for system memory size expansion. In addition, the DIMM type of 32GB is RDIMM, and the others are UDIMM. The platform does not support mixing of DIMM, so there are not allowed the combinations of mixing 32GB. -
Page 66: Installing The Optional Cache-To-Flash Modules
Cache-to-Flash Module : C2F-SP16G + C2F-FLHMD (Protect up to 16GB memory per controller) C2F-BBMD Battery Backup Module for Cache-to-Flash C2F-SP16G Super Capacitor Module for Cache-to-Flash (Protect up to 16GB memory per controller) © Copyright 2019 QSAN Technology, Inc. All Right Reserved. -
Page 67: Figure 3-17 Location Of The Cache-To-Flash Module
C2F-FLHMD Flash Module for Cache-to- Flash CAUTION: The flash module of Cache-to-Flash is hot swappable because it is a PCIe device. Before removing the flash module from the system chassis, you must press the attention button until the flash module status LED finished blinking. -
Page 68: Figure 3-18 Components Of The Cache-To-Flash Modules
Remove the dummy cache-to-flash cage by losing the screw on it and then remove the dummy cage from the system chassis. Follow the same procedure for both sides. Figure 3-19 The Dummy Cage Screw Location of the Cache-to-Flash Module © Copyright 2019 QSAN Technology, Inc. All Right Reserved. -
Page 69: Figure 3-20 Installing The Flash Module
Align the flash module cage to the slot and then push it all the way into the system chassis until hear a “click” sound (for 4U/3U chassis, release tabs of both flash and power modules are facing left hand side while installing into the system; 2U chassis release tabs of both flash and power modules are facing upward while installing into the system). -
Page 70: Installing The Optional Slide Rails
Status and Information of Cache-to-Flash Module 3.6. Installing the Optional Slide Rails If you did not purchase QSAN qualified slide rails, please skip this section. The table below shows the available slide rail, model name, and its description. Table 3-13... -
Page 71: Figure 3-23 First Step Of The Slide Rails Installation
CAUTION: The populated XCubeSAN system can be very heavy, to avoid any potential injury or harm to installers, or damage to the system, we strongly recommend at least two certified operators or engineers perform the system installation. TIP: Install the disk drive trays into the system after the system chassis is mounted in the rack. -
Page 72: Figure 3-24 Second Step Of The Slide Sails Installation
3. Third step of the slide rails installation 。 Install the outer rail/bracket assembly to the frame. 。 Repeat this installation step for the other side. Figure 3-25 Third Step of the Slide Rails Installation © Copyright 2019 QSAN Technology, Inc. All Right Reserved. -
Page 73: Installing The Trays Into The System
4. Fourth step of the slide rails installation 。 Pull the middle member fully extended in locked position. 。 Ensure ball bearing retainer is located at the front of the middle member. 。 Insert chassis into middle-outer member. 。 When hitting the stop, pull/push release tab to unlock and retract chassis into rack. 。... -
Page 74: Connecting The System To A Host
SAS3 expansion ports for expansion by adding up to nine XCubeDAS series enclosures. To learn more about advanced types of cabling, please refer to the chapter 4, Deployment Types and Cabling. © Copyright 2019 QSAN Technology, Inc. All Right Reserved. -
Page 75: Connecting To The Management Ports
3.8.1. Connecting to the Management Ports XCubeSAN series models are equipped with one 1Gb BASE-T (RJ45) management port onboard per controller to allow access to the web based SANOS management system. The following image is the example of the cabling for the XCubeSAN management ports. Switch XCubeSAN Figure 3-29... -
Page 76: Expansion Deployment
XCubeSAN series using CAT 6 network cables. And a dual controller XCubeSAN series connected to a dual controller XCubeDAS XD5300 series using mini SAS HD to mini SAS HD cable (SAS 12G expansion cable with Wake-on-SAS, SFF-8644 to SFF-8644). © Copyright 2019 QSAN Technology, Inc. All Right Reserved. -
Page 77: Connecting Power Cords And Powering On The System
Server XCubeSAN Wake-on-SAS Cable Wake-on-SAS Cable XCubeDAS Figure 3-31 One Server / One HBA / One XCubeSAN / One XCubeDAS / Dual Path 3.9. Connecting Power Cords and Powering ON the System Before you power on your XCubeSAN system for the first time, please make sure following tasks are done: Check the power cord type. -
Page 78: Figure 3-32 Press The Power Button One Time To Power On The System
Temperature: Operating temperature 0 to 40°C Shipping temperature -10°C to 50°C Relative Humidity: Operating Relative Humidity 20% to 80% non-condensing Non-Operating Relative Humidity 10% to 90% © Copyright 2019 QSAN Technology, Inc. All Right Reserved. -
Page 79: Powering Off The System
TIP: The XCubeSAN series will remember the current power state when the power failed by accent. If the system is online state, after power is recovered, the system will power on automatically. If the system is offline, the system will keep power off. 3.10. -
Page 80: Wake-On-Lan / Wake-On-Sas To Power On / Off The System
QSAN’s Wake-on-SAS technology allows you to remotely power on/off all cascaded XD5300 expansion enclosures by using QSAN proprietary SAS cables. You can power on the XCubeSAN system remotely using the Wake-on-LAN feature. The XCubeSAN can work with any available Wake-on-LAN freeware and shareware. Wake-on-SAS ensures that expansion enclosures will not run idly, consuming electricity after the SAN storage system is shut down for maintenance or other purposes. -
Page 81: Connecting A Ups
If users want to install a UPS (uninterruptible power supply) to provide clean power and also offer protection against mains power failures, please follow the following instructions. Before you purchase a UPS system, please check QSAN XCubeSAN series supported ... -
Page 82: Connecting The Optional Usb Lcm
Connect the USB LCM to the female side of the USB extension cable. Connect the male side of the USB extension cable to the USB port on the system front pillar. © Copyright 2019 QSAN Technology, Inc. All Right Reserved. -
Page 83: Discover And Carry Out The Initial Configuration For The System
To discover the system, we suggest downloading our QFinder application from the QSAN web site; this will hunt the network for your new SAN and allow you to access it via the SANOS GUI. For more information about discovering your system... -
Page 84: Deployment Types And Cabling
XCubeSAN system. In multi-server models) attached deployment, both single and dual path deployment modes are supported. For more detail deployment type and cabling, please refer following sections. © Copyright 2019 QSAN Technology, Inc. All Right Reserved. -
Page 85: Cabling The System
Recommended SAS cable length for the host connection is less than 3 meters. If you want to enable wake on SAS for the XCubeDAS enclosures, the QSAN genuine SAS cable with sideband is required to enable this feature. The XCubeSAN supports a maximum of up to 626 drives for the system storage space expansion;... - Page 86 XD5312 (2U 26 + 10 x 12 1,262.4TB 2,079.36TB XS3226 / 12-bay, LFF) = 146 XS1226 XD5316 (3U 26 + 10 x 16 1,662.4TB 2,639.36TB (2U 26-bay, 16-bay, LFF) = 186 © Copyright 2019 QSAN Technology, Inc. All Right Reserved.
-
Page 87: Single Path Deployment
SFF) XD5324 (4U 26 + 10 x 24 2,462.4TB 3759.36TB 24-bay, LFF) = 266 XD5326 (2U 26 + 10 x 26 686.4TB 4,392.96TB 26-bay, SFF) = 286 XD5360 (4U 26 + 10 x 60 6,062.4TB 8,799.36TB 60-bay, LFF) = 626 4.2.2. -
Page 88: Dual Path (Mpio) Deployment
The following figure shows an example of a dual controller, connect enclosure configuration with one server accessing the storage via switches. One server is connected to a dual controller XCubeSAN series using CAT 6 network cables. © Copyright 2019 QSAN Technology, Inc. All Right Reserved. -
Page 89: Figure 4-3 One Server / One Hba / Two Switches / One Xcubesan / Dual Path
Server Switch XCubeSAN Figure 4-3 One Server / One HBA / Two Switches / One XCubeSAN / Dual Path One Server / One HBA / One XCubeSAN / One XCubeDAS / Dual Path The following figure shows an example of a dual controller, connect enclosure configuration with one server accessing the storage. -
Page 90: Multi-Server Attached Cabling Deployment
10GBASE-T iSCSI port in a single controller XCubeSAN series using CAT 6 network cables. Server XCubeSAN Figure 4-5 Two Servers / One HBA per Server / One XCubeSAN / Single Path © Copyright 2019 QSAN Technology, Inc. All Right Reserved. -
Page 91: Figure 4-6 Two Servers / One Hba Per Server / Two Switches / One Xcubesan / Dual Path
Two Servers / One HBA per Server / Two Switches / One XCubeSAN / Dual Path The following figure shows an example of a dual controller, connect enclosures configuration with two servers accessing the storage via switches. Two servers are connected to a dual controller XCubeSAN series using CAT 6 network cables. -
Page 92: Figure 4-7 Ten Servers / One Hba Per Server / One Xcubesan / Dual Path
3.3, Installing the Optional Host Cards. Figure 4-7 Ten Servers / One HBA per Server / One XCubeSAN / Dual Path © Copyright 2019 QSAN Technology, Inc. All Right Reserved. -
Page 93: Expansion Topology And Deployment
4.2.5. Expansion Topology and Deployment The following images illustrate some examples of expansion topology and deployment types for dual controller XCubeSAN series. Cascade Topology: One XCubeSAN / One XCubeDAS / Dual Path The following figure shows an example of a dual controller XCubeSAN series connected to a dual controller XCubeDAS XD5300 series using mini SAS HD to mini SAS HD cable (SAS 12G expansion cable with Wake-on-SAS, SFF-8644 to SFF-8644). -
Page 94: Figure 4-9 Cascade Topology: One Xcubesan / Two Xcubedas / Dual Path
Wake-on-SAS, SFF-8644 to SFF-8644). XCubeSAN Wake-on-SAS Cable Wake-on-SAS Cable XCubeDAS 1 Wake-on-SAS Cable Wake-on-SAS Cable XCubeDAS 2 Figure 4-9 Cascade Topology: One XCubeSAN / Two XCubeDAS / Dual Path © Copyright 2019 QSAN Technology, Inc. All Right Reserved. -
Page 95: Figure 4-10 Reverse Topology: One Xcubesan / Two Xcubedas / Dual Path
Reverse Topology: One XCubeSAN / Two XCubeDAS / Dual Path The XCubeDAS can be connected in redundant connection mode based on forward direction and backward direction. This provides the optimal networking reliability. The following figure shows an example of a dual controller XCubeSAN series connected to a dual controller XCubeDAS XD5300 series which is in turn connected to the second dual controller XCubeDAS XD5300 series using mini SAS HD to mini SAS HD cable (SAS 12G expansion cable with Wake-on-SAS, SFF-8644 to SFF-8644). -
Page 96: Introduction Of Remote Replication
4.2.6. Introduction of Remote Replication If users purchase two or more XCubeSAN series systems and plan to deploy them in different locations, the Remote Replication function in QSAN SANOS supports multiple topologies to suit various disaster recovery configurations. The following remote replication... -
Page 97: Figure 4-12 One-Directional Remote Replication
One-Directional Figure 4-12 One-Directional Remote Replication A Source Volume (S) in Site A is replicating to a Target Volume (T) in Site B. This is the most basic remote replication topology. Bi-Directional Figure 4-13 Bi-Directional Remote Replication Each system in a two system topology acts as a replication target for the other’s production data. -
Page 98: Figure 4-15 Many-To One Remote Replication
Site C is replicating to a Target Volume (T2) in Site A. So does S3 in Site D to T3 in Site A. Many-to-Many Figure 4-16 Many-to Many Remote Replication Combination with bi-Directional, one-to-many, and many-to-one, remote replication also supports Many-to-Many topology. Multiple source systems replicate to multiple target © Copyright 2019 QSAN Technology, Inc. All Right Reserved. - Page 99 systems. A Source Volume (S1) in Site A is replicating to a Target Volume (T1) in Site B. At the same time, a Source Volume (S2) in Site B is replicating to a Target Volume (T2) in Site A. And does S3 to T3, S4 to T4, …, S8 to T8. TIP: Note that all supported topologies have a 1-to-1 configuration for each individual replication session in the topology.
-
Page 100: Descriptions Of Leds And Buttons
5.1.1. System Controls and Indicators XCubeSAN features the button and indication module on the right ear. Please refer to the following content for definitions of LED behaviors. Figure 5-1 System Controls and Indicators © Copyright 2019 QSAN Technology, Inc. All Right Reserved. - Page 101 Table 5-1 Descriptions of the System Controls and Indicators LEDs Number Description Definition Enclosure Power Power Button Button/LED Press the button one time to turn ON the system power and keep pressing for 4 seconds to turn OFF the system power. Power LED ...
-
Page 102: Disk Drive Leds
Solid Amber: There is disk drive error. Blinking Amber (interval of 0.5 sec): The disk drive is rebuilding. Blinking Amber (interval of 0.05 sec): Identify the disk drive. Off: The disk drive is healthy. © Copyright 2019 QSAN Technology, Inc. All Right Reserved. -
Page 103: Rear Panel
5.2. Rear Panel In this session, we will describe the system control LEDs, PSU LEDs, host card LEDs, and the cache-to-flash module LED in the rear panel. 5.2.1. Controller LEDs Please refer to the following content for definitions of the LED behaviors. Figure 5-3 The Controller LEDs Table 5-3... -
Page 104: Power Supply Unit Led
(Standby) is on. Solid Amber: There is critical event caused shutdown. Blinking Amber: There are PSU warning events including high temperature, high power, high current, slow fan, or under input voltage. © Copyright 2019 QSAN Technology, Inc. All Right Reserved. -
Page 105: Host Card Leds
5.2.3. Host Card LEDs Please refer to the following content for definitions of the LED behaviors. 4-port 16Gb Fibre Channel Host Card (SFP+) LEDs Figure 5-5 4-port 16Gb Fibre Channel Host Card (SFP+) LEDs Table 5-5 Descriptions of 4-port 16Gb Fibre Channel Host Card (SFP+) LEDs Number Description Definition... -
Page 106: Figure 5-6 2-Port 16Gb Fibre Channel Host Card (Sfp+) Leds
link is established and maintained Off: No link is detected or link fails. 4-port 10GbE iSCSI Host Card (SFP+) LEDs Figure 5-7 4-port 10GbE iSCSI Host Card (SFP+) LEDs © Copyright 2019 QSAN Technology, Inc. All Right Reserved. -
Page 107: Figure 5-8 2-Port 10Gbase-T Iscsi Host Card (Rj45) Leds
Table 5-7 Descriptions of 4-port 10GbE iSCSI Host Card (SFP+)LEDs Number Description Definition Activity LED Blinking Green: Asserted when the link is established and packets are being transmitted along with any receive activity (Access). Off: No link is detected or link fails. Speed LED Solid Blue: Asserted when a 10G link is ... -
Page 108: Cache-To-Flash Module Leds And Button
Off: No link is detected or link fails. 5.2.4. Cache-to-Flash Module LEDs and Button Please refer to the following content for definitions of the LED and button behaviors. Figure 5-10 Flash Module LEDs and Button © Copyright 2019 QSAN Technology, Inc. All Right Reserved. - Page 109 Table 5-10 Descriptions of Flash Module LEDs and Button Number Description Definition Power LED Solid Green: Power is good at flash module. Off: There is no power at flash module. Status LED Solid Blue: The status of flash module is good.
-
Page 110: Quick Maintenance
Removing / Installing the Controller Module This section outlines how to check the status of your controller module and the procedure of removing / installing the controller module when encountering problems. © Copyright 2019 QSAN Technology, Inc. All Right Reserved. - Page 111 Removing the Controller Module CAUTION: The controller module is heavy and fragile; please use both hands while installing, removing, or carrying the controller module. Recommended place for removing the controller module: the system is in a well secured rack or on a stable surface. For single controller model, the controller must be installed into slot 1 ...
- Page 112 Use a Phillips screwdriver to loosen the thumb screws on each release levers. Pull down both release levers at the same time and then pull out about half length of the controller module by holding two release levers. © Copyright 2019 QSAN Technology, Inc. All Right Reserved.
- Page 113 Use one hand to hold one end of the controller module (the side with release levers) and the other hand hold the bottom of the controller; pull out the controller module until it is free from the system chassis. Figure 6-4 Procedures of Removing the Controller Module Installing the Controller Module...
- Page 114 UI will show figure 6-6: System Healthy is Good. Figure 6-6 Screenshot of the Controller Module Successfully Installed in SANOS UI © Copyright 2019 QSAN Technology, Inc. All Right Reserved.
-
Page 115: Removing / Installing The Power Supply Unit
6.2. Removing / Installing the Power Supply Unit The standard XCubeSAN series system comes with two redundant PSUs (Power Supply Units) that allow users to hot swap it when one of the PSUs is not functioning. All XCubeSAN models are fitted with the same PSU, but the installation direction came differ. - Page 116 Use one hand to hold one end of the PSU (the side with release tab) and the other hand hold the bottom of the power supply unit; pull out the power supply unit until it is free from the system chassis. © Copyright 2019 QSAN Technology, Inc. All Right Reserved.
- Page 117 Figure 6-9 Procedures of Removing the Power Supply Unit Installing the Power Supply Unit The following are detailed steps of installing the PSU into the system chassis. Use one hand to hold one end of the power supply unit (the side with release tab and ...
-
Page 118: Removing / Installing The Fan Module
In the event that the fan module fails, it can be hot-swapped. The XCubeSAN series utilizes two types of fan module 100 © Copyright 2019 QSAN Technology, Inc. All Right Reserved. - Page 119 for 4U/3U and 2U system chassis. Please refer to the following information for the fan module removing / installing procedures. CAUTION: The fan module is heavy; please use both hands while removing, holding, or carrying the fan module. The fan module is hot swappable, but power off the system to do the fan module installing or removing is highly recommended.
- Page 120 Use one hand to hold one end of the fan module (the side with release tab and handle) and the other hand hold the bottom of the module; pull out the module until it is free from the system chassis. 102 © Copyright 2019 QSAN Technology, Inc. All Right Reserved.
- Page 121 Figure 6-14 Procedures of Removing the Fan Module Installing the Fan Module The following details the steps of installing the fan module into the system chassis. Use one hand to hold one end of the fan module (the side with release tab and handle) ...
-
Page 122: Removing The Host Card
Overview, it will show all host cards you have installed. If the host card has fault, all of the ports will have a fault and will show as Down. The following figure is the example of one port failed of the 10GbE iSCSI host card. 104 © Copyright 2019 QSAN Technology, Inc. All Right Reserved. - Page 123 Figure 6-17 Example of a Failed Port on the 10GbE iSCSI Host Card The following content and images are detailed steps of removing a host card from the system. Remove the controller module first. For detailed steps of removing a controller module; please refer to the chapter 6.1, Removing / Installing the Controller Module section.
-
Page 124: Removing The Cache-To-Flash Modules
You may need to replace the power module or flash to ensure continued protection. The following figure is the example of a failed flash module. 106 © Copyright 2019 QSAN Technology, Inc. All Right Reserved. - Page 125 Figure 6-21 Example of a Failed Power Module Figure 6-22 Example of a Failed Flash Module CAUTION: The flash module of Cache-to-Flash is hot swappable because it is a PCIe device. Before removing the flash module from the system chassis, you must press the attention button until the flash module status LED finished blinking.
- Page 126 Install the dummy cache-to-flash cage and then use a Phillips screw driver to tighten it. Figure 6-24 The Procedure of Removing the Flash Module from the System Chassis The following content and image are detail steps of removing the power module. 108 © Copyright 2019 QSAN Technology, Inc. All Right Reserved.
- Page 127 Press the release button of power module and pull it out until it is free from system chassis. Install the dummy cache-to-flash cage and then use a Phillips screw driver to tighten it. To ensure proper cooling of the system, please install all dummy cache-to-flash module ...
-
Page 128: Support And Other Resources
SANOS UI -> MAINTINANCE > System Information and use it to register your product at https://www.qsan.com/business_partnership. We recommend registering your product in QSAN partner website for firmware updates, document download, and latest news in eDM. To contact QSAN Support, please use the following information. Via the Web: https://www.qsan.com/technical_support... - Page 129 Figure 7-1 Download Service Package in the SANOS UI Support and Other Resources...
-
Page 130: Online Customer Support
Please follow the procedures below to setup the online help environment for QSAN support team. The following procedure will help you to setup the serial console via the console cable that is enclosed in the shipping carton. - Page 131 2. You must use terminal software such as HyperTerminal or Putty to open the console after the connection is made. INFORMATION: For more information about terminal software, please refer to HyperTerminal: http://www.hilgraeve.com/hyperterminal/ PuTTY: http://www.putty.org/ 3. Here we first demonstrate HyperTerminal. The console settings are on the following. Baud rate: 115200, 8 data bit, no parity, 1 stop bit, and no flow control Terminal type: vt100 Support and Other Resources...
- Page 132 Figure 7-4 The Procedures of Setup Serial Console by HyperTerminal 4. If you are using PuTTY instead, please refer to below 114 © Copyright 2019 QSAN Technology, Inc. All Right Reserved.
- Page 133 Support and Other Resources...
-
Page 134: Accessing Product Updates
Following is the procedure to setup the connection for online support via TeamViewer: 1. Please download the TeamViewer from following hyper link: https://www.teamviewer.com/en/download/ 2. Install TeamViewer. 3. Please provide the ID/password showed on the application to QSAN support team member to join the online support session. 7.3. Accessing Product Updates To download product updates, please visit QSAN website: https://www.qsan.com/download_center... -
Page 135: Documentation Feedback
7.4. Documentation Feedback QSAN is committed to providing documentation that meets and exceeds your expectations. To help us improve the documentation, email any errors, suggestions, or comments to docsfeedback@qsan.com. When submitting your feedback, include the document title, part number, revision, and publication date located on the front cover of the document. - Page 136 EULA. Any right beyond this EULA will not be granted. Intellectual Property Right Intellectual property rights relative to the Product are the property of QSAN or its licensor(s). User will not acquire any intellectual property by this EULA.
- Page 137 WARRANTY OF ANY KIND. QSAN MAKES NO WARRANTY THAT THE PRODUCT WILL BE FREE OF BUGS, ERRORS, VIRUSES OR OTHER DEFECTS. IN NO EVENT WILL QSAN BE LIABLE FOR THE COST OF COVER OR FOR ANY DIRECT, INDIRECT, SPECIAL, PUNITIVE, INCIDENTAL, CONSEQUENTIAL OR SIMILAR DAMAGES OR...
- Page 138 QSAN may assign its rights and obligations under this EULA to any third party without condition. This EULA will be binding upon and will inure to User’s successors and permitted assigns. This EULA shall be governed by and constructed according to the laws of R.O.C. Any ...
Need help?
Do you have a question about the XCUBESAN XS5226S XCUBESAN XS3224D and is the answer not in the manual?
Questions and answers