Table of Contents
Advertisement
Quick Links
Advertisement
Table of Contents

Subscribe to Our Youtube Channel
Related Manuals for AG Neovo M-19


Summary of Contents for AG Neovo M-19
-
Page 2: Table Of Contents
TABLE OF CONTENT PRECAUTIONS ... 2 ... 2 NSTALLATION ... 2 OWER CONNECTION ... 2 SING THE RACE ... 3 AINTENANCE RANSPORTING THE MONITOR GETTING STARTED... 4 ... 4 ACKAGE CONTENTS NSTALLATION OF IRST DENTIFYING PARTS AND CONTROLS UNCTIONS OF THE BUTTONS AND INDICATOR ... -
Page 3: Precautions
Installation • Do not cover or block the ventilation ports on the rear of the monitor. • Do not install the monitor close to heat sources such as radiators or air ducts, or in a location exposed to direct sunlight, excessive dust, mechanical vibration, or shock. Power connection •... -
Page 4: Maintenance
Maintenance • Clean the cabinet and controls with a soft cloth lightly moistened with a mild detergent solution. Do not use any abrasive materials or solvents such as alcohol or benzene. • Do not rub, touch, or tap the surface of the screen with sharp or abrasive items such as pens or screwdrivers, as the screen may scratch. -
Page 5: Getting Started
Package contents Before beginning, ensure that the carton contains the following items: • Monitor • Power cord The power cord set shall be approved according to IEC 60227 and relevant national standard with conductors providing a cross-sectional area of 3 x 0.75min, type H05VV-F or H03VV-F. -
Page 6: Installation Of First Use
Installation of First Use The installation of the monitor is very simple. What you need to do is to take the monitor from the packing box and remove all the packing materials, and then put the monitor on the desk carefully, rotating the brace on the back of the monitor to a fixed angle according to the arrowhead indication. -
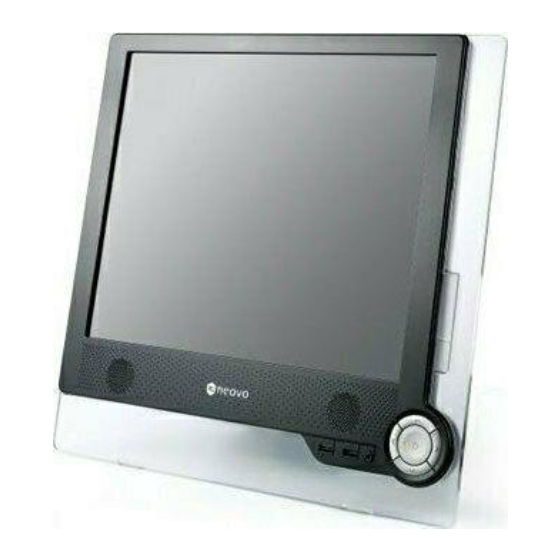
Page 7: Identifying Parts And Controls
Identifying parts and controls This monitor has a bran new OSD menu: The control buttons as following: Functions of the buttons and indicator: Button Hotkey: Volume + / Mute Off Item Show / Hide OSD ON / OFF Switch Function Selection Key Function Detail Press this key to activate or deactivate the OSD menu. - Page 8 Function Selection Key Down Hotkey: Volume - / Mute On Setting Key Hotkey: Luminance Left Setting Key Hotkey: Luminance Right Light continuously (Green) Operating Turn Bright and Dark Slowly mode indicator Extinguish Completely Press this key once; the OSD menu will be activated clockwise one by one.
- Page 9 *To avoid others to alter the setting values of the monitor, the lock function of the OSD menu has been designed. Lock: When the monitor is power-off, press the time and turn on the monitor. Keep pressing the Up and Down buttons for about 5 seconds until the words “Key Lock”...
-
Page 10: Setup
Setup Follow these directions to correctly set up your monitor. DC 12V DVI Port VGA Port Audio In USB Port... - Page 11 Please turn off PC power. To connect the signal cable to the VGA or DVI port on your PC. Make sure connection is secure. To connect the DC 12V plug of the power adapter to the Monitor DC 12V socket. Connect the other plug of the power adapter to a power source.
-
Page 12: Customizing Your Monitor
Customizing your Monitor The On Screen Display (OSD) system provides a full range of customizable tools to optimize your display. Important: While full customization is available, we strongly recommend using the AUTO settings, which are preset to fully optimize your monitor’s performance. Simply presses the AUTO button to engage the AUTO settings. - Page 13 Press to adjust the setting values. (Press the keys continuously, when the setting value is number type, the value will increase or reduce 10 every time.) The usage of the rest keys can be deduced from analogy. Select , and then press the key menu.
-
Page 14: Hotkey And The Characteristic Functions Introduction
Hotkey and the Characteristic Functions Introduction Volume Control Press Press the key (Press the key Luminance The contrast and luminance are two setting values that users adjust most frequently. However, it is not easy for users to set the proportions of these two values properly to acquire the best quality pictures. - Page 15 avMode Doing official work, surfing on the internet, playing computer games, seeing films and so on are the common functions of computer. But during these activities, the factors such as the content of displaying, the distance from the user to the monitor, etc. are different and in order to obtain the best effect, different contrast and luminance, even color temperature are needed to adapt to the situations, especially when environment light of day and night differs so greatly.
-
Page 16: Advanced Power Saving Mode
Advanced Power Saving Mode The traditional monitors have the function of electricity-saving dormancy. But the interval of dormancy is difficult to decide. If the interval is too long, the purpose of saving electricity can not be achieved. While the interval is too short, after you answer a phone call, your monitor becomes dormant and you must press the keys to awake your computer. -
Page 17: Osd Icon List
OSD Icon List Function Detail Icon Brightness Light Contrast Sharpness Clock Screen Phase H-position V-position Warm Cold Color Color Temperature Normal Auto Color... - Page 18 OSD Language User Define Power Manager Select input English Français Deutsch Español Italiano Nederlands РУССКИЙ Română 繁體中文 简体中文 日本語 Standard Power Saving Mode Advanced Power Saving Mode Recall Factory...
- Page 19 iRelax Set Timer iRelax iRelax set Position Power Port Hot Key Normal Mode Dark Mode Off, 15.30, 45, 60 (min.) Left_Upper Right_Upper Left_Buttom Right_Buttom Graphic Mode Text Mode Exit Text Mode Movie Mode Game Mode Text Mode Movie Mode...
- Page 20 Game Mode Volume + Speak On Volume – Volume Mute (Speak Off) Luminance Power Power On / Off...
-
Page 21: Troubleshooting
This LCD Monitor has pre-adjusted using factory standard VGA timings. Due to the output timing differences among various VGA cards in the market, users may initially experience an unstable or unclear display whenever a new display mode or new VGA card is selected. Attention This LCD Monitor Supports Multiple VGA Modes. - Page 22 There is no picture on LCD Monitor After the USB equipment inserted into Monitor Windows could not detect it. A little pattern which is like an eye often appears on the corner of my screen. And sometimes the color of my screen will become light green.
-
Page 23: Lcd Panel Display Technical Features And Specifica Tions
LCD Panel Display Technical Features and Screen Size Panel Pixel Format Monitor Display Colors Input Signal Frequency Compatibility Analog Connector Digital Power Tilt Tilt Angle Dimensions (W×H×D) Weight Safety Regulations VESA Power Consumption 19"(48.3cm) diagonal 1280 x 1024 vertical strip 16.2M with FRC or Dithering Horizontal: 30KHz –80KHz, Vertical: 50Hz -75Hz... -
Page 24: Interface Frequency
Interface Frequency The following frequency range is the working period. If the entered mode between below period but not match the frequency of supported timing, display optimization not be assured. If the entered mode is out of the working period, the display will be blanking (just show “out of range”) then go to power saving. -
Page 25: Regulations
FCC compliance This device complies with Part 15 of the FCC Rules. Operation is subject to the following two conditions (1) this device may not cause harmful interference, and (2) this device must accept any interference received, including interference that may cause undesired operation. NOTE: This equipment has been tested and found to comply with the limits for a Class B digital device, pursuant to part 15 of the FCC Rules. -
Page 26: Information For Users Applicable In European Union Countries
Information for users applicable in European Union countries The symbol on the product or its packaging signifies that this product has to be disposed separately from ordinary household wastes at its end of life. Please kindly be aware that this is your responsibility to dispose electronic equipment at recycling centers so as to help conserve natural resources. -
Page 27: Tco'99
TCO’99 Congratulations! You have just purchased a TCO’99 approved and labeled product! Your choice has provided you with a product developed for professional use. Your purchase has also contributed to reducing the burden on the environment and also to the further development of environmentally adapted electronics products. - Page 28 TCO Development SE-114 94 Stockholm, Sweden Fax:+4687829207 Email (Internet): development@tco.se Current information regarding TCO’99 approved and labeled products may also be obtained via the Internet, using the address: http://www.tco-info.com/ Environmental requirements Flame retardants Flame retardants are present in printed circuit boards, cables, wires, casings and housings. Their purpose is to prevent, or at least to delay the spread of fire.
Need help?
Do you have a question about the M-19 and is the answer not in the manual?
Questions and answers