Table of Contents
Advertisement
Quick Links
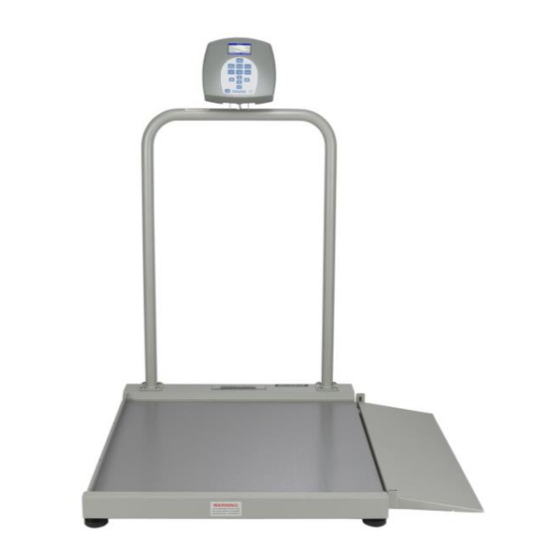
2500KL / 2500KG
Digital Wheelchair Scales
Equipped with
®
Everlock
0459
User Instructions
E112697
®
PELSTAR
, LLC
9500 West 55th St. McCook, IL 60525-7110 USA
www.homscales.com
®
Health o meter
Professional 2500KL
®
Health o meter
Professional 2500KG
®
© Pelstar
, LLC 2019
P/N UM2500KL_2500KG_E_REV20190827
Advertisement
Table of Contents

Related Manuals for Pelstar Health O Meter Professional 2500KG


Summary of Contents for Pelstar Health O Meter Professional 2500KG
- Page 1 Equipped with ® Everlock 0459 User Instructions E112697 ® PELSTAR , LLC 9500 West 55th St. McCook, IL 60525-7110 USA www.homscales.com ® Health o meter Professional 2500KL ® Health o meter Professional 2500KG ® © Pelstar , LLC 2019 P/N UM2500KL_2500KG_E_REV20190827...
-
Page 2: Table Of Contents
2500KL / 2500KG Thank you for your purchase of this Health o meter® Professional product. Please read this manual carefully, and keep it for easy reference or training. TABLE OF CONTENTS Cautions and Warnings ..................... 3 Specifications ......................4 Certifications / Connectivity / Disposal ..............5 Assembly Instructions .................... -
Page 3: Cautions And Warnings
Consult Customer Service or a field service technician for help. ® In no event whatsoever shall Pelstar , LLC be liable for damages or injuries whatsoever arising out of or connected with the assembly, use, or misuse of its products. -
Page 4: Specifications
SPECIFICATIONS General This scale uses highly sophisticated microprocessor technology. Each precision scale is designed to provide accurate, reliable, and repeatable weight measurements. In addition, each scale is designed to provide the user with features that make the weighing process simple, fast, and convenient. -
Page 5: Certifications / Connectivity / Disposal
To enable reliable transmission of weight, height, and Body Mass Index (BMI) data, this scale is ® designed to connect to a computer, monitor, or other electronic device via USB or Pelstar wireless technology. This connectivity helps minimize a source of potential medical errors caused by incorrectly copying and then recording patient data. -
Page 6: Assembly Instructions
ASSEMBLY INSTRUCTIONS Before Assembly Each scale is shipped disassembled in a single carton. Carefully inspect the carton for shipping damage before unpacking. If damage is found, contact your shipper or a Health o meter® Professional representative immediately at 1-800-815-6615. Claims must be filed with the shipper as soon as possible after receipt of the package. - Page 7 ASSEMBLY INSTRUCTIONS (CONT.) ® Health o meter Professional Scales recommends that assembly be performed by two people. Warning: Do not drop scale, as this can permanently damage the load cells. Caution: Do not insert the batteries into the display head until it is mounted onto the scale. 1.
- Page 8 ASSEMBLY INSTRUCTIONS (CONT.) 6. Obtain the display head and align the tab slots on the back of the display head with the tabs on the silver display support. Slide the slots on the display head onto the tabs in the bracket. Slots on back of display head Slide slots onto tabs in bracket 7.
- Page 9 ASSEMBLY INSTRUCTIONS (CONT.) Ramp Assembly Instructions Follow these instructions for moving the ramp to the opposite side of the scale, or for adding a second ramp to the scale (B2500RAMP option): 1. On the side of the platform opposite to the ramp, remove the guardrail mounted to the end of the platform by unscrewing and then removing the four guardrail...
-
Page 10: Powering The Scale
POWERING THE SCALE Powering the Scale Plug the AC adapter into the power adapter jack (the jack is located on the rear of the display head), then plug the scale’s AC adapter into the power source. Warning: To avoid a safety hazard, do not use an unspecified AC adapter. Only use the ®... -
Page 11: Set-Up Instructions
SET-UP INSTRUCTIONS The scale must be powered on before performing any of the following operations. Press to turn on the scale. Unit of Measure Configuration / Unit Lock (This feature is not available on KG models) The scale ships from the factory set to display weight in kilograms. The weight measuring unit can be changed by pressing . - Page 12 SET-UP INSTRUCTIONS (CONT.) Setting Sound Options The display can be set to stay silent or beep while operating the scale. Follow this procedure to set the preferred option. Help 1. Press to access the Help menu options. 2. While in the Help menu, press to select “Set Options”.
- Page 13 SET-UP INSTRUCTIONS (CONT.) Setting Auto Zero Option When a scale is set to zero, it creates a reference point for weights that are placed on it. There are two approaches to how this can take place. This option allows the user to select whether the scale will re-set itself to ZERO each time it is powered up or whether it will use the zero reading from the last time it was zeroed.
-
Page 14: Everlock ® Instructions
® EVERLOCK INSTRUCTIONS ® Everlock (This feature is not available on KG models or models with a date code lower than 1918) ® The Everlock feature allows the scale to be permanently locked in KG (metric) or LB (imperial) units. When activating this feature, the Unit button will become disabled. This lock is permanent and can only be reversed at the factory. -
Page 15: Operating Instructions
OPERATING INSTRUCTIONS and selecting “Key Definitions” in the Help Key definitions can also be found by pressing submenu. Keypad Function Description Powers scale on and off. Zeroes the scale prior to a weighing. Also used as a screen navigation key to exit a Zero/ display menu. - Page 16 OPERATING INSTRUCTIONS (CONT.) Tare Function When using this scale, the weight of an object, such as a wheelchair, can be subtracted from the total weight in order to determine the weight of the patient alone. The Tare Function automatically performs this subtraction. The scale allows a tared weight to be entered manually by using the keypad, or automatically, as outlined in this section.
- Page 17 OPERATING INSTRUCTIONS (CONT.) Weighing a Patient and Taring a Known Weight / Pre-Tare Pre-Tare can be performed within the following weight limits: 0.2 lb - 200 lb / 0.1 kg – 91 kg) 1. Wait until “0.0” appears on the display. Tare 2.
- Page 18 OPERATING INSTRUCTIONS (CONT.) Weighing a Patient Standing on the Platform 1. Make sure there is nothing on the weighing platform and the display shows “0.0”. 2. Ask the patient to step on the scale. The scale will begin to display the patient’s weight and the word “PROCESSING”. Depending on the movement of the patient on the scale, it may take several seconds for the scale to lock onto the weight.
- Page 19 OPERATING INSTRUCTIONS (CONT.) BMI Function 1. Make sure there is nothing on the weighing platform and the display shows “0.0”. 2. Follow weight measuring procedure. After obtaining the patient’s weight, and with the patient remaining on the scale, press 3. The scale will prompt entry of the patient’s height. Use the arrow keys to enter the patient’s height.
- Page 20 OPERATING INSTRUCTIONS (CONT.) Parent/Child Function ® The Parent/Child function on Health o meter Professional scales provides the convenience of weighing a small child or infant while being held by a parent. Follow these simple steps to subtract the parent’s weight from the total so only the child’s weight is displayed.
-
Page 21: Maintenance And Cleaning
MAINTENANCE AND CLEANING Maintenance The following pages provide instructions for maintenance, cleaning, calibration, and troubleshooting for your scale. Maintenance operations other than those described in this manual should be performed by qualified service personnel. Caution: Before first use, or after long periods of non-use, check the scale for proper operation and function. -
Page 22: Calibration
CALIBRATION This scale has been factory calibrated, and does not require calibration prior to use. There are no requirements for calibration in the field; users should adhere to their institution’s calibration policies. Calibration of your scale can be performed using calibrated kilogram (kg) or pound (lb) weight standards. - Page 23 CALIBRATION (CONT.) 7. When the zeroing process is complete the display will prompt for entry of the calibration weight. Minimum calibration is 200 lb / 100 kg. Maximum calibration weight is 1000 lb / 454 kg. Calibration weight can be adjusted in 10 lb or 10 kg increments.
-
Page 24: Troubleshooting
TROUBLESHOOTING Troubleshooting Before contacting service personnel, refer to the following instructions to check and to ® correct any failures. For further assistance, contact Health o meter Professional Scales Technical Support at 1-800-638-3722. Symptom Possible Cause Corrective Action 1. Dead battery 1. -
Page 25: Warranty
Health o meter is a registered trademark of Sunbeam Products, Inc. used under license. Health o meter ® Professional products are manufactured, designed, and owned by Pelstar , LLC. We reserve the right to improve, ® enhance, or modify Health o meter Professional product features or specifications without notice.
Need help?
Do you have a question about the Health O Meter Professional 2500KG and is the answer not in the manual?
Questions and answers