Pelpro PP130 Owner's Manual
Hide thumbs
Also See for PP130:
- Owner's manual (40 pages) ,
- Owner's manual (40 pages) ,
- Owner's manual (40 pages)
Table of Contents
Advertisement
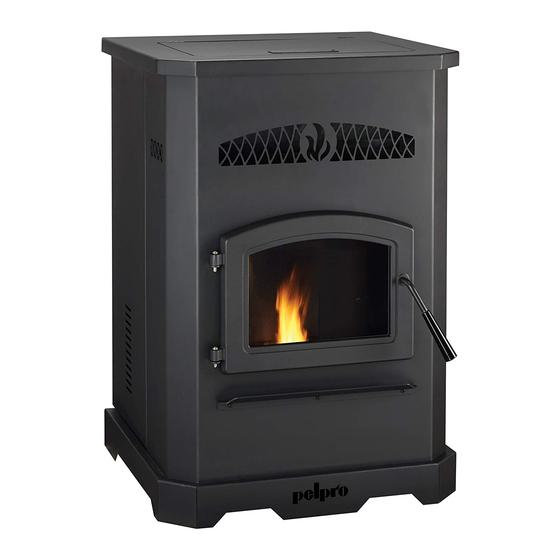
PP130 Pellet Stove
Owner's Manual
WARNING!
Please read this entire manual before installation and use of this pellet fuel-burning room Stove, and save for future reference.
Failure to follow these instructions could result in property damage, bodily injury or even death. Contact local building or fire
officials about restrictions and installation inspection requirements in your area.
Note: To obtain a French translation of this manual, please contact your dealer or visit www.pelprostoves.com. Pour obtenir
une traduction francaise de ce manuel, s'il vous plait contracter votre revendeur ou visitez
www.pelprostoves.com
Advertisement
Table of Contents

Related Manuals for Pelpro PP130


Summary of Contents for Pelpro PP130
- Page 1 PP130 Pellet Stove Owner’s Manual WARNING! Please read this entire manual before installation and use of this pellet fuel-burning room Stove, and save for future reference. Failure to follow these instructions could result in property damage, bodily injury or even death. Contact local building or fire officials about restrictions and installation inspection requirements in your area.
-
Page 2: Get To Know Your Stove
• Pro Tip: Indicates additional information to help you better understand your Stove and optimize its performance. • NOTICE: Fire Risk Pelpro disclaims any responsibility, and the warranty and agency listing will be voided, by the below actions. DO NOT: Install or operate damaged Stove Modify Stove... -
Page 3: Table Of Contents
Reference Materials ......... . 39 • Service Part List • Maintenance Log pelprostoves.com PelPro Pellet Stove • 7104-171C • 10/3/18... -
Page 4: Getting Started
Getting Started Pallet Removal There are bolts holding your PelPro Stove in place on the Pallet Removal pallet. To remove your Stove from the pallet: Visit pelprostoves.com or scan the code: Using a 5/16 inch wrench, Loosen the three on each side of the Stove retaining bolts on the remove the two bolts. -
Page 5: What You'll Need
Stove. (<1%) less than 1.5” in length and avoid the dusty bits and pieces of pellets in the bottom of the bag. pelprostoves.com PelPro Pellet Stove • 7104-171C • 10/3/18... -
Page 6: Installing Your Stove
Materials such as: • Wood • Sheet rock (drywall) • Carpet WARNING! Asphyxiation Risk. DO NOT INSTALL IN A SLEEPING ROOM. Consumes oxygen in the room. For Canada, the installation must conform to CAN/CSA-B365 PelPro Pellet Stove • 7104-171C • 10/3/18 pelprostoves.com... - Page 7 International Conference of Building Officials (ICBO) standards for solid fuel Stoves. Caution, do not pass connector pipe through a combustible wall or ceiling. Please refer to connector pipe installation instructions for details. Installation Video Visit pelprostoves.com or scan this code: pelprostoves.com PelPro Pellet Stove • 7104-171C • 10/3/18...
-
Page 8: Vent Termination Clearances
• The safest and preferred venting method is to extend the vent vertically through the roof or above the roof PelPro Pellet Stove • 7104-171C • 10/3/18 pelprostoves.com... -
Page 9: Placing Your Stove
*Non-combustible floor protection must extend 2 inches (51mm) beneath the flue pipe when installed horizontal venting or under the top vent adapter with vertical installation. CANADA REQUIRED, USA RECOMMENDED. pelprostoves.com PelPro Pellet Stove • 7104-171C • 10/3/18... - Page 10 Alcove: Minimum* Maximum Inches Inches Height 1092 Width 42-1/2 1080 Depth** 25-3/4 *All minimums listed are to a combustible surface. **Front of stove must be flush or extend past the alcove front. PelPro Pellet Stove • 7104-171C • 10/3/18 pelprostoves.com...
-
Page 11: Venting Your Stove
• Your Stove will not draft properly that can build up a concentration of fumes such as a stairwell, • Smoke may seep in your house covered breezeway, etc. • Excessive sooting pelprostoves.com PelPro Pellet Stove • 7104-171C • 10/3/18... - Page 12 Horizontal Run (FT) Minimum Vertical Vent for Three Elbows Minimum Vertical Vent for Three Elbows Minimum Vertical Vent for Two Elbows Minimum Vertical Vent for Two Elbows PelPro Pellet Stove • 7104-171C • 10/3/18 pelprostoves.com WO 90° ELBOWS THREE 90° ELBOWS Minimum...
- Page 13 Installing a clean-out “T” (sold separately) to the rear of your Stove, when venting vertically can save time during cleaning. Install outside air kit (included) For optimal performance, PelPro recommends the outside air kit for all installations. Outside air kit is required for all mobile/manufactured home installations.
-
Page 14: Using Your Stove
Your Stove has a manufacture-set minimum low burn rate that must not be altered. It is against federal regulations to alter this setting or otherwise operate your Stove in a manner inconsistent with operation instructions in this manual. PelPro Pellet Stove • 7104-171C • 10/3/18 pelprostoves.com... -
Page 15: Starting Your Stove The First Time
CAREFULLY SUPERVISE children in same room as fireplace • Alert children and adults to hazards of high temperatures • High temperatures may ignite clothing or other flammable materials • Keep clothing, furniture, draperies and other flammable materials away pelprostoves.com PelPro Pellet Stove • 7104-171C • 10/3/18... - Page 16 Ensure dial control is set in off position. WARNING! Shock hazard. • Plug directly into properly grounded 3 prong receptacle • Do NOT route cord under or in front of Stove • Recommend the use of a surge protector PelPro Pellet Stove • 7104-171C • 10/3/18 pelprostoves.com...
-
Page 17: Starting Your Stove From An Empty Hopper
LED light will blink green as ignition starts. This process can take up to 20 minutes. CAUTION: During this process DO NOT: • Try to restart, manually add pellets or use any type of accelerant pelprostoves.com PelPro Pellet Stove • 7104-171C • 10/3/18... -
Page 18: What Do The Blinking Lights Mean
HI for 30 minutes to allow paint to cure. After 30 minutes, turn the dial control to OFF and allow your Stove to cool completely. Once cooled, clean the fire pot. Your Stove is now ready to resume normal use. PelPro Pellet Stove • 7104-171C • 10/3/18 pelprostoves.com... -
Page 19: Comfort Settings
15 minutes for stabilization before making another adjustment. Thermostat Your PelPro Stove comes with a built-in thermostat system that provides easy temperature adjustments. The Stove is not designed to use a remote control or external thermostat. -
Page 20: Turning Your Stove Off
Turn dial control to OFF, let Stove completely cool and exhaust blower must be off. Now you can unplug Stove before servicing • Smoke spillage into room can occur if Stove is not cool before unplugging PelPro Pellet Stove • 7104-171C • 10/3/18 pelprostoves.com... -
Page 21: Maintaining Your Stove
What You’ll Need Cleaning tool Phillips head Safety glasses screwdriver Gloves Ceramic glass cleaner & Flue cleaning non-abrasive cloth brush Metal container Drop cloth Ash vacuum with lid pelprostoves.com PelPro Pellet Stove • 7104-171C • 10/3/18... -
Page 22: Where, When And How
Apply ceramic glass cleaner • Use non-abrasive cloth to remove residue Door Inspection • The gasket between the glass and firebox should be inspected periodically to make sure there is a good seal. PelPro Pellet Stove • 7104-171C • 10/3/18 pelprostoves.com... - Page 23 • Vacuum any debris from the fan blades and blower Zone Zone housing Zone Zone Hopper Zone Zone • Empty hopper of any pellets • Vacuum any remaining pellets/debris from the hopper pelprostoves.com PelPro Pellet Stove • 7104-171C • 10/3/18...
- Page 24 Your chimney should be inspected once every few months during the heating season to determine if a creosote or soot buildup has occurred. If creosote or soot has accumulated, it should be removed to reduce the risk of a chimney fire. PelPro Pellet Stove • 7104-171C • 10/3/18 pelprostoves.com...
-
Page 25: Replacement Parts
3. Remove the left baffle and then the right baffle by pulling up and then towards you. The left and right Zone Zone baffles have similar hooks and slots. Replacement kit: SRV7077-006 pelprostoves.com PelPro Pellet Stove • 7104-171C • 10/3/18... - Page 26 5. Remove the exhaust blower and gasket. 6. Check for degradation on the gasket and replace if necessary using the gasket included in the kit. 7. Re-install in reverse order. Replacement kit: 812-4400 PelPro Pellet Stove • 7104-171C • 10/3/18 pelprostoves.com...
- Page 27 6. Inspect the igniter from the front of the unit by removing the firepot and looking into the end of the chamber. MAKE SURE THE IGNITER IS CENTERED IN THE CHAMBER. Replacement kit: SRV7000-660 pelprostoves.com PelPro Pellet Stove • 7104-171C • 10/3/18...
- Page 28 Silicone the end cap to the feed tube. 8. Plug the feed motor leads back in and restore power. Replacement kit: SRV7077-014 PelPro Pellet Stove • 7104-171C • 10/3/18 pelprostoves.com...
-
Page 29: Troubleshooting
In the event of a power outage: Check passages to assure they are clear of ash and obstructions. • If using a generator, PelPro recommends a steady state Poor airflow leads to poor generator for best Stove performance. performance of your Stove. •... -
Page 30: Blockage Related
- Confirm all exhaust blower connections ... secure - Confirm the feed assembly and motor are clean and clear of debris • Confirm exhaust path is clean and clear (Zone 3) PelPro Pellet Stove • 7104-171C • 10/3/18 pelprostoves.com... - Page 31 Confirm exhaust path is clean and clear (Zone 3) • Examine Stove body (Zone 2) - Align igniter so it is properly placed and centered - Review fuel quality (see Pellet Fuel information on page 13) pelprostoves.com PelPro Pellet Stove • 7104-171C • 10/3/18...
- Page 32 Excessive fuel Excessive feeding/Feed Motor locked on Follow corrective action for feed motor does not spilling over the turn off. fire pot into the ash wells and/or excessive flame PelPro Pellet Stove • 7104-171C • 10/3/18 pelprostoves.com...
- Page 33 Convection blower Review the fuel being used. Dirty Failed Clean Installation Replace Installation configuration is tight allowing for limited air circulation around the Stove. Review the installation and move if necessary. pelprostoves.com PelPro Pellet Stove • 7104-171C • 10/3/18...
-
Page 34: Warranty
5 Years All replacement parts are covered for remainder of original warranty 90 Days period or 90 days, whichever is longer Additional terms and limitations apply. See page 28 for complete warranty information. PelPro Pellet Stove • 7104-171C • 10/3/18 pelprostoves.com... -
Page 35: Support
Order replacement parts • Installation videos • Troubleshooting videos • Use and care videos • Manuals and more Contact information To contact a Consumer Care Specialist, email us at Info_PelPro@hearthnhome.com or call 877-427-3316. pelprostoves.com PelPro Pellet Stove • 7104-171C • 10/3/18... -
Page 36: Note
• The Stove must be secured to the mobile home structure by bolting it to the floor through holes provided at bottom of your cast legs on your Stove. PelPro Pellet Stove • 7104-171C • 10/3/18 pelprostoves.com... -
Page 37: Glass Specifications
Listings and Certifications Glass Specifications This Stove is equipped with 5mm ceramic glass. Replace glass only with 5mm ceramic glass. Please contact PelPro for replacement glass. Electrical Rating (On High) PP130-B: 120 VAC, 60 Hz, Start 2.6 Amps, Run 2.3 Amps BTU &... -
Page 38: Warranty
Warranty Coverage: Subject to the table below, HHT warrants to the owner of the PelPro Stove that the Stove will be free from defects in materials and workmanship at the time of manufacture. After installation, if covered components are found to be defective in materials or workmanship during the applicable warranty period, HHT will replace the covered components. -
Page 39: Reference Materials
SRV7000-531 Vacuum Hose, 5/32 ID 3 Ft SRV240-0450 Side Curtain, Right Hand SRV7086-153 Dial Control SRV7083-036 Wire Harness, Dial Control SRV7000-667 Hopper Switch SRV7000-612 See Following page for additional servcie parts 8/18 pelprostoves.com PelPro Pellet Stove • 7104-171C • 10/3/18... - Page 40 Feed Motor SRV7000-670 16.2 Feed Shaft Bushing Pkg of 2 7000-600/2 Power Cord 812-1180 Ambient Probe SRV7000-668 Component Pack SRV7104-028 Exhaust Probe SRV7000-669 Wire Harness SRV7093-184 Wire Clip Pkg of 10 7000-400/10 PelPro Pellet Stove • 7104-171C • 10/3/18 pelprostoves.com...
-
Page 41: Maintenance Log
We recommend that you record the following information for your heating stove: Date Purchased / installed: ____________________________________________________ (Attach Proof of Purchase) Serial Number: ________________________ Location on Stove: _____________________ Store Purchased From: _______________________________________________________ Store Location: _____________________________________________________________ Maintenance Log: pelprostoves.com PelPro Pellet Stove • 7104-171C • 10/3/18... - Page 42 Reference Materials Maintenance Log: PelPro Pellet Stove • 7104-171C • 10/3/18 pelprostoves.com...
- Page 43 Reference Materials Maintenance Log: pelprostoves.com PelPro Pellet Stove • 7104-171C • 10/3/18...
- Page 44 | 352 Mountain House Road | Halifax, PA 17032 Hearth & Home Technologies ® PelPro Pellet Stove • 7104-171C • 10/3/18 pelprostoves.com...
Need help?
Do you have a question about the PP130 and is the answer not in the manual?
Questions and answers