Table of Contents
Advertisement
Quick Links
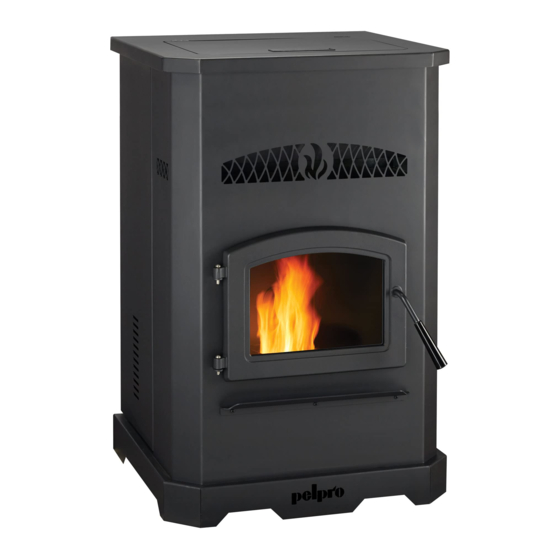
PP150 Pellet Stove
Owner's Manual
WARNING!
Please read this entire manual before installation and use of this pellet fuel-burning room Stove, and save for future reference.
Failure to follow these instructions could result in property damage, bodily injury or even death. Contact local building or fire
officials about restrictions and installation inspection requirements in your area.
Note: To obtain a French translation of this manual, please contact your dealer or visit www.pelprostoves.com. Pour obtenir
une traduction francaise de ce manuel, s'il vous plait contracter votre revendeur ou visitez
www.pelprostoves.com
Advertisement
Table of Contents

Related Manuals for Pelpro PP150


Summary of Contents for Pelpro PP150
- Page 1 PP150 Pellet Stove Owner’s Manual WARNING! Please read this entire manual before installation and use of this pellet fuel-burning room Stove, and save for future reference. Failure to follow these instructions could result in property damage, bodily injury or even death. Contact local building or fire officials about restrictions and installation inspection requirements in your area.
-
Page 2: Table Of Contents
Comfort Settings Fire Risk • Trim Adjustment Pelpro disclaims any responsibility, and the warranty and agency listing will be voided, by the below actions. • Turning Your Stove Off DO NOT: Maintaining Your Stove ........21... -
Page 3: Getting Started
Getting Started Getting Started Pallet Removal What You’ll Need There are bolts holding your PelPro Stove in place on the Pallet Removal pallet. To remove your Stove from the pallet: Tools & Supplies Visit pelprostoves.com or scan the code: •... -
Page 4: Installing Your Stove
DO NOT INSTALL IN A SLEEPING ROOM. Consumes oxygen in the room. For Canada, the installation must conform to CAN/CSA-B365 PelPro Pellet Stove • 8104-171B • 10/21 pelprostoves.com pelprostoves.com PelPro Pellet Stove • 8104-171B • 10/21... -
Page 5: Vent Termination Clearances
• The safest and preferred venting method is to extend the vent vertically through the roof or above the roof PelPro Pellet Stove • 8104-171B • 10/21 pelprostoves.com pelprostoves.com PelPro Pellet Stove • 8104-171B • 10/21... -
Page 6: Venting Your Stove
• Smoke may seep in your house covered breezeway, etc. • Excessive sooting PelPro Pellet Stove • 8104-171B • 10/21 pelprostoves.com pelprostoves.com PelPro Pellet Stove • 8104-171B • 10/21... - Page 7 • 90° elbow is equivalent to 3 feet of straight pipe Install outside air kit (included) For optimal performance, PelPro recommends the outside air kit for all installations. Outside air kit is required for all mobile/manufactured home installations. ONE 90° ELBOW Install through wall •...
-
Page 8: Using Your Stove
Alert children and adults to hazards of high temperatures • High temperatures may ignite clothing or other flammable materials • Keep clothing, furniture, draperies and other flammable materials away PelPro Pellet Stove • 8104-171B • 10/21 pelprostoves.com pelprostoves.com PelPro Pellet Stove • 8104-171B • 10/21... -
Page 9: Starting Your Stove From An Empty Hopper
During this process DO NOT: • Recommend the use of a surge protector • Try to restart, manually add pellets or use any type of accelerant PelPro Pellet Stove • 8104-171B • 10/21 pelprostoves.com pelprostoves.com PelPro Pellet Stove • 8104-171B • 10/21... -
Page 10: What Do The Blinking Lights Mean
Your Stove is now ready to resume normal use. Thermostat Your PelPro Stove comes with a built-in thermostat system that provides easy temperature adjustments. The Stove is not designed to use a remote control or external thermostat. -
Page 11: Turning Your Stove Off
Stove before servicing • Smoke spillage into room can occur if Stove is not cool before unplugging Metal container Drop cloth Ash vacuum with lid PelPro Pellet Stove • 8104-171B • 10/21 pelprostoves.com pelprostoves.com PelPro Pellet Stove • 8104-171B • 10/21... -
Page 12: Where, When And How
Use non-abrasive cloth to remove residue Door Inspection • The gasket between the glass and firebox should be inspected periodically to make sure there is a good seal. PelPro Pellet Stove • 8104-171B • 10/21 pelprostoves.com pelprostoves.com PelPro Pellet Stove • 8104-171B • 10/21... -
Page 13: Replacement Parts
Replacement kit: SRV7077-006 or soot buildup has occurred. If creosote or soot has accumulated, it should be removed to reduce the risk of a chimney fire. PelPro Pellet Stove • 8104-171B • 10/21 pelprostoves.com pelprostoves.com PelPro Pellet Stove • 8104-171B • 10/21... - Page 14 6. Check for degradation on the gasket and replace if necessary using the gasket included in the kit. 7. Re-install in reverse order. Replacement kit: 812-4400 PelPro Pellet Stove • 8104-171B • 10/21 pelprostoves.com pelprostoves.com PelPro Pellet Stove • 8104-171B • 10/21...
-
Page 15: Troubleshooting
connectors. are clear of ash and obstructions. • If using a generator, PelPro recommends a steady state 4. Install new board following the steps in reverse. Poor airflow leads to poor generator for best Stove performance. performance of your Stove. -
Page 16: Blockage Related
- Align igniter so it is properly placed and centered - Review fuel quality (see Pellet Fuel information on page 14) • Confirm exhaust path is clean and clear (Zone 3) PelPro Pellet Stove • 8104-171B • 10/21 pelprostoves.com pelprostoves.com PelPro Pellet Stove • 8104-171B • 10/21... - Page 17 Dirty Failed Clean Installation Replace Installation configuration is tight allowing for limited air circulation around the Stove. Review the installation and move if necessary. PelPro Pellet Stove • 8104-171B • 10/21 pelprostoves.com pelprostoves.com PelPro Pellet Stove • 8104-171B • 10/21...
-
Page 18: Warranty
All replacement parts are covered for remainder of original warranty 90 Days period or 90 days, whichever is longer Additional terms and limitations apply. See page 38 for complete warranty information. PelPro Pellet Stove • 8104-171B • 10/21 pelprostoves.com pelprostoves.com PelPro Pellet Stove • 8104-171B • 10/21... -
Page 19: Listings And Certifications
Listings and Certifications Listings and Certifications Stove Certification Glass Specifications This Stove is equipped with 5mm ceramic glass. Replace glass only with 5mm ceramic glass. Please contact PelPro for replacement glass. Series PP150 Laboratory UL LLC Electrical Rating (On High) -
Page 20: Warranty
Warranty Coverage: Subject to the table below, HHT warrants to the owner of the PelPro Stove that the Stove will be free from defects in materials and workmanship at the time of manufacture. After installation, if covered components are found to be defective in materials or workmanship during the applicable warranty period, HHT will replace the covered components. -
Page 21: Maintenance Log
Pkg of 2 7000-600/2 Power Cord 812-1180 Ambient Probe SRV7000-668 Component Pack SRV8104-028 Exhaust Probe SRV7000-669 Wire Harness SRV7093-184 Wire Clip Pkg of 10 7000-400/10 PelPro Pellet Stove • 8104-171B • 10/21 pelprostoves.com pelprostoves.com PelPro Pellet Stove • 8104-171B • 10/21... - Page 22 Reference Materials Reference Materials Maintenance Log: Maintenance Log: PelPro Pellet Stove • 8104-171B • 10/21 pelprostoves.com pelprostoves.com PelPro Pellet Stove • 8104-171B • 10/21...
- Page 23 | 352 Mountain House Road | Halifax, PA 17032 Hearth & Home Technologies ® PelPro Pellet Stove • 8104-171B • 10/21 pelprostoves.com...