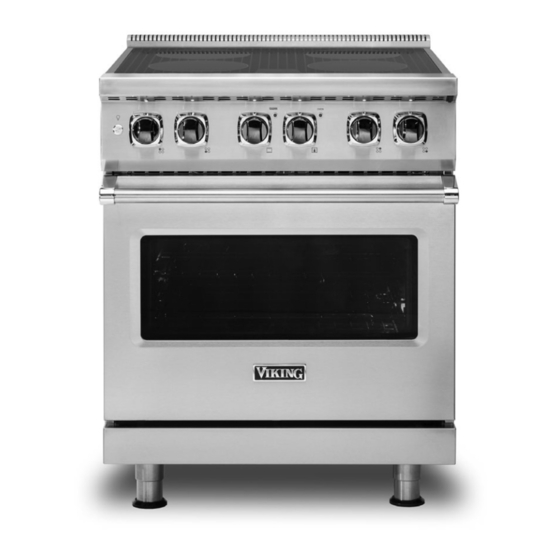
Viking CVER5301 Installation Manual
Freestanding 30” w electric & 30” w induction ranges
Hide thumbs
Also See for CVER5301:
- Use & care manual (28 pages) ,
- Install manual (20 pages) ,
- Use & care manual (28 pages)

Subscribe to Our Youtube Channel
Related Manuals for Viking CVER5301


Summary of Contents for Viking CVER5301
- Page 1 Installation GUIDE 5 Series Freestanding 30” W Electric & 30” W Induction Ranges VER5301 / CVER5301 VIR5301 / CVIR5301...
-
Page 2: Table Of Contents
Table of Contents Warnings & Important Safety Instructions ____________________________________________________2 Dimensions______________________________________________________________________________4 Specifications ____________________________________________________________________________5 Clearance Dimensions (Proximity to Cabinets) ________________________________________________6 Clearance Dimensions (Wood/Composite Overlay)_____________________________________________7 Electrical Requirements ___________________________________________________________________8 General Information ______________________________________________________________________9 Installation _____________________________________________________________________________10 Door Removal____________________________________________________________________10 Leg Installation___________________________________________________________________10 Electrical Connection (3-wire) ______________________________________________________11 Electrical Connection (4-wire) ______________________________________________________12 Leveling/Adjustments/Alignment ___________________________________________________13 Anti-tip Device Installation _________________________________________________________14 Final Installation _________________________________________________________________16... - Page 3 Important –Read and Follow! Your safety and the safety of others is very important. We have provided many important safety messages in this manual and on your appliance. Always read and obey all safety messages. This is the safety alert symbol. This symbol alerts you to hazards that can kill or hurt you and others.
-
Page 4: Dimensions
Dimensions - 7 / ( 7 5 8 ” 1 ” ( 2 . ( 9 1 - 7 / 8 ” i n . ( 9 4 ” 28-1/16” (71.2 cm) 1-5/8” (4.1 cm) 26-7/16” (67.2 cm) 1” (2.5 cm) 8-1/8”... -
Page 5: Specifications
Specifications Description VER/CVER530 VIR/CVIR5301 Overall width 29-7/8” (75.9 cm) Overall height To top of glass frame 35-7/8” (91.1 cm) min. 37” (94.0 cm) max. Legs adjust 1-1/8” (2.9 cm) Overall depth from To end of side panel—24-5/16” (61.8 cm) rear To front of door—25-3/4”... -
Page 6: Clearance Dimensions (Proximity To Cabinets)
Clearance Dimensions (Proximity to Cabinets) • This range may be installed directly adjacent to CAUTION existing 36” (91.4 cm) high base cabinets. To prevent possible damage to cabinets and IMPORTANT: The side trim MUST be 3/8” (.95 cm) cabinet finishes, use only materials and finishes above the adjacent base cabinet countertop. -
Page 7: Clearance Dimensions (Wood/Composite Overlay)
Clearance Dimensions (Wood/Composite Overlay) The bottom of a standard hood should be 30” (76.2 cm) min. to 36” (91.4 cm) max. above the countertop. This would typically result in the bottom of the hood / C o being 66” (167.6 cm) to 72” (182.9 cm) above the floor. o s i e r l Refer to the range hood installation instructions for... -
Page 8: Electrical Requirements
• Viking Range, LLC will NOT warranty any problems resulting from GFI outlets which are not installed properly or do not meet the requirements below. -
Page 9: General Information
Viking Authorized Service Center before continuing operation. Failure to do so can result in damage to the... -
Page 10: Installation
Installation Door Removal Lift door up and out Open door completely. Close door until latches stop door Fold latches backward until locked in place. Leg Installation Legs are packed in styrofoam top pack. Note: It is strongly recommended Screw legs into couplings on all Note: Legs should be installed near to where that a pallet or lift jack be used rather than tilting. -
Page 11: Electrical Connection (3-Wire)
Electrical Connection (3-wire) Note: If you have a 4-wire connection, see following section for 4-wire connection instructions. WARNING WARNING Electrical shock hazard. Electrical shock hazard. To avoid risk or electrical shock, To avoid risk of electrical shock, personal injury or death; verify your personal injury or death;... -
Page 12: Electrical Connection (4-Wire)
Electrical Connection (4-wire) WARNING WARNING Electrical shock hazard. Electrical shock hazard. To avoid risk of electrical shock, To avoid risk or electrical shock, personal injury or death; grounding personal injury or death; verify your appliance has been properly product to the frame of the unit may grounded in accordance with local codes or in or may not be permitted through your local codes. -
Page 13: Leveling/Adjustments/Alignment
Electrical Connection (4-wire) Push supply cord toward terminal block Reattach access door. to relieve strain, reattach supply cord strain relief bracket over supply cord. Leveling/Adjustments/Alignment For uneven or sloped floors, level unit with Measure the four corners in cutout area to Move unit into opening. -
Page 14: Anti-Tip Device Installation
Leveling/Adjustments/Alignment Set the high corner of range so that the top of side trim is 3/8” (0.95 cm) above countertop. Level range to high corner. Anti-tip Device Installation - Wall Mount WARNING Tipping hazard. To reduce the risk of the appliance tipping, it must be secured by a properly installed anti-tip bracket(s). - Page 15 Anti-tip Device Installation - Floor Mount *(Add only when using 8” backguard) 12-3/4” 3/8” 30” (32.4 cm) (.95 cm) Ø Ø Ø 8 ” 8 ” 8 ” ( . 3 ( . 3 ( . 3 Locate anti-tip bracket hook on the floor 8-1/2” (21.6 cm) from side cabinet and 1-1/2”...
-
Page 16: Final Installation
Final Installation ” ” ” 3 / 8 3 / 8 3 / 8 ( 0 . ( 0 . ( 0 . Connect electrical in shaded area. See the “Electrical Requirements” section for more Slide range into place. Be sure anti-tip Check that unit is level side to side and front information. -
Page 17: Performance Checklist
Performance Checklist NOTICE When conducting performance test, do not run self-clean cycle for more than 10 minutes with oven racks inside oven. This could cause them to discolor due to the high temperature required for self-cleaning. A qualified installer should carry out the following Convection bake function—bake and broil checks: elements the same with the convection fan on. -
Page 18: Final Preparation
Only authorized replacement parts may be used in performing service on the appliance. All servicing should be referred to a qualified technician. Contact Viking Range, LLC, 1-888-845-4641, for the nearest service parts distributor in your area or write to: VIKING RANGE, LLC... - Page 20 Viking Range, LLC 111 Front Street Greenwood, Mississippi 38930 USA (662) 455-1200 For product information, call 1-888-845-4641 or visit the Viking Web site at vikingrange.com 073521-000 EN (101519)
Need help?
Do you have a question about the CVER5301 and is the answer not in the manual?
Questions and answers