Viking VER5301 Use & Care Manual
Freestanding 30” w. electric & 30” w. induction ranges
Hide thumbs
Also See for VER5301:
- Use & care manual (28 pages) ,
- Installation manual (20 pages) ,
- Install manual (20 pages)

Related Manuals for Viking VER5301


Summary of Contents for Viking VER5301
- Page 1 Use & Care MANUAL 5 SERIES Freestanding 30” W. Electric & 30” W. Induction Ranges VER5301, CVER5301 VIR5301, CVIR5301...
-
Page 2: Table Of Contents
Congratulations Congratulations and welcome an elite world of ownership. We hope you will enjoy and appreciate the care and attention we have put into every detail of your new, state-of-the-art self-cleaning range. Your range is designed to off er years of reliable service. This Use and Care Manual will provide you with the information you need to become familiar with your product’s care and operation. -
Page 3: Warnings And Important Safety Instructions
Warnings Warning and Important Safety Instructions appearing in this manual are not meant to cover all possible conditions and situations that may occur. Common sense, caution, and care must be exercised when installing, maintaining, or operating this appliance. Always contact the manufacturer about problems or conditions you do not understand. Recognize Safety Symbols, Words, Labels DANGER Hazards or unsafe practices which WILL result in death... - Page 4 Warnings CAUTION WARNING To avoid sickness and food waste, DO NOT allow defrosted food to ELECTRICAL SHOCK HAZARD remain in the oven for more than two hours. To avoid risk of injury or death, DO NOT touch a hot oven light bulb with a damp cloth as the bulb could break.
- Page 5 Warnings To Prevent Fire or Smoke Damage •Be sure all packing materials are removed from the appliance before operating it. •Keep area around appliance clear and free from combustible materials, gasoline, and other fl ammable vapors and materials. •If appliance is installed near a window, proper precautions should be taken to prevent curtains from blowing over burners. •...
- Page 6 Warnings Utensil Safety • Use pans with fl at bottoms and handles that are easily grasped and stay cool. Avoid using unstable, warped, easily tipped or loose-handled pans. Also avoid using pans, especially small pans, with heavy handles as they could be unstable and easily tip. Pans that are heavy to move when fi lled with food may also be hazardous.
-
Page 7: Before Using Range
Warnings Radio Interference This unit generates, uses, and can radiate radio frequency energy and, if not installed and used in accordance with the instructions, may cause harmful interference to radio communications. However, there is no guarantee that interference will not occur in a particular installation. If this unit does cause harmful interference to radio or television reception, which can be determined by turning the unit off and on, the user is encouraged to try to correct the interference by one or more of the following measures: •... -
Page 8: Range Features
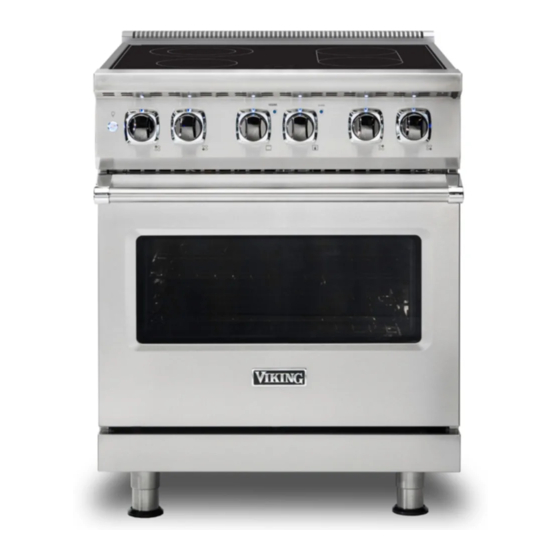
Electric Range Features CLEAN OVEN SURFACE Quick Cook Elements Thermal-Convection Interior oven light switch Left rear element control knob Left front element control knob Oven function selector knob Oven temperature control knob Right rear element control knob Right front element control knob Island trim (Air grille) Dual element 9”... -
Page 9: Surface Operation
Surface Operation Cooking Vessels Each cook has his or her own preference for the particular cooking vessels that are most appropriate for the type of cooking being done. Any and all cooking vessels are suitable for use on the electric range and it is not necessary to replace your present domestic vessels with commercial cookware. -
Page 10: Elements / Indicator Lights
Surface Operation Electric Ranges Single Front or Rear Element Push in and turn the control knob counterclockwise to the desired setting. The element will cycle on and off to maintain the desired heat setting. When fi nished, turn all controls to “OFF. ” Front and Bridge Element Push in and turn the right rear control knob clockwise to the desired setting. -
Page 11: Surface Cooking Tips
Surface Operation Surface Cooking Tips The minimum pot or pan (vessel) diameter recommended is 5” (13 cm). Use of pots or pans as small as 4” (10 cm) is possible but not recommended. Note: If ALL elements are turned to HI for a long period of time, the internal temperature inside the cooktop may rise, causing the cooktop to turn off . -
Page 12: Common Noises While Cooking
Surface Operation I hear noises while cooking? Noises may be generated while using the induction cooktop depending on the properties of the base of the cookware, size of the cookware or method of cooking. These noises are normal for induction technology. They do not indicate that there is a fault. Common Noises While Cooking Potential Nose A low humming noise... -
Page 13: Oven Features
Therefore, placing food items in the oven during the preheat mode is not recommended. The Viking Rapid Ready™ Preheat System is engineered so that the oven is brought to the desired set temperature in a manner which will provide the optimum cooking environment based on the T I O selected cooking mode in the shortest possible time. -
Page 14: Bake (Two-Element Bake)
Using the Oven Two element Baking Because of variations in food density, surface texture and consistency, some foods may be prepared more successfully using the conventional bake setting. For this reason, conventional baking is recommended when preparing baked goods such as custard. Full power heat is radiated from the bake element in the bottom of the oven cavity and supplemental heat is radiated from the broil element. - Page 15 Using the Oven CONVENTIONAL BAKING CHART Food Pan Size Single Rack Single Rack Temperature Time Position Position (min.) (Lg Oven) (Sm Oven) BREADS Biscuits Cookie sheet 3 or 4 400˚F (204˚C) 10 - 12 Yeast loaf Loaf pan 3 or 4 375˚F (191˚C) 30 - 35 Yeast rolls...
-
Page 16: Conv Bake (Convection Bake)
Using the Oven CONV BAKE (Convection Bake) The bottom element operates at full power, and the top broil element operates at supplemental power. The heated air is circulated by the motorized fan in the rear of the oven providing a more even heat distribution. - Page 17 Using the Oven CONVECTION BAKING CHART Food Pan Size Single Rack Temperature Time Position (min.) (Lg Oven) BREADS Biscuits Cookie sheet 3 or 4 375˚F (191˚C) 7 - 9 Yeast loaf Loaf pan 3 or 4 375˚F (191˚C) 25 - 30 Yeast rolls Cookie sheet 3 or 4...
- Page 18 Using the Oven Solving Baking Problems Baking problems can occur for many reasons. Check the chart below for the causes and remedies for the most common problems. It is important to remember that the temperature setting and cooking times you are accustomed to using with your previous oven may vary slightly from those required with this oven.
-
Page 19: Conv Roast (Convection Roast)
Using the Oven CONV ROAST* (Convection Roast) The convection element runs in conjuction with the inner and outer broil elements. The reversible convection fan runs at a higher speed in each direction. This transfer of heat (mainly from the convection element) seals moisture inside of large roasts. A time savings is gained over existing, single fan convection roast modes. -
Page 20: Conv Broil (Convection Broil)
Using the Oven CONV BROIL* (Convection Broil) The top element operates at full power. This function is exactly the same as regular broiling with the additional benefi t of air circulation by the motorized fan in the rear of the oven. Smoke is reduced since the airfl ow also reduces peak temperatures on the food. - Page 21 Using the Oven Broiling Tips • ALWAYS use a broiler pan and grid for broiling. They are designed to provide drainage of excess liquid and fat away from the cooking surface to help prevent splatter, smoke, and fi re. • To keep meat from curling, slit fatty edge. •...
-
Page 22: Convection Dehydrate
Using the Oven Convection Dehydrate CAUTION This oven is designed not only to cook, but also to dehydrate fruits and vegetables. You must carefully check the food during the dehydration 1. Prepare the food as recommended. process to ensure that it does not catch fi re. 2. - Page 23 Cleaning and Maintenance Cleaning Problems on Glass Tops Problem Cause To Prevent To Remove Brown streaks and Cleaning with sponge or cloth Use cleaning cream with clean Use a light application of cleaning cream with specks containing soil laden detergent damp paper towel.
-
Page 24: Replacing Oven Lights
Cleaning and Maintenance Power Failure No attempt should be made to operate the appliance during a power failure. Make sure the oven control is in the “OFF” position. Momentary power failure can occur unnoticed. The range is aff ected only when the power is interrupted. When it comes back on, the range will function properly without any adjustments. -
Page 25: Door Removal
Cleaning and Maintenance To start the Self-Clean cycle: 1. Close the door completely. 2. Turn the oven selector knob clockwise to the “SELF CLEAN” mode. 3. Turn the temperature control knob past the clean setting until the knob stops. At this time, the clean indicator light will come on. Within 30 seconds the automatic door latch engages and the oven indicator light comes on. -
Page 26: Troubleshooting
Clearly describe the problem that you are having. If you are unable to obtain the name of an authorized service agency, or if you continue to have service problems, contact 1-888-845-4641, or write to: VIKING RANGE, LLC PREFERRED SERVICE 111 Front Street Greenwood, Mississippi 38930 Record the information indicated below. -
Page 27: Warranty
Freestanding electric ranges and all of their component parts, except as detailed below*†, are warranted to be free from defective materials or workmanship in normal residential use for a period of two (2) years from the date of original retail purchase. Viking Range, LLC, warrantor, agrees to repair or replace, at its option, any part which fails or is found to be defective during the warranty period. - Page 28 VIKING RANGE, LLC 111 Front Street Greenwood, Mississippi 38930 USA (662)455-1200 For more product information , call 1-888-845-4641, or visit our web site www.vikingrange.com 073520-000 EN (101519)
Need help?
Do you have a question about the VER5301 and is the answer not in the manual?
Questions and answers