Table of Contents
Advertisement
Quick Links
Advertisement
Table of Contents

Subscribe to Our Youtube Channel
Related Manuals for Viking VGBQ54224LSS


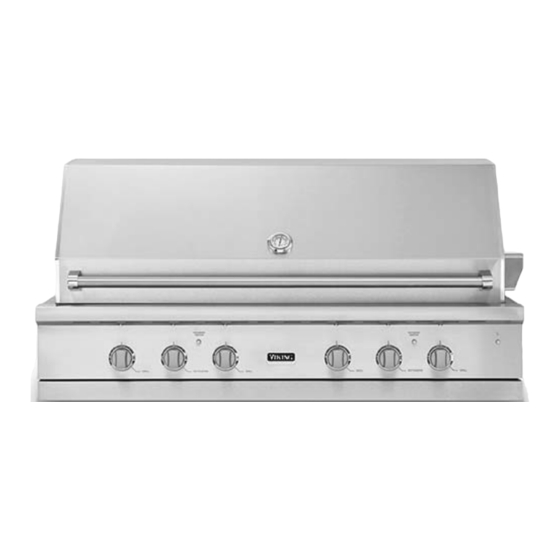
Summary of Contents for Viking VGBQ54224LSS
- Page 1 Installation Guide 5 Series Outdoor Gas Grills...
-
Page 2: Table Of Contents
Table of Contents Important Safety Instructions __________________________________________________________2 Dimensions (30" & 36" W. Grills) ______________________________________________________4 Specifications (30" & 36" W. Grills) ____________________________________________________5 Dimensions (42” & 54" W. Grill) _______________________________________________________6 Specifications (42” & 54" W. Grill) _____________________________________________________7 General Information__________________________________________________________________8 Clearance Dimensions ______________________________________________________________10 Cutout Dimensions _________________________________________________________________12 Ventilation for Built-In Installations ____________________________________________________16 Gas and Electrical Connection _______________________________________________________17... - Page 3 IMPORTANT – Please Read and Follow WARNING WARNING Keep electrical supply cord and the fuel supply This outdoor gas grill is not intended to be hose away from heated surfaces. installed inside a home or on recreational vehicles and/or boats. FOR YOUR SAFETY WARNING If not installed, operated and maintained in...
-
Page 4: Dimensions (30" & 36" W. Grills)
Dimensions (30" & 36" W. Grills) 2 9 - 2 9 - 30" W. 7 / 8 7 / 8 ( 7 5 ( 7 5 " " . 9 c . 9 c 1 7 - 1 7 - 1 / 4 1 / 4 ( 4 3... -
Page 5: Specifications (30" & 36" W. Grills)
Specifications (30" & 36" W Grills.) 30” W. & 36” W. Grills Description VGBQ53024/CVGBQ53024 VGBQ53624/CVGBQ53624 Cutout width 29-1/4” (74.2cm) 35-1/4” (89.5cm) Cutout depth 24-3/8” (67.9 cm) Cutout height 10-1/8” (25.7 cm) Overall width 30-1/16” (76.4 cm) 35-7/8” (91.1 cm) Overall depth 29”... -
Page 6: Dimensions (42" & 54" W. Grill)
Dimensions (42” & 54" W. Grill) 42" W. 3 9 - 3 9 - 1 / 2 1 / 2 ( 1 0 ( 1 0 ” ” 0 . 3 0 . 3 1 7 - 1 7 - 1 / 4 1 / 4 ( 4 3... -
Page 7: Specifications (42" & 54" W. Grill)
Specifications (42” & 54" W. Grill) 42” W. & 54” W. Grills VGBQ54224/CVGBQ54224 VGBQ55424/CVGBQ55424 Description VGIQ54224/CVGIQ54224 VGIQ55424/CVGIQ55424 Cutout width 40-1/4”” (102.2 cm) 52-1/4” (132.7 cm) Cutout depth 24-3/8” (67.9 cm) Cutout height 10-1/8” (25.7 cm) Overall width 42” (106.7 cm) 54”... -
Page 8: General Information
General Information • Keep grill area clear and free from combustible WARNING materials, gasoline, and other flammable vapors. If the following instructions are not followed • When the outdoor grill is not in use, the gas exactly, a fire causing death or serious injury supply must be turned off at the LP gas supply may occur: cylinder. - Page 9 General Information • A minimum of 6” (15.2 cm) from the sides, • When determining a suitable location for or a minimum of 8” (20.3 cm) from the the grill, take into account concerns such right side if there is a rotisserie motor and as exposure to wind, proximity to traffic a minimum of 24”...
-
Page 10: Clearance Dimensions
Clearance Dimensions (30” W & 36” W.. Grill) 30" W. 36" W. - Page 11 Clearance Dimensions (42” & 54” W. Grill) 42" W. 54" W.
-
Page 12: Cutout Dimensions
Cutout Dimensions (30” W. Grill) Gas inlet and power cord Gas inlet and power cord location area location area ” ” 3 / 8 3 / 8 2 9 - 2 9 - 2 4 - 2 4 - 1 / 4 1 / 4 . - Page 13 Cutout Dimensions (36” W. Grill) Gas inlet and power cord Gas inlet and power cord location area location area ” ” 3 5 - 3 5 - 3 / 8 3 / 8 2 4 - 2 4 - 1 / 4 1 / 4 ( 8 9 ( 8 9...
- Page 14 Cutout Dimensions (42” W. Grill) Gas inlet and power cord location area 8 ” - 3 / - 1 / ( 1 0 . 9 c 4 ” 4 . 8 ( 6 1 Electrical connection 3 ” for rotisserie motor ( 7 .
- Page 15 Cutout Dimensions (54” W. Grill) Gas inlet and power cord location area 8 ” - 3 / - 1 / Electrical connection . 9 c ( 1 3 4 ” 5 . 3 for rotisserie motor ( 6 1 (position unit so that the plug is always accessible) 3 ”...
-
Page 16: Ventilation For Built-In Installations
Ventilation for Built-In Installations Not more more than 5.00 than 5.00 inches from inside inches from inside bottom of countertop. bottom of countertop. 5.00 5.00 inch inch maximum maximum Vents Vents 5.00 5.00 inch inch 1.00 1.00 inch inch maximum maximum maximum maximum... -
Page 17: Gas And Electrical Connection
Gas and Electrical Connection Gas Connection Gas Conversion To convert a grill from natural to Verify the type of gas supply to be used, either LP/Propane or LP/Propane to natural, you natural or LP, and make sure the marking on the MUST use conversion kit sold seperately. -
Page 18: Natural Fixed Piping Connection
Be sure to check on type and size of run and how deep to bury the lines. If the gas line Note: If using a Viking GSH12 flexible hose, is too small, the grill will not function properly. -
Page 19: Lp/Propane Fixed Piping Connection
LP/Propane Fixed Piping Connection Check with your local gas utility company or with adapter to the regulator assembly. Ensure that local codes for instructions on installing gas the regulator arrow points in the direction of the supply lines. Be sure to check on type and size of gas flow towards the unit and away from the run and how deep to bury the lines. -
Page 20: Built-In Installations
LP/Propane Tank Requirements A dented or rusty LP/Propane tank may be that is provided with the cylinder valve. hazardous and should be checked by your tank Other types of caps or plugs may result in supplier. Never use a cylinder with a damaged leakage of propane. -
Page 21: Lp/Propane Tank Connection
LP/Propane Tank Connection Outdoor grills orificed for use with LP/Propane Type 1, QCC-1 fitting for leaks with a soapy water gas come equipped with a high capacity solution. If bubbles appear, tighten the hose/regulator assembly for connection to a connection. Repeat until all leaks have been standard 20 lb. -
Page 22: Leak Testing
Leak Testing Although all gas connections on the grill are leak CAUTION tested at the factory prior to shipment, a complete gas tightness check must be performed Before placing into operation, always check for at the installation due to possible mishandling in gas leaks with a soapy water solution. - Page 23 Bubbling bubbles in the soap solution indicates that a Stop a leak by tightening the loose joint or by leak is present. replacing the faulty part with a replacement part recommended by the manufacturer. Do not attempt to repair the cylinder valve if it should If you are unable to stop a leak, shut off the gas become damaged.
-
Page 24: Burner Adjustment
Burner Adjustment A qualified installer should perform the following burner adjustments. Each burner is tips, excessive noise or lifting. If any of these tested and adjusted at the factory prior to conditions exist, check if the air shutter or burner shipment;... - Page 25 CORRECT YELLOW 2 " ( 1 . 8 " ( . 9 BLUE LIFTING If the flame is yellow, turn the air shutter counter When adjustments are complete, turn the valve clockwise to allow more air to the burner. If the off, tighten the air shutter screw, and replace flame is noisy and lifting away from the burner, turn the landing ledge assembly...
-
Page 26: Rotisserie System
Rotisserie System The rotisserie motor is attached to the mounting WARNING bracket located on the right side of the grill frame. The rotisserie motor must be electrically ELECTRICAL SHOCK HAZARD grounded in accordance with local codes. The skewer for the rotisserie is assembled by placing This appliance is equipped with a grounding plug for your protection against shock hazard the pointed end into the rod socket inside the... -
Page 27: Final Preparation
• All internal packaging removed. technician. • Specified clearances maintained to combustible materials. Contact Viking Range, LLC, 1-888-(845-4641), for the • Pressure regulator connected and set. nearest service parts distributor in your area or write • Manual shut-off valve installed and accessible. - Page 28 Viking Range, LLC 111 Front Street Greenwood, Mississippi 38930 USA (662) 455-1200 For product information, call 1-888-(845-4641) or visit our website at vikingrange.com in the US or brigade.ca in Canada (021515) F21349B EN...
Need help?
Do you have a question about the VGBQ54224LSS and is the answer not in the manual?
Questions and answers