Table of Contents
Advertisement
Quick Links
Advertisement
Table of Contents

Related Manuals for AEG KSE892220M


Summary of Contents for AEG KSE892220M
- Page 1 KSE892220M User Manual Steam oven USER MANUAL...
-
Page 2: Table Of Contents
13. ENERGY EFFICIENCY..................... 51 FOR PERFECT RESULTS Thank you for choosing this AEG product. We have created it to give you impeccable performance for many years, with innovative technologies that help make life simpler features you might not find on ordinary appliances. Please spend a few minutes reading to get the very best from it. - Page 3 ENGLISH manufacturer is not responsible for any injuries or damages that are the result of incorrect installation or usage. Always keep the instructions in a safe and accessible location for future reference. 1.1 Children and vulnerable people safety This appliance can be used by children aged from 8 •...
-
Page 4: Safety Instructions
Before carrying out any maintenance, disconnect the • appliance from the power supply. WARNING: Ensure that the appliance is switched off • before replacing the lamp to avoid the possibility of electric shock. Do not use the appliance before installing it in the •... - Page 5 ENGLISH • Make sure not to cause damage to • Do not operate the appliance with the mains plug and to the mains wet hands or when it has contact with cable. Should the mains cable need water. to be replaced, this must be carried •...
- Page 6 • If you use an oven spray, follow the 2.4 Steam Cooking safety instruction on it's packaging. • Do not clean the catalytic enamel (if...
-
Page 7: Product Description
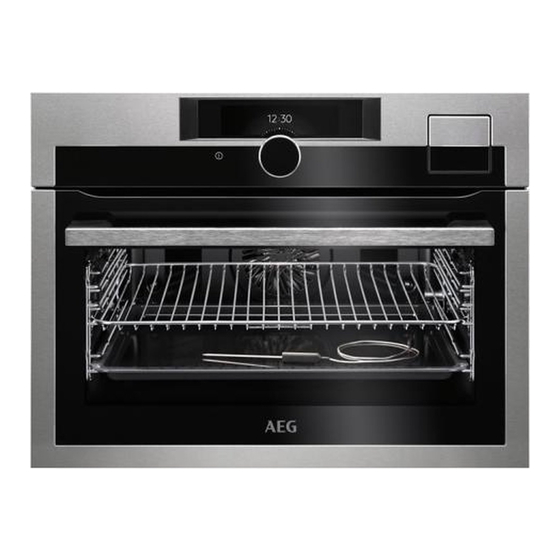
ENGLISH 3. PRODUCT DESCRIPTION 3.1 General overview Control panel Electronic programmer Water drawer Socket for the food sensor Heating element Lamp Descaling pipe outlet Shelf support, removable Shelf positions 3.2 Accessories Food Sensor Wire shelf To measure the temperature inside food. For cookware, cake tins, roasts. -
Page 8: Operating The Appliance
4. OPERATING THE APPLIANCE 4.1 Control panel Function Comment On / Off To turn the appliance on and off. Display Shows the current settings of the appliance. To adjust the settings and navigate through the menu. Press to turn the appliance on. -
Page 9: Before First Use
ENGLISH 5. BEFORE FIRST USE 5.2 First Connection WARNING! Refer to Safety chapters. After the first connection the software version will appear for 7 seconds. 5.1 Initial Cleaning You have to set the language, the Display Brightness, Water hardness and Remove all accessories and removable the Time of Day. -
Page 10: Daily Use
6. DAILY USE 5. Set the temperature and confirm. WARNING! 6. Press . Food Sensor can be Refer to Safety chapters. plugged at any time before or during cooking process. Some functions 6.1 Heating Functions contain a sequence of pop-ups. Press the rotary knob to go to the next Turning the heating functions on and off. - Page 11 ENGLISH Heating functions: Standard Heating function Application True Fan Cooking To bake on up to two shelf positions at the same time and to dry food. Set the temperature 20 - 40 °C lower than for the function: Conventional Cooking. True Fan + Bottom To bake food on one shelf position for a more in- tensive browning and a crispy bottom.
- Page 12 Heating functions: Steam Heating function Application Full Steam For steaming vegetables, side dishes or fish. Humidity High The function is suitable for cooking delicate dishes like custards, flans, terrines and fish. Humidity Medium The function is suitable for cooking stewed and braised meat as well as bread and sweet yeast dough.
- Page 13 ENGLISH Water drawer When you fill the water drawer, insert it in the same position. Push the front button until the water drawer is inside the oven. Empty the water drawer after each use. CAUTION! A. Lid Keep the water drawer away B.
- Page 14 The steam appears after cavity. Always dry the bottom of the approximately 2 minutes. When the cavity when the oven is cool. oven reaches the set temperature, Let the oven dry fully with the door open. the signal sounds.
- Page 15 ENGLISH Submenu for: Basic Settings Submenu Description Child Lock When the Child Lock is on, the oven cannot be activa- ted accidentally. You can activate and deactivate this function via Basic Setting Menu. Once activated, Child Lock appears on the display when you turn on the oven. To enable the oven use, choose the code letters with the rotary knob in the following order: A B C.
- Page 16 Submenu Description Show Software Version Information about software version. Factory Settings Reset to factory settings. Submenu for: Assisted Cooking Meat Veal Tenderloin Every dish in this submenu has a proposed function and temperature. Roast Those parameters can be adjusted...
- Page 17 ENGLISH Food Category: Side / Oven dishes Fish Dishes Whole fish Small Roasted Side dishes Potatoes Steamed Fresh Steamed SousVide Medium Roasted Potatoes French fries Frozen Steamed Croquettes Large Roasted Wedges Steamed Hash browns Fillets Thin Steamed Rice SousVide Pasta, fresh Thick Steamed Polenta...
- Page 18 Food Category: Savoury baking Food Category: Desserts / Baking Dish Dish Fresh Thin Cake in tin Almond cake Thick Apple pie Frozen Thin Pizza Cheesecake Thick Apple cake, Snacks covered Chilled Short pastry base Thin Quiche Sponge flan Thick...
- Page 19 ENGLISH Dish Dish Small pastry Small cakes Florets Cauliflower Cream puffs Whole Eclairs Steamed Celery Macaroons SousVide Muffins Celery root Pastry strips Steamed Courgette slices Puff pastry SousVide Short pastry Steamed Eggplant biscuits SousVide Flan Steamed Fennel Custard SousVide Casserole, Green beans sweet Steamed...
-
Page 20: Clock Functions
6.3 Options Menu 170°C Options Options Description Timer Settings Contains a list of clock functions. Fast Heat Up To decrease heat up time in the currently running heating function. On / Off Set + Go To set a function and turn it on later. Once set, the message "Set&Go active"... -
Page 21: Using The Accessories
ENGLISH Clock function Application Reminder To set a countdown. This function has no effect on the operation of the oven. Choose and set the time. When the time ends the signal sounds. Press the rotary knob to stop the signal. When the oven is turned off press the rotary knob to turn on this function. - Page 22 The display shows: Food Sensor. 4. Set the core temperature. 4. Cover the Food Sensor with the 5. Set a heating function and, if remaining ingredients. necessary, the oven temperature. 5. Put the plug of the Food Sensor into When the dish reaches the set the socket at the front of the oven.
-
Page 23: Additional Functions
ENGLISH Changing the core temperature You can change the core temperature and the oven temperature at any time during cooking. 1. Select on the display. 2. Turn the rotary knob to change the temperature. 3. Press to confirm. Wire shelf and baking tray / deep pan together: 8.2 Inserting the accessories Push the baking tray / deep pan between... -
Page 24: Hints And Tips
10. HINTS AND TIPS Remove the food packaging and put the WARNING! food on a plate. Do not cover the food, Refer to Safety chapters. as it can extend the defrosting time. Use the first shelf position. The temperature and baking times in the tables are 10.3 Full Steam... - Page 25 ENGLISH VEGETABLES VEGETABLES (min) (min) Peeled tomatoes Green beans 35 - 45 Vegetables, blanched Black salsify 35 - 45 Spinach, fresh 15 - 20 Cabbage white or red, 40 - 45 strips Courgette, slices 15 - 25 Artichokes 50 - 60 Mushroom, slices 15 - 20 Dried beans, soaked,...
- Page 26 SIDE DISHES / ACCOMPANI- MEAT MENTS (°C) (min) (min) Chipolatas 15 - 20 Rice, water / rice ratio 1:1, the 35 - 45 Bavarian veal 20 - 30 ratio of water to rice can sausage, White change according to the type...
- Page 27 ENGLISH Put prepared vegetables and accompaniments in ovenproof dishes. Put in the oven with the roast. Use the first shelf position. Start the function: Full Steam. Cook it all together until ready. Cool down the oven to a temperature of around 80 °C.
- Page 28 Use the first shelf position. (°C) (min) Dumplings 15 - (°C) (min) Potato gratin 160 - 170 50 - 60 10.9 Yogurt Function Chicken 1 kg 180 - 210 50 - 60 This function allows you to prepare yogurt.
- Page 29 ENGLISH Baking results Possible cause Remedy The cake sinks and be- The oven temperature is Next time set slightly lower oven comes soggy or streaky. too high. temperature. The baking time is too Next time set a longer baking short. time and lower oven temperature.
- Page 30 CAKE / PASTRIES / BREADS ON BAKING TRAYS Preheat the empty oven. (°C) (min) Plaited bread / Bread crown Conventional 170 - 190 30 - 40 Cooking Christstollen Conventional 160 - 180 50 - 70 Cooking Rye bread Conventional...
- Page 31 ENGLISH BISCUITS Use the second shelf position. (°C) (min) Short pastry biscuits True Fan Cooking 150 - 160 15 - 25 Short pastry / Pastry strips True Fan Cooking 20 - 35 Short pastry / Pastry strips, pre- Conventional Cook- 20 - 30 heat the empty oven Biscuits made of sponge cake...
- Page 32 Use the first shelf position. (°C) (min) Baguettes with melted True Fan Cooking 160 - 170 15 - 30 cheese Milk rice Conventional Cooking 180 - 200 40 - 60 Fish bakes Conventional Cooking 180 - 200 30 - 60...
- Page 33 ENGLISH 10.16 Roasting tables Use the first shelf position. BEEF (°C) (min) Pot roast 1 - 1.5 kg Conventional 120 - 150 Cooking Roast beef or fil- per cm of thick- Grill + Fan 190 - 200 5 - 6 let, rare, preheat ness the empty oven...
- Page 34 VEAL Use the function: Grill + Fan. (kg) (°C) (min) Roast veal 160 - 180 120 - 150 Veal knuckle 1.5 - 2 160 - 180 120 - 150 LAMB Use the function: Grill + Fan. (kg) (°C) (min) Lamb leg / Roast lamb 1 - 1.5...
- Page 35 ENGLISH POULTRY Use the function: Grill + Fan. (kg) (°C) (min) Chicken 0.2 - 0.25 each piece 200 - 220 30 - 50 Chicken, half 0.4 - 0.5 each piece 190 - 210 40 - 50 Poultry, portions 1 - 1.5 190 - 210 50 - 70 Duck...
- Page 36 PIZZA Preheat the empty oven before cooking. Use the second shelf position. (°C) (min) Pizza, thin crust 210 - 230 15 - 25 Pizza, thick crust, use a deep pan 180 - 200 20 - 30 Unleavened bread 210 - 230...
- Page 37 ENGLISH 10.19 Grill Put a pan on the first shelf position to collect fat. Grill only thin pieces of meat or fish. Preheat the empty oven before cooking. GRILL Use the first shelf position. (°C) (min) 1st side 2nd side Roast beef, medium 210 - 230 30 - 40...
- Page 38 10.20 Slow Cooking Always cook without a lid while using this function. This function allows you to prepare lean, 3. Use Food Sensor. tender meat and fish. It is not applicable 4. Select the function: Slow Cooking. for: poultry, fatty roast pork, pot roast.
- Page 39 ENGLISH DEFROSTING Use the second shelf position. (°C) (min) Wedges / Croquettes 190 - 210 20 - 40 Hash browns 210 - 230 20 - 30 Lasagne / Cannelloni, fresh 170 - 190 35 - 45 Lasagne / Cannelloni, frozen 160 - 180 40 - 60 Baked cheese...
- Page 40 VEGETABLES VEGETABLES (min) (min) (min) (min) Cooking Continue to Cooking Continue to time until cook at 100 time until cook at 100 simmering °C simmering °C Carrots 50 - 60 5 - 10 Kohlrabi / 50 - 60 15 - 20...
- Page 41 ENGLISH BEEF Food core temperature (°C) Less Medium More Meatloaf PORK Food core temperature (°C) Less Medium More Ham / Roast Saddle chop / Pork loin, smoked / Pork loin, poached VEAL Food core temperature (°C) Less Medium More Roast veal Veal knuckle MUTTON / LAMB Food core temperature (°C)
- Page 42 POULTRY Food core temperature (°C) Less Medium More Chicken Duck, whole / half / Turkey, whole / breast Duck, breast FISH (SALMON, TROUT, Food core temperature (°C) ZANDER) Less Medium More Fish, whole / large / steamed / Fish, whole / large / roasted CASSEROLES - PRE- Food core temperature (°C)
- Page 43 ENGLISH Ramekins Pizza pan Baking dish Flan base tin Ceramic Dark, non-reflective Dark, non-reflective Dark, non-reflective 8 cm diameter, 28 cm diameter 26 cm diameter 28 cm diameter 5 cm height 10.26 Moist Fan Baking FAST GRILLING Use the first shelf position. Food Tempera- Time...
-
Page 44: Care And Cleaning
HUMIDITY HIGH Use the second shelf position. Put the baking tray on the first shelf position. Set the temperature to 99 °C. Container (Gastro- (kg) (min) norm) Broccoli 1 x 2/3 perforated 13 - 15 Preheat the empty oven. - Page 45 The steam cleaning functions support You can buy our products at the steam cavity cleaning of the oven. www.aeg.com/shop and at the best Before you start a cleaning procedure, retailer shops. make sure that the oven is cool.
- Page 46 3. Wipe the cavity of the oven with a non-abrasive sponge. You can use warm water. 4. Remove the remaining water from the water drawer. After cleaning keep the oven door open for approximately 1 hour. Wait until the oven is dry.
- Page 47 ENGLISH 7. Fill the water drawer with fresh water. 2. Fill the water drawer with fresh water. Make sure there is no remaining 3. Press cleaning solution inside the water Remove the baking tray after the end of drawer. the procedure. 8.
-
Page 48: Troubleshooting
1. Turn off the oven. Wait until the oven is cooled down. 2. Disconnect the oven from the mains. 3. Put a cloth on the bottom of the cavity. The top lamp 1. Turn the lamp glass cover to remove 9. - Page 49 ENGLISH Problem Possible cause Remedy The oven does not heat up. The door is not closed cor- Fully close the door. rectly. The oven does not heat up. The fuse is blown. Make sure that the fuse is the cause of the malfunction. If the fuse is blown again and again, contact a quali- fied electrician.
- Page 50 Problem Possible cause Remedy The appliance does not re- You did not fully press the Insert the water drawer body tain the water drawer after water drawer body. in the appliance by pushing you push it on the cover.
-
Page 51: Energy Efficiency
ENGLISH 12.2 Service data on the front frame of the oven cavity. Do not remove the rating plate from the If you cannot find a solution to the oven cavity. problem yourself, contact your dealer or an Authorised Service Centre. The necessary data for the service centre is on the rating plate. - Page 52 14. ENVIRONMENTAL CONCERNS appliances marked with the symbol Recycle materials with the symbol with the household waste. Return the Put the packaging in relevant containers product to your local recycling facility or to recycle it. Help protect the contact your municipal office.
- Page 53 ENGLISH...
- Page 54 www.aeg.com...
- Page 55 ENGLISH...
- Page 56 www.aeg.com/shop...
Need help?
Do you have a question about the KSE892220M and is the answer not in the manual?
Questions and answers