Table of Contents
Advertisement
Quick Links
Advertisement
Table of Contents

Subscribe to Our Youtube Channel
Related Manuals for Transcend DrivePro 550


Summary of Contents for Transcend DrivePro 550
- Page 1 User’s Manual Dashcam DrivePro™ 550 2020/05 (Version 1.2)
-
Page 2: Table Of Contents
Table of Contents Introduction ..................3 System Requirements ..............4 Package Contents ................5 Getting Started ................. 6 4-1 Overview ..........................6 4-2 Inserting a microSD Memory Card ..................7 4-3 Mounting the DrivePro ......................8 4-4 Connecting to Power ......................10 4-5 Function Buttons ......................11 4-6 LED Indicator Chart ...................... - Page 3 20. Eurasian Conformity Mark (EAC) ............. 36...
-
Page 4: Introduction
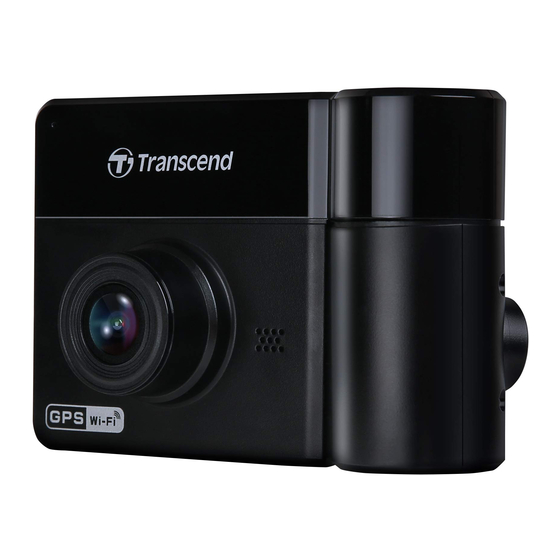
The DrivePro 550’s front lens integrates a Sony sensor, a wide 160° angle lens, and a ƒ/2.2 aperture to record images in crystal clear Full HD 1080P (30 FPS). The rear rotatable lens has four Infrared LEDs that automatically turn on in low light conditions, dramatically increasing in-car recording quality even at night. -
Page 5: System Requirements
2. System Requirements System requirements for connecting the DrivePro to a desktop or a laptop with a working USB port: Windows ® Windows ® Windows ® Windows ® mac OS ® 10.14 or later Linux ®... -
Page 6: Package Contents
3. Package Contents The DrivePro dashcam package includes the following items: DrivePro Dashcam Adhesive Mount or Suction Mount Car Adapter microSD Memory Card Quick Start Guide... -
Page 7: Getting Started
4. Getting Started 4-1 Overview Mounting Socket Microphone Front Lens Speaker 2.4” LCD Display Infrared LED Rear Lens Recording Indicator Indicator Reset Button Emergency Button Power Button Function Buttons micro USB Port microSD Slot... -
Page 8: Inserting A Microsd Memory Card
WARNING: 1. DrivePro 550 supports the FAT32 and exFAT file formats, but not NTFS. 2. Make sure the allocation Unit Size of the microSD card is 32 KB or larger; if not, the DrivePro will format the card before recording. -
Page 9: Mounting The Drivepro
2. To remove, push to eject the memory card out of the slot. WARNING: Do not remove the memory card during shutdown to avoid damages to the memory card and loss of recorded videos. 4-3 Mounting the DrivePro 1. Insert the mounting bracket into the top of the DrivePro, and slide sideways until you hear a click. - Page 10 4. Turn the adjustment knob anticlockwise to loosen, and then adjust the DrivePro’s position. 5. After the DrivePro is in the best position, turn the adjustment knob clockwise to make sure that the DrivePro is securely locked in place.
-
Page 11: Connecting To Power
4-4 Connecting to Power Note: Insert a microSD memory card before connecting the DrivePro to your car’s lighter socket. 1. Connect the small end of the car adapter to the USB connector of the DrivePro. 2. Plug the other end of the car adapter in your car’s lighter socket. 3. -
Page 12: Function Buttons
4-5 Function Buttons Mode Video Recording Power / Wi-Fi* Browse Files Settings Snapshot Browse/Settings Back Down Video Playback Back Play/Pause Protected/Unprotected Delete View Photos Back* Down Delete Long press the button to manually turn on/off the DrivePro in any mode. ... -
Page 13: Setting The Date, Time And Time Zone
4-7 Setting the Date, Time and Time Zone To set the current date and time: 1. During video recording, press the Settings button 2. Use to select Date/Time and press 3. Use to adjust values, and press to move to the next block. 4. -
Page 14: Recording Videos
5. Recording Videos 5-1 Normal Recording After the car engine is switched on, the DrivePro will automatically turn on and start recording. By default, one video file is saved for every 3 minutes of recording. To adjust the recording length, please refer to the Settings section in this manual. -
Page 15: Parking Mode Recording
(connected to power). Transcend’s car lighter adapter does not supply power after the engine is switched off. If long-term recording in Parking mode is required, please use an external power supply. Enter the Parking mode manually by long pressing the button during video recording. -
Page 16: Playing Videos And Browsing Photos
Low Battery Please charge the DrivePro immediately after viewing the Low Battery warning to avoid errors happening to the system time. Please avoid using the built-in battery to record videos directly. Note: 1. If you want to record by the built-in battery, please make sure that it has sufficient power supply. 2. -
Page 17: Deleting Videos/Photos
3. Use to select the desired file, and press to preview 4. Press to return to the video file list. 6-2 Deleting Videos/Photos 1. Press to delete video/photo files. 2. Use to cancel or confirm the deletion of the video/photo file, and press... -
Page 18: Protecting Videos
6-3 Protecting Videos 1. Press to protect the video file. 2. Use to select the desired option and press 7. Settings In the Settings menu, you can adjust settings of video resolution, recording time and G-Sensor sensitivity. You can also set the date/time, change the interface language, format the memory card, and upgrade firmwares etc. - Page 19 2. Use to select the menu and press 3. Use to select the desired setting, and press 4. Press to return to the Settings menu.
- Page 20 Menu Options Resolution: Set the resolution/quality for video recording (front lens+rear lens). Available options: 1080P+720P (default) / 720P+720P Exposure Value: Adjust exposure composition value to lighten or darken the preview screen. Available options: +0.5 +1.0 +1.5 +2.0 / 0 / -0.5 / -1.0 / -1.5 / -2.0 Video Length: Set the recording length of each recorded video file.
- Page 21 G-Sensor: Adjust the sensitivity of the G-Sensor. Available options: Disable / Low (default) / Medium / High Speed Unit: Set the measurement unit of speed. Available options: km/h (default) / mph Lane Departure: Alert the driver when the vehicle veers out of a lane. This function is activated when the driving speed exceeds the value set ahead.
- Page 22 Upgrade Firmware: Keep your DrivePro up-to-date with the latest version downloaded from Transcend website http://www.transcend-info.com/Support/service. 1. After downloading the firmware from Transcend website, decompress it and put it in the “SYSTEM” folder in the microSD memory card. 2. Insert the microSD memory card that contains the latest firmware version.
- Page 23 WARNING: NEVER remove the power cord or the microSD memory card while the firmware is being upgraded. If the DrivePro cannot be turned on due to firmware upgrade failure, please contact Transcend customer service for technical support. Information: Display the DrivePro’s current firmware version, card capacity and free space.
-
Page 24: Using The Drivepro App
8. Using the DrivePro App Developed specifically for iOS and Android devices, the free download DrivePro App allows you to wirelessly live stream real-time video footages while recording, adjust DrivePro settings, and play videos directly from your mobile devices. 8-1 Downloading and Installing the App 1. -
Page 25: Drivepro™ Toolbox Software
DrivePro, and see your driving paths of the recorded videos displayed on maps without the need to install separate codecs. 1. Download the installation files from: www.transcend-info.com/downloads 2. Install DrivePro Toolbox software on your desktop or laptop. The useful features include: 1. -
Page 26: Transferring Files To A Computer
Transferring Files to a Computer To transfer files between the DrivePro’s memory card and your computer: Option 1: Take the microSD memory card out of the DrivePro, and insert to a compatible card reader to transfer files to your computer. Option 2: 1. - Page 27 *Note: (E:) is an example drive letter – the letter in your “My Computer” window may differ. Your DrivePro is now ready to transfer data just like an external hard drive. To transfer videos, simply drag-and-drop files from the folder that represents the DrivePro. Proper removal of your DrivePro from Windows: Click once on the Removable Hardware icon in the system tray.
-
Page 28: Safety Cautions
Do not use the DrivePro in an environment with strong magnetic fields or excessive vibration. Only use the car adapter provided by Transcend. Other car adapters may not compatible with the DrivePro. Lighter sockets of some types of vehicles will still supply power after the car engine is turned off. -
Page 29: Troubleshooting
DrivePro for repair. If you cannot find any ideal solution to your question below, please consult your dealer, service center, or local Transcend branch office for further help. You can also visit Transcend website for FAQ and Technical Support services. For any Hardware issues, please refer to the DrivePro User’s Manual. -
Page 30: Specifications
CE, FCC, BSMI, NCC, MIC, EAC Certification: 2-Year Limited Warranty: In addition to the bundled microSD card, we recommend Transcend’s High Endurance microSD cards or MLC-based memory cards to ensure the best recording performance. 16GB-64GB High Endurance microSDHC card Note... -
Page 31: Eu Compliance Statement
EU Compliance Statement Transcend Information hereby declares that all CE marked Transcend products incorporating radio equipment functionality are in compliance with Directive 2014/53/EU. The full text of the EU declaration of conformity is available at the following internet address: www.transcend-info.com/eu_compliance... -
Page 32: Recycling And Environmental Protection
Recycling and Environmental Protection Recycling the Product (WEEE): Your product is designed and manufactured with high quality materials and components, which can be recycled and reused. When you see the crossed-out wheel bin symbol attached to a product, it means that the product is covered by the European Directive 2002/96/EC: Never dispose of your product with other household waste. -
Page 33: Federal Communications Commission (Fcc) Statement
Federal Communications Commission (FCC) Statement This device complies with Part 15 FCC Rules. Operation is subject to the following two conditions: (1) This device may not cause harmful interference. (2) This device must accept any interference received including interference that may cause undesired operation. This Equipment has been tested and found to comply with the limits for a Class B digital device, pursuant to Part 15 of the FCC rules. -
Page 34: Two-Year Limited Warranty
Under special circumstances, Transcend may refund or credit the current value of the product at the time the warranty claim is made. The decision made by Transcend shall be final and binding upon you. Transcend may refuse to provide inspection, repair or replacement service for products that are out of warranty, and will charge fees if these services are provided for out-of-warranty products. -
Page 35: Gnu General Public License (Gpl) Disclosure
End-User License Agreement (EULA) Software license terms and conditions 1. Generally. Transcend Information, Inc. ("Transcend") is willing to grant the following license to install or use the software and/or firmware (“Licensed Software”) pursuant to this End-User License Agreement (“Agreement”), whether provided separately or associated with a Transcend product (“Product”), to the original purchaser of the Product upon or with which the Licensed Software was installed or associated as of the time of purchase ("Customer") only if Customer accepts all of the terms and conditions of this Agreement. - Page 36 9. Termination. Transcend may, in addition to any other remedies available to Transcend, terminate this Agreement immediately if Customer breaches any of its obligations under this Agreement.
- Page 37 (d) A waiver by either party of any term or condition of this Agreement or any breach thereof, in any one instance, will not waive such term or condition or any subsequent breach thereof. (e) Transcend may assign its rights under this Agreement without condition. (f) This Agreement will be binding upon and will inure to the benefit of the parties, their successors and permitted assigns.
Need help?
Do you have a question about the DrivePro 550 and is the answer not in the manual?
Questions and answers